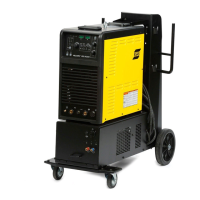
- 19 -
Arranged integral with the inverter module are RC elements. They serve to attenuate the high-
frequency voltage pulses from power transformer T3 and block off the HF-pulses.
Moreover, high-voltage starting pulses are required so as to permit non-contact starting of the arc
and stabilising the arc in AC welding. These pulses are generated in pulser A7 and fed into the
HF reactor L2.
The HF reactor L2 is also referred to as a pulse gating reactor. It prevents a drop in high-voltage
pulses in the inverter A9, A13, A10, A14.
3 FUNCTION OF CONTROL AND ADJUSTMENT
The welder usually starts the power supply by pressing the Torch button S1. The Torch button
signal to X5 is processed on module A6 and passed on in floating mode to the control unit A2 (see
section A6-5). Previously, the welder enters the settings for the welding process sequence, i.e. to
control the timings of the gas valve, pulser and inverter. The weld current setting is shown on an
LED display. Light-emitting diodes display whether or not the inverter has been started, which cur-
rent is selected or is applied, whether the gas valve is switched, or a fault has occurred. The elec-
tronic signals used to control the gas valve and the pulser are routed to the supply and control bus
to module A6 where they control the associated relays (see section A6-2 and section A6-4).
All the signals required to control the inverter are transferred over the inverter control bus from
A2-1 to module A8. These include Start, Mode (DC+, DC-, AC), current reference, frequency ref-
erence, and balance reference. From A8, fault signals as well as actual current and voltage levels
are reported back to the control panel over this bus.
So setpoints (references) are fed to A8 from the control panel A2. The current actual value is re-
ported to A8 via the transformer shunt T2 (see section A8-1). The output voltage is tapped at the
inverter A9, A13, A10, A14 (see section A8-2). These references and actual values are used by
A8 to generate the associated control pulses for primary switches A4, A5, A11, A12 and inverter
A9, A13, A10, A14 via control and regulation circuits. The control signals of the four transistors of
the inverter A9, A13, A10, A14 are generated on A8 in floating mode.
The control signal for the primary switches A4, A5, A11, A12 runs over the supply bus to module
A1. The two drives for the primary switches A5, A12 and A4, A11 are located there (see section
A1-7).
As indicated in the schematic diagram, the primary switch and the inverter power sections each
comprise two power sections connected in parallel, i.e. they are directly connected in parallel on
both power and control sides.
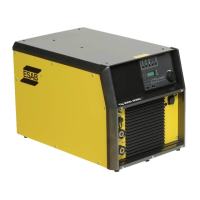
The DTG405 is a water-cooled system. The water cooling unit comprises a water pump, a cooler,
and a LOW WATER switch F11 via X1-5, X1-6. If no water pressure is built up, the LOW WATER
switch sends a signal (contact opens) to the control A6 (see section A6-6). The inverter is shut
down and the fault is displayed on A2. This prevents water-cooled torches from operated without
adequate cooling.
The power electronics components of the primary switch, the secondary rectifier (A4, A5, A11,
A12) and the inverter (A9, A10, A13, A14) are cooled by heat sinks consisting of aluminium sec-
tions. Each heat sink, as well as the transformer and the reactor, are fitted with a thermal switch
F1 to F10. The contacts of the thermal switches are all connected in series. When one thermal
switch opens because of high temperature, the chain of temperature switches opens. This is de-
tected on module A1 (see section A1-4) and signalled to module A8 via the supply bus. This trips
the inverter and signals overtemperature to the control unit A2 which displays the event.