- 75 -
7 TIG WELDING
For TIG welding, the operating type selector has three positions:
• Spot welding
• TIG four-step welding
• TIG two-step welding
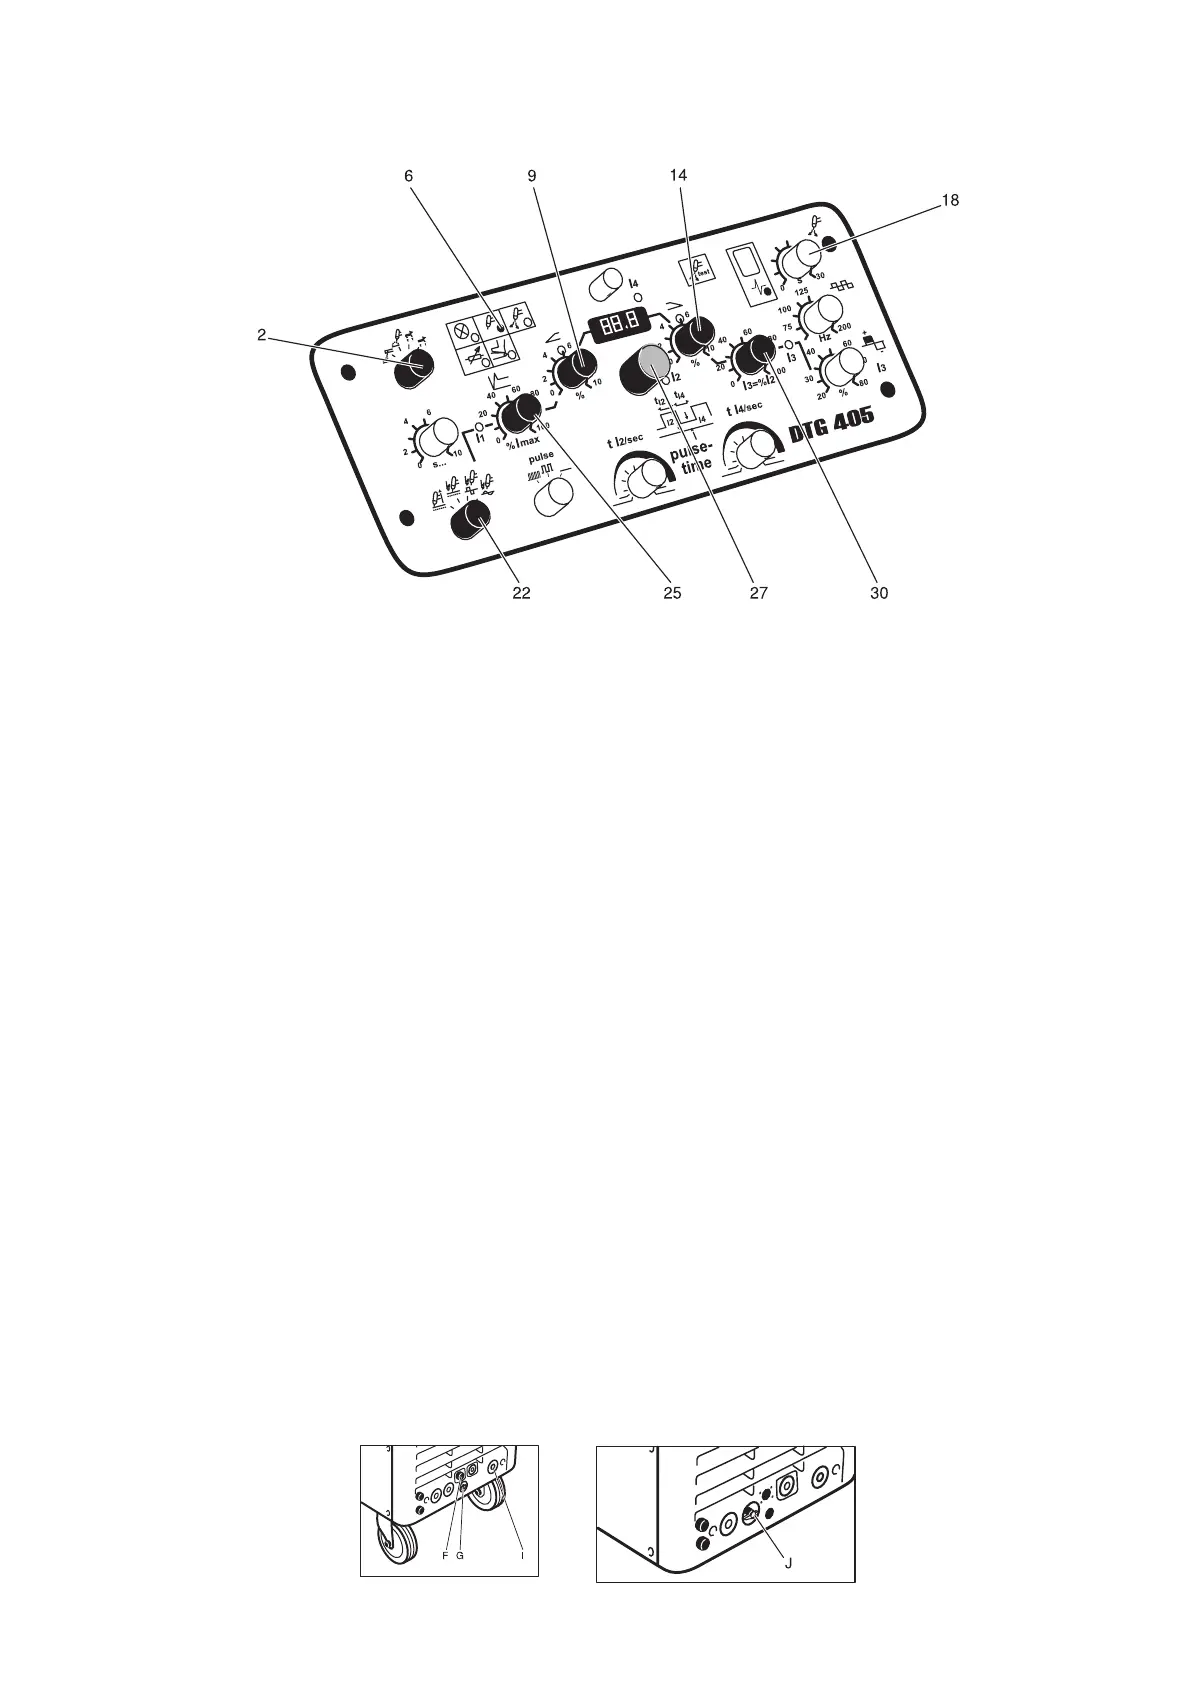
7.1 SETTINGS ON THE CONTROL PANEL WHEN TIG WELDING
1. Connect the TIG-torch to the control cable connection (F) and gas connection (G).
Connect the return cable to the positive side of the welding current socket (I) .
Connect the TIG torch to (J) when using central connection.
2. Gas pre-flow time has an internal default value.
3. Set operation mode selector (2) to the desired position.
(Explanation of the particular operation types, see page 84.)
LED (6) indicates the voltage on the welding current socket after manipulation of the torch
button.
4. Set the desired welding current type and ignition method using the welding current selection
switch (22).
5. Set Soft-Hot-Start function (ignition current) using the potentiometer I1 (25).
The ignition current is a percentage of the power sources maximum output of 400 A (ie. a
setting of 25% will give an ignition current of approximately 100A).
Set this control to a level that provides easy ARC.
6. Set welding current value I2 using the potentiometer (27).
The welding current can be controlled by a hand or foot operated remote control.
7. Set the ramp up rate using the potentiometer Up-Slope (9).
8. Set the ramp down rate using the potentiometer Down-Slope (14).
9. Set desired final current using the potentiometer I3 (30).
10. Set gas post-flow time using the potentiometer (18).