B
A
C D E F G SERVICE
28
Notes:
1) Should the flue not extend past the apex of the roof, the bottom opening of the flue should extend at least
200mm from the roof (or 300mm in regions with heavy snow).
2) The installation of a flue into a carport is not recommended.
3) The flue terminal will get very hot when in use. Precautions should be taken to protect people and animals
from injury.
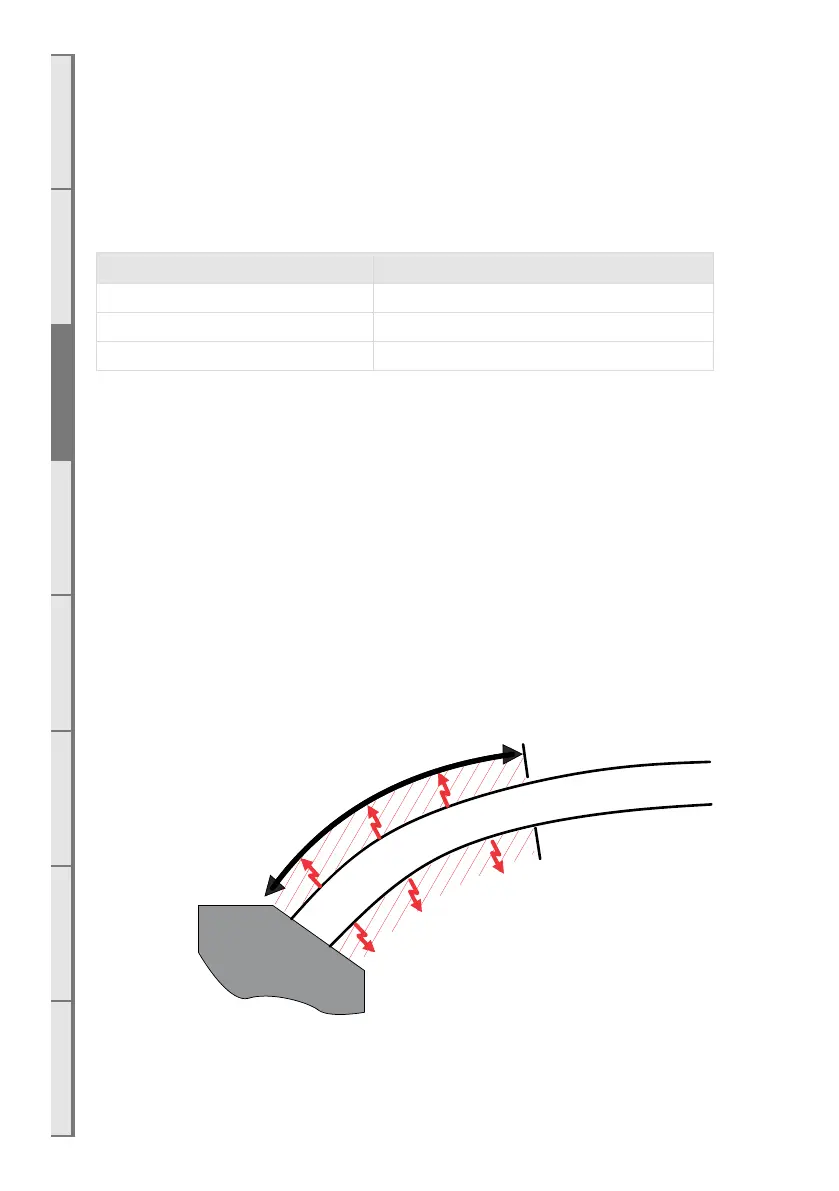
C9 Running the Flue
Use the following table to determine the exhaust flue clearances to combustibles:
Model Clearance to Combustibles
DF700 50mm clearance for first 0.9m
DF960 50mm clearance for first 0.6m
DF990 50mm clearance for first 0.6m
Run the Ø100mm ID and Ø75mm ID (Ø110mm OD and Ø85mm OD) flexible aluminium hoses
from the cavity to the rear of where the Horizontal or Vertical Power Flue Terminal will be installed.
Allow enough stretch in the flexible aluminium flue to allow it to be able to protrude through the
wall/ceiling/roof/flue liner to enable it to be connected to the Power Flue Terminal. The flue should
be expanded at each end in order for the flue to be attached to the fire/Power Flue. It is advisable
to secure the flexi flue at regular intervals to prevent vibration, movement and sagging. Steel wire or
‘builders strapping’ may be used for this purpose.
NOTE: The flexible flue is shipped in a ‘compressed’ form. Extend it to your desired length by stretching.
For information on running the PolyPro flue , see the installation manual which is supplied with the flue
components.
F ireplace
D
F
7
0
0
:
0
.
9
m
5
0
m
m
5
0
m
m
5
0
m
m
5
0
m
m
ø
1
0
0
m
m
E
x
h
a
u
s
t
D
F
9
6
0
a
n
d
D
F
9
9
0
:
0
.
6
.
m
D
Z
e
r
o
C
l
e
a
r
a
n
c
e
Z
e
r
o
C
l
e
a
r
a
n
c
e