B
A
C D E F G SERVICE
50
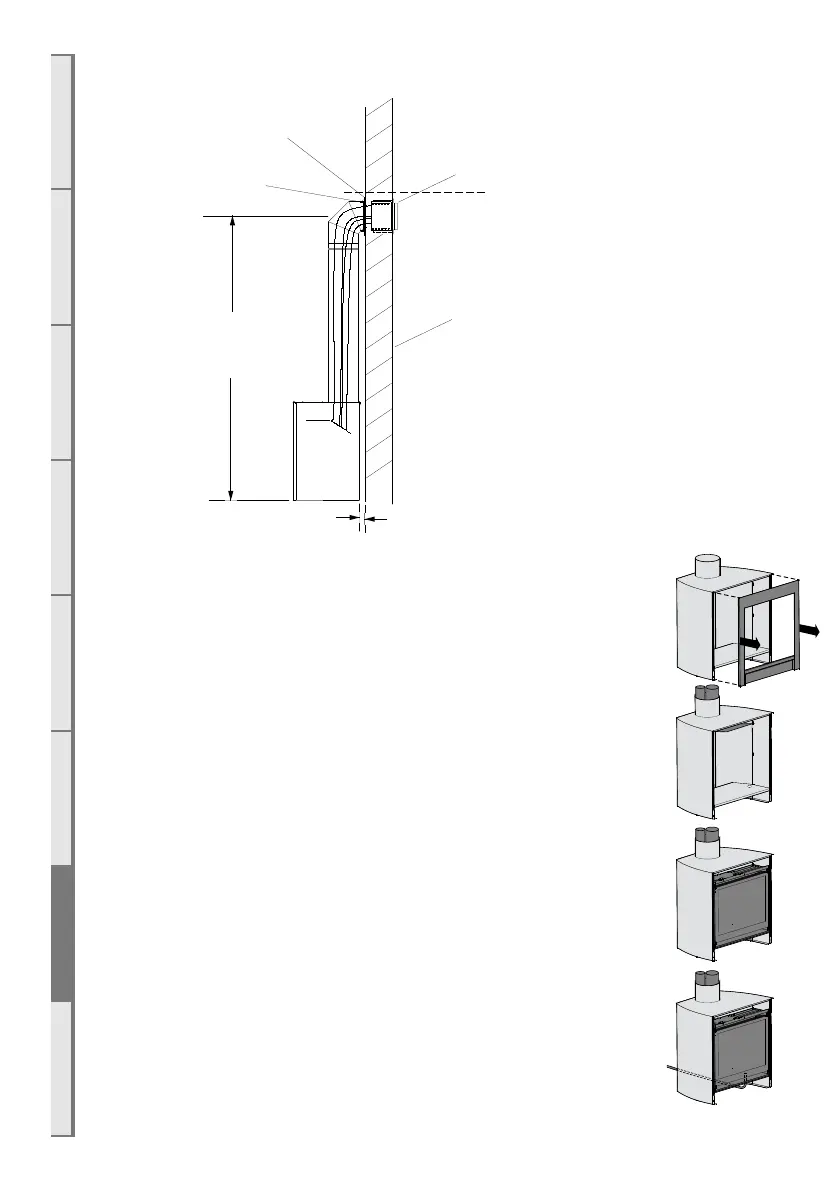
G6 Horizontal Flue Kit
NOTE: Instructions for installation are provided with the kit.
G7 DF700 Fireplace Installation into DFS730 Freestanding Unit
Once the freestanding unit is in place, and the flue system installed, the DF700
fireplace installation can commence.
Note: for the Apartment Flue Kit, see the instructions provided with the kit.
□ Place the freestanding unit in the correct location, complying with the
clearances specified in the previous section.
□ Remove 2 screws on each side of the fascia just below the top panel and pull
towards you to remove the fascia.
□ Refer to section C on page 16 of this installation manual for minimum and
maximum flue lengths, and all other flue information.
□ Take the plastic grommet in the back panel out. Push the power cable through
the hole in the rear, then push the grommet over the power cable and fix the
grommet back to the back panel.
□ Run the Power Flue cable through the silicone grommet on the RH side of
the chassis and connect it as per section E4 on page 36.
□ Install the DF700 fireplace into the freestanding unit while sliding on the flue
spigot plate as per section E on page 34.
□ Run gas piping to the front right of the fireplace as shown, where you will
find a hole positioned so the gas pipe can run directly to the regulator and be
connected as per section E on page 34.
50 mm
Approx.
1828mm
Approx.
Horizontal Power?ue
Terminal
External Wall
Flue iner L
ttachment racketAB
Panel Support
Liner Enclosure