B
A
C D E F G SERVICE
34
E
Installing The Appliance
E1 Installation
NOTE: Ensure the wall has been correctly framed to the dimensions specified in section B1 on page 10
before starting the appliance install. The wall must be lined after the fire has been fitted into the cavity with
the appliance electrical cord plugged into an outlet, carefully place the appliance in front of the cavity base.
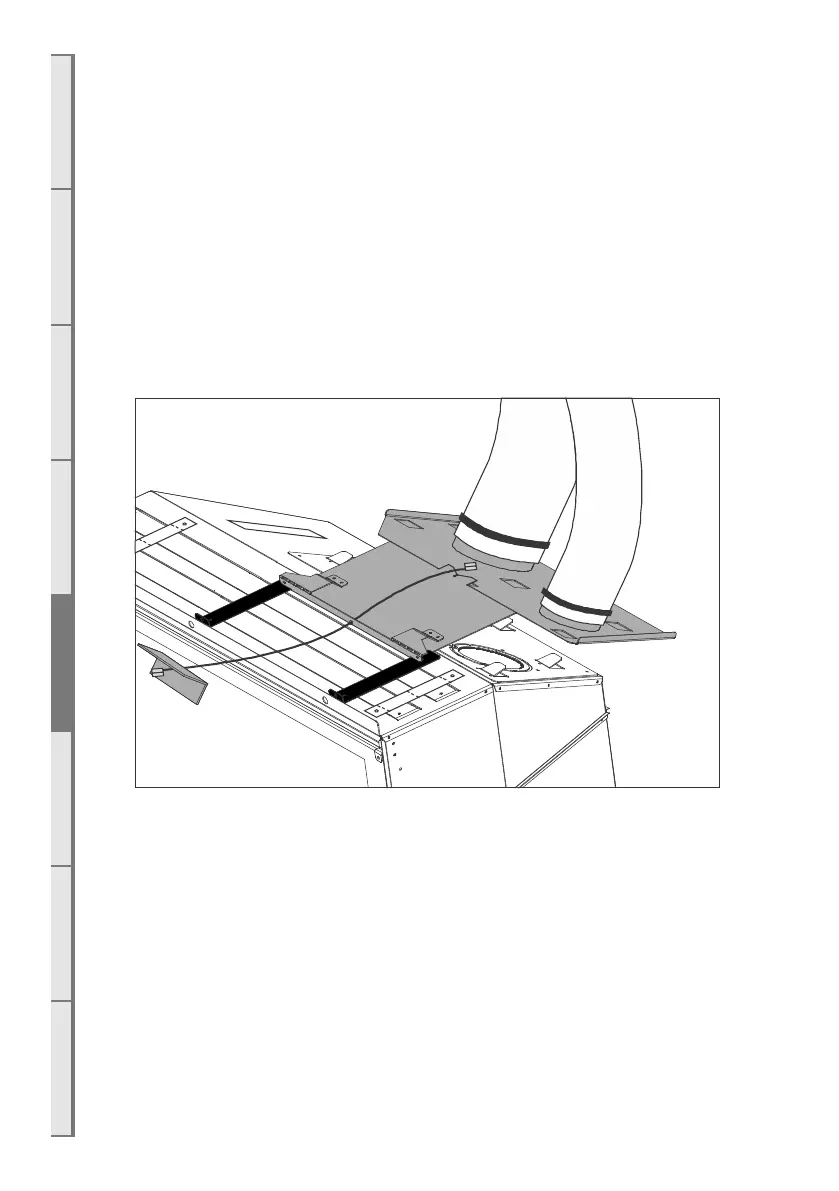
E2 Connecting the Flue
Carefully push the fireplace into the cavity just enough to bring the gas connection through the
silicone grommet of the appliance (as shown in the second diagram of section D5 on page 33). The
appliance should have enough room above the fireplace to reach in and align the flue spigot plate onto
the rails (highlighted in the diagram below). Use the cable tool provided for pulling the flue spigot plate
up the railing in a tight cavity. Use the tool as shown in the diagram below: with the cable threaded
through the hole in the front face of the flue spigot plate, locate the end of the tool into the “V” in the
centre of the main fold in the flue spigot plate.