F
51
630791 DS MKII INSTALLATION MANUAL
For 10mm-20mm wall linings, an oponal “Linear Trim” can be used to cover any unwanted exposed wall lining
and/or act as a slimline fascia.
Ensure the edge of the wall lining is nished in a dy manner. Leave at least 3mm between the trim and the wall
lining (for a nice plasterboard edge nish we recommend Rondo stopping bead).
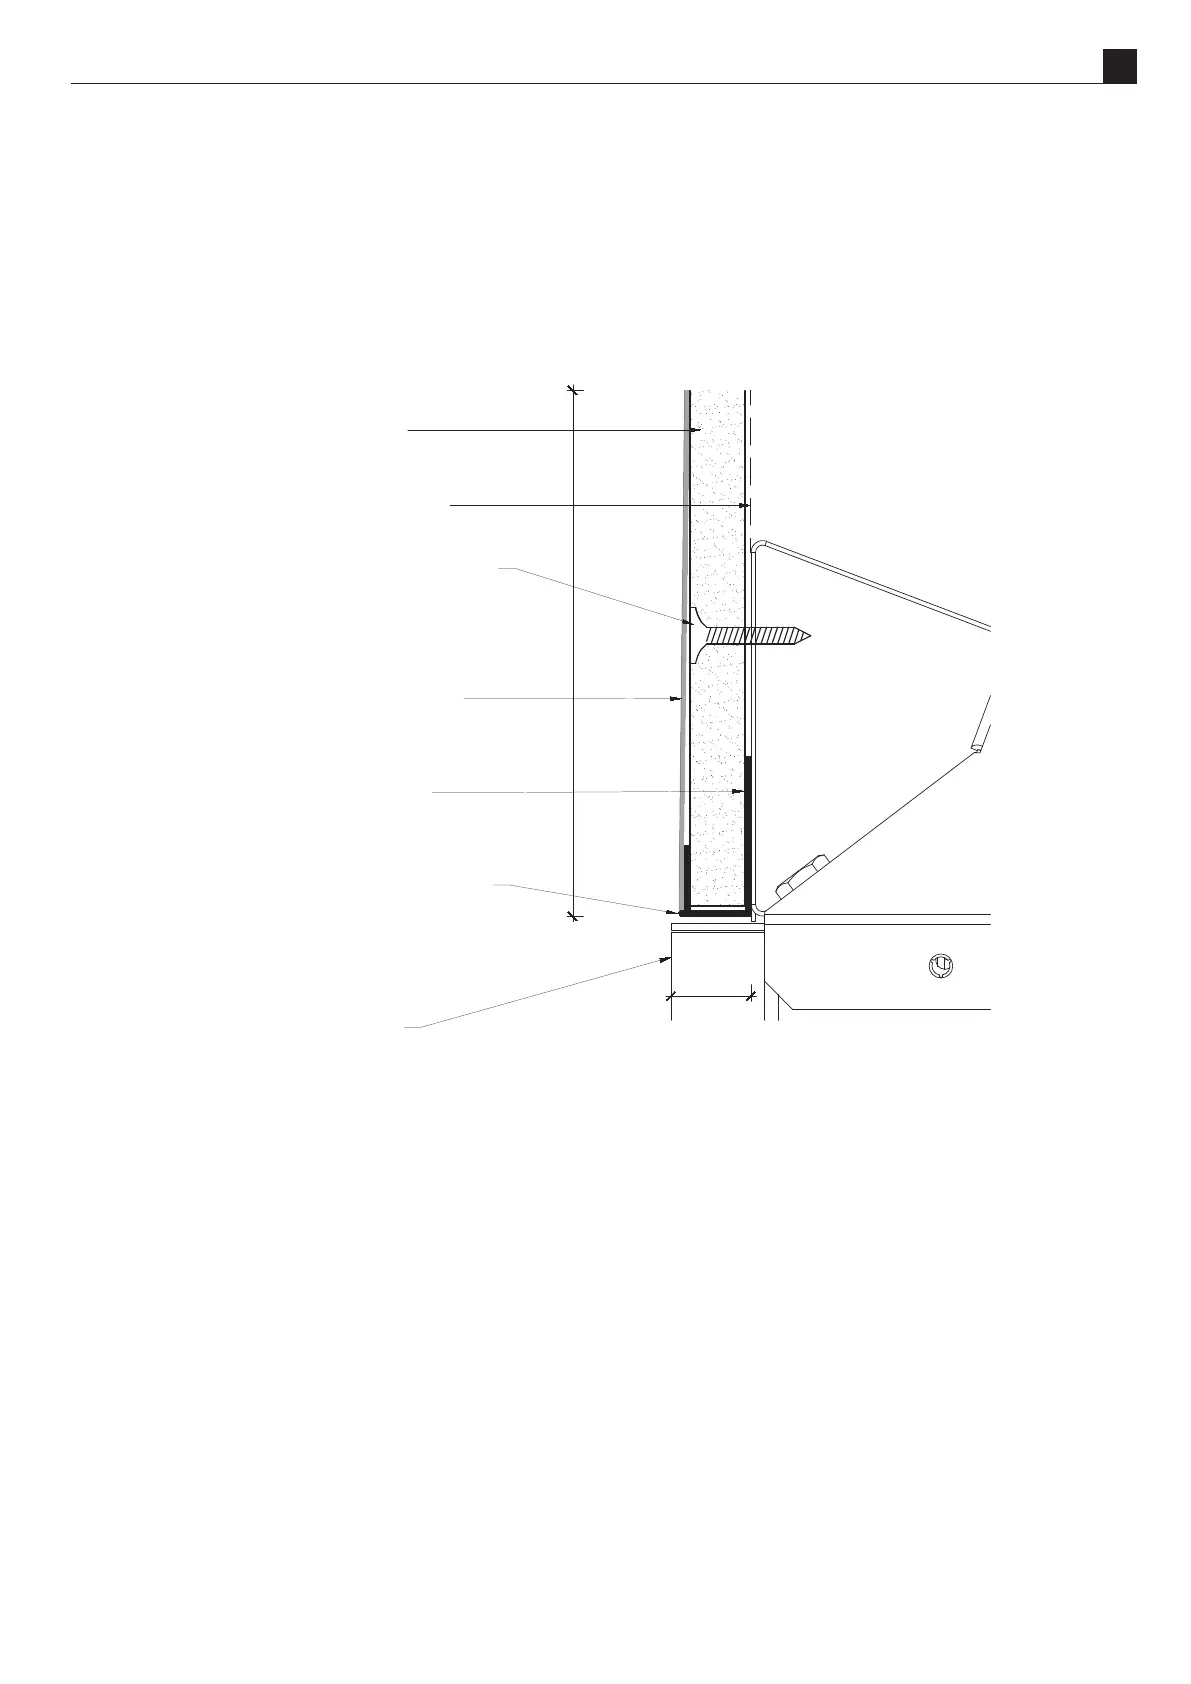
200 min
14
DS Series fire reveal
14mm in depth
standard construction
adhesive - applied directly
to fire for fixing plasterboard
10mm plasterboard stopping
bead fixed to plasterboard
edge prior to lining - minimal
gap to the reveal
10mm plasterboard
wall lining fixing bracket
scavenger head self-tapping
metal screw and adhesive
fixing to wall lining fixing
bracket
plaster compound as per
plasterboard manufacturers
specifications
Note: a 20mm or less wall lining must be used when installing a DS Series replace without a fascia. For
wall linings with a total thickness of 10mm or larger, a “Linear Trim” may be purchased to cover any
exposed wall lining. A 10mm wall lining is recommended for ease of installaon.
NOTE: Do not glue the fascia to wall cladding, do not t cladding around the fascia that prevents it from
being removed, do not run the re without the fascia properly aached, the fascia is designed to be easily
removed for future servicing.
Bevelled Lite Fascia
If using a Bevelled Lite fascia, cutouts will be required in the nished plaster board to allow for the fascia
securing pins to aach to the appliance.
NOTE: Do not glue the fascia to wall cladding, do not t cladding around the fascia that prevents it from
being removed, do not run the re without the fascia properly aached, the fascia is designed to be easily
removed for future servicing.
Note: A 13mm wall lining must be used when installing a DS replace with a Bevelled Lite fascia; this is the
maximum distance the Bevelled Lite fascia can sit o the front face of the re.