S
67
630791 DS MKII INSTALLATION MANUAL
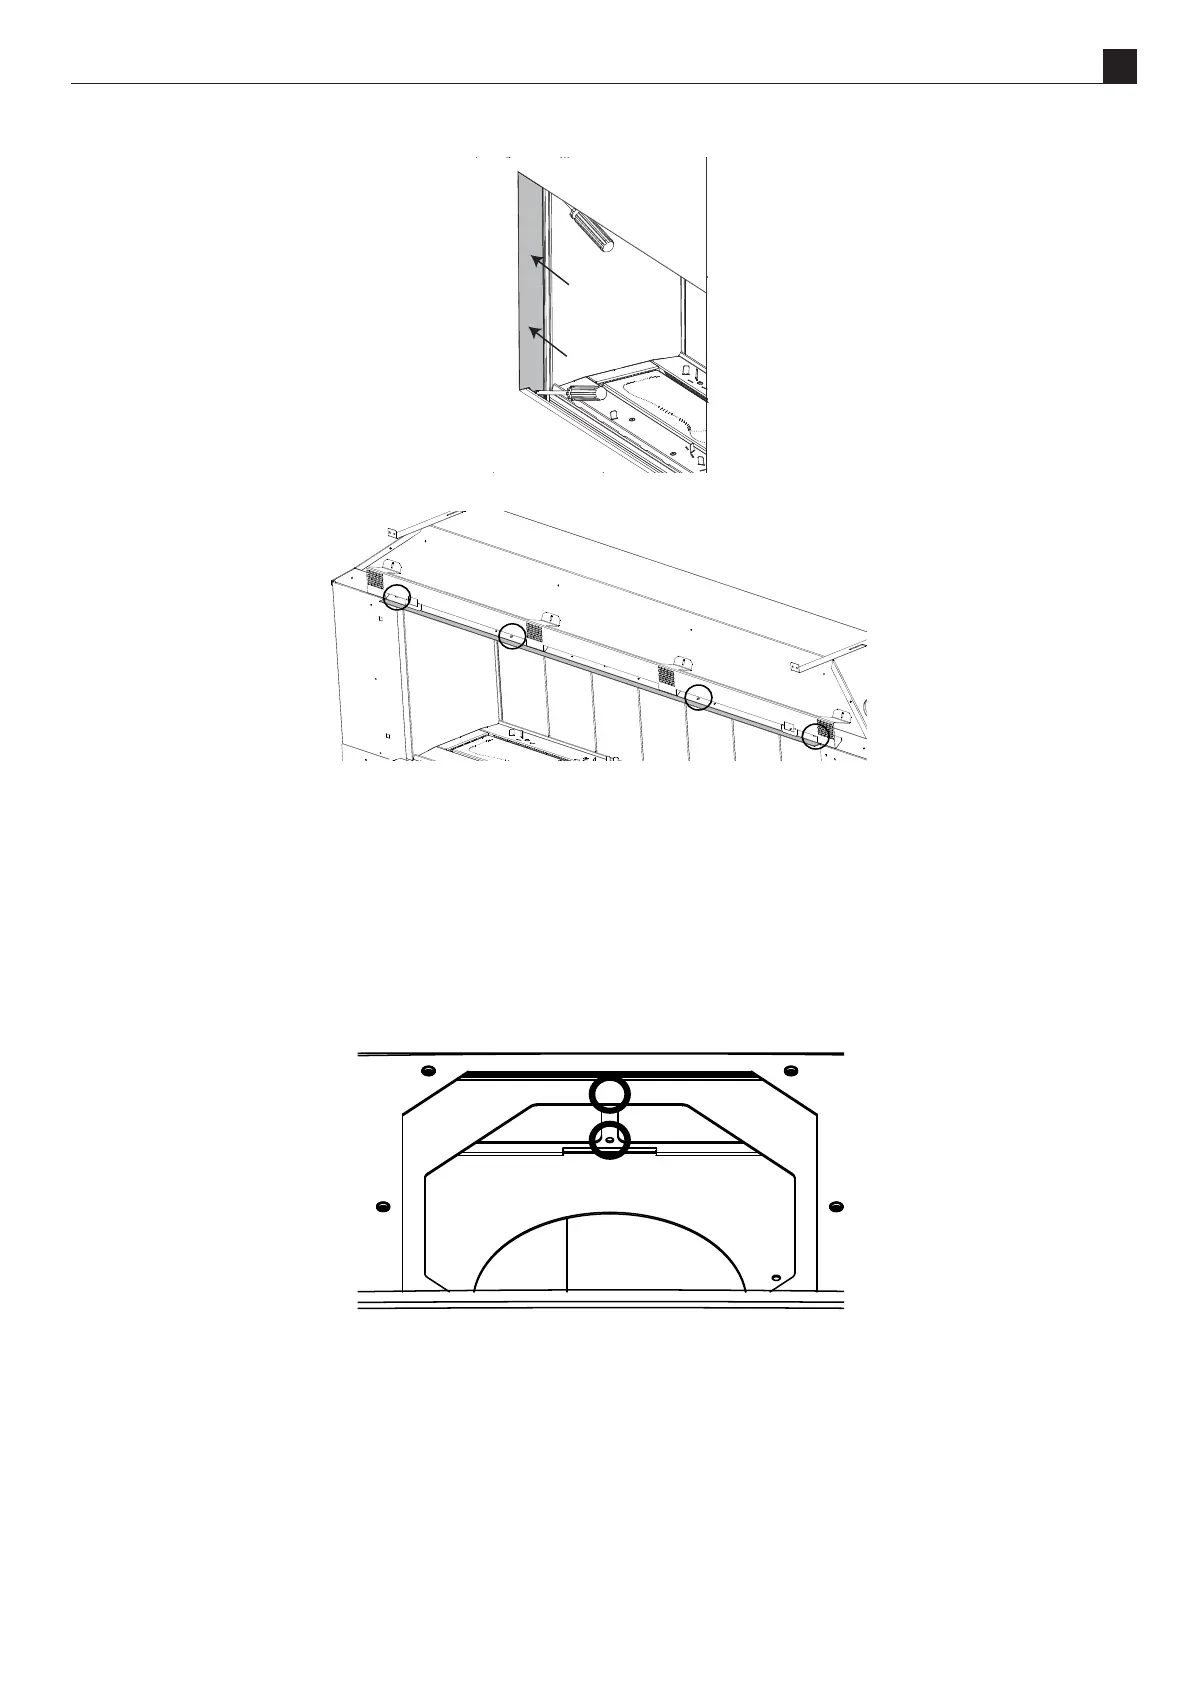
9. Remove the two side trims. These are xed with magnets.
10. Remove the top trim bracket from the front by unscrewing the black machine screws provided (circled below).
11. Remove the two fan assemblies from the re by following the instrucons in secon "S9 Removing or Cleaning
Fan(s)" on page 61.
To ensure the re funcons properly, the air ramps need to be adapted. All four of the parts are the same just in
dierent posions. Change the front parts rst and then the rear.
NOTE: There is tension in the ramps which may make them ght to change posions.
12. To change the front parts remove the top and boom screws (shown in the picture below), li up the part unll the
boom ange can be slid into the slot in the fan box, now use the removed screws to x down the ramp.
13. To change the rear ramps remove the two screws xing the ramp down to the fan box and then slide the ange out
and aen the ramp against the fan box installing the removed screws in the top and boom to hold it in place.
14. Reinstall the fan assemblies into the re.
15. Reinstall the rebox back panel, removed in step 6, onto what was the front and is now the back, making sure to
install the screws removed in step 4
16. Reinstall the chassis back panel and the internal rebox liners, also on the opposite side to which they came out
from. Remove the screws from the rebox ceiling to aach the liner bracket.
17. Aer reinstalling the components in the previous steps, reinstall the side and top trims, leaving the boom trim for