Chapter 1. Get Started
Related Documents
• ESP-LyraT-8311A Schematic (PDF)
• ESP-LyraT-8311A PCB Layout (PDF)
For other design documentation for the board, please contact us at sales@espressif.com.
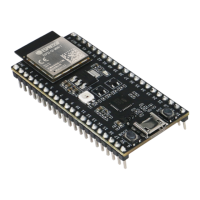
• ESP32-S2-WROVER Datasheet (PDF)
• ESP Product Selector
• JTAG Debugging
• ESP32-S2-Kaluga-1 Schematic (PDF)
• ESP32-S2-Kaluga-1 PCB Layout (PDF)
• ESP32-S2-Kaluga-1 Pin Mapping (Excel)
For other design documentation for the board, please contact us at sales@espressif.com.
1.4 Installation Step by Step
This is a detailed roadmap to walk you through the installation process.
1.4.1 Setting up Development Environment
• Step 1. Install prerequisites for Windows, Linux, or macOS
• Step 2. Get ESP-IDF
• Step 3. Set up the tools
• Step 4. Set up the environment variables
1.4.2 Creating Your First Project
• Step 5. Start a Project
• Step 6. Connect Your Device
• Step 7. Configure
• Step 8. Build the Project
• Step 9. Flash onto the Device
• Step 10. Monitor
1.5 Step 1. Install prerequisites
Some tools need to be installed on the computer before proceeding to the next steps. Follow the links below for the
instructions for your OS:
1.5.1 Standard Setup of Toolchain for Windows
Introduction
ESP-IDF requires some prerequisite tools to be installed so you can build firmware for supported chips. The prereq-
uisite tools include Python, Git, cross-compilers, CMake and Ninja build tools.
For this Getting Started we’re going to use the Command Prompt, but after ESP-IDF is installed you can use Eclipse
or another graphical IDE with CMake support instead.
Note: Limitations: - The installation path of ESP-IDF and ESP-IDF Tools must not be longer than 90 characters.
Too long installation paths might result in a failed build. - The installation path of Python or ESP-IDF must not contain
Espressif Systems 54
Submit Document Feedback
Release v4.4

 Loading...