Installation
Edition 10_2010 - 38891EN-900-AB
27
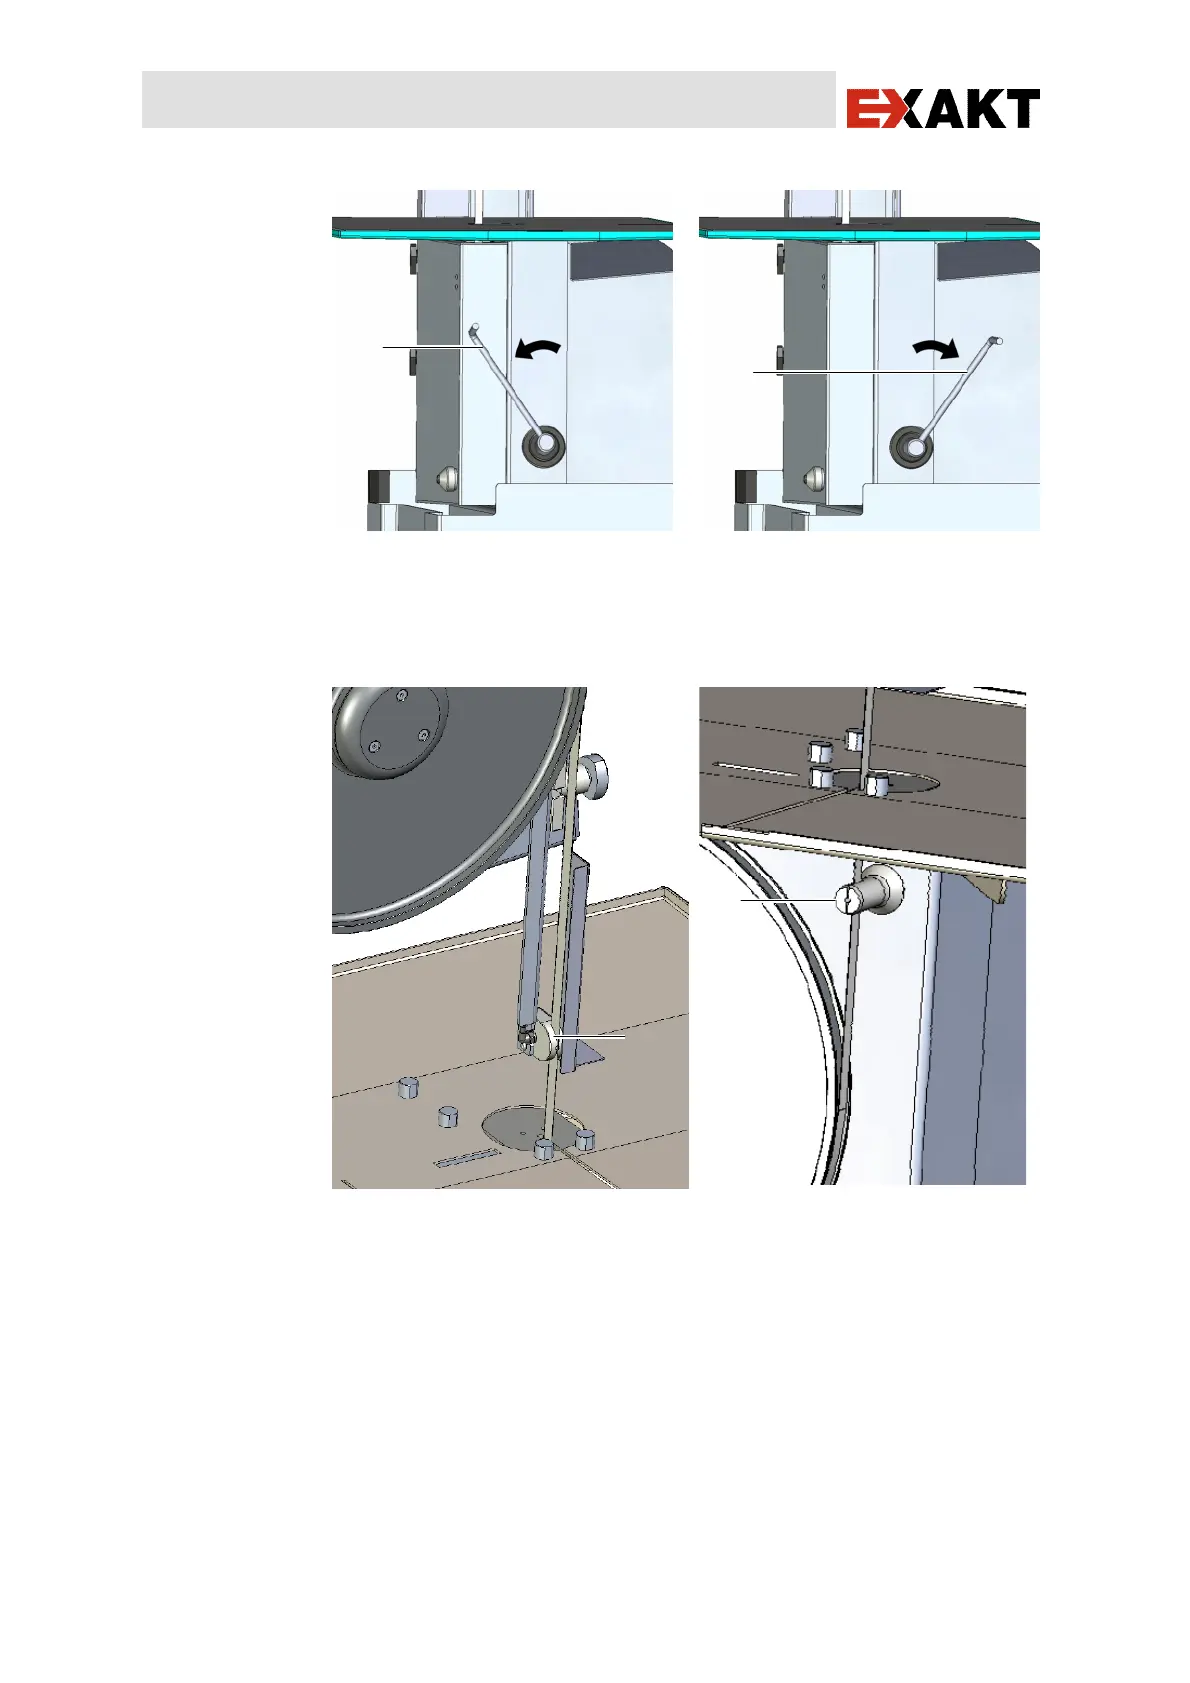
Abb. 13 Cutting band relieved Abb. 14 Cutting band tensioned
u Pull tensioning lever 18 on the saw base unit forward (toward the
user) so that the bottom pulley is moved upward.
Abb. 15 Cutting band in top cutting band
guide
Abb. 16 Cutting band in (bottom) cutting
band flushing (guide)
u Carefully unfold the folded cutting band.
u Guide the cutting band through the slot on the work table tray.
u Place the cutting band over the top pulley with the diamond-coated
side to the front.
u Place the cutting band in the top cutting band guide 26.
u Place the cutting band in the bottom cutting band guide 28.
u Manually centre the position of the cutting band on the bottom pulley.
u Slowly push tensioning lever 18 to the rear to the stop to tension the