METALJET D2+ INSTALLATION
Revision 19, November 2016 Page 4-17
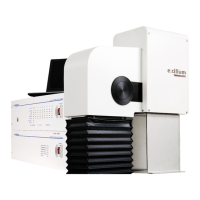
1. Connect the high-voltage cable to the electron gun (Figure 4-18).
a) Remove the transportation cover and wipe the tapered end of the insulator on the connector
of the high-voltage cable with a minor amount of isopropanol and lint-free tissue paper.
b) Gently insert the tapered end into the high-voltage connector on the electron gun, being
careful not to scrape the insulator. Avoid excessive twisting or force when inserting cable.
c) Tighten the eight M6x20 screws in a star-shaped pattern until fully screwed in.
Figure 4-18. Connect the tapered end of the high voltage cable to the electron gun according to the
instructions above.
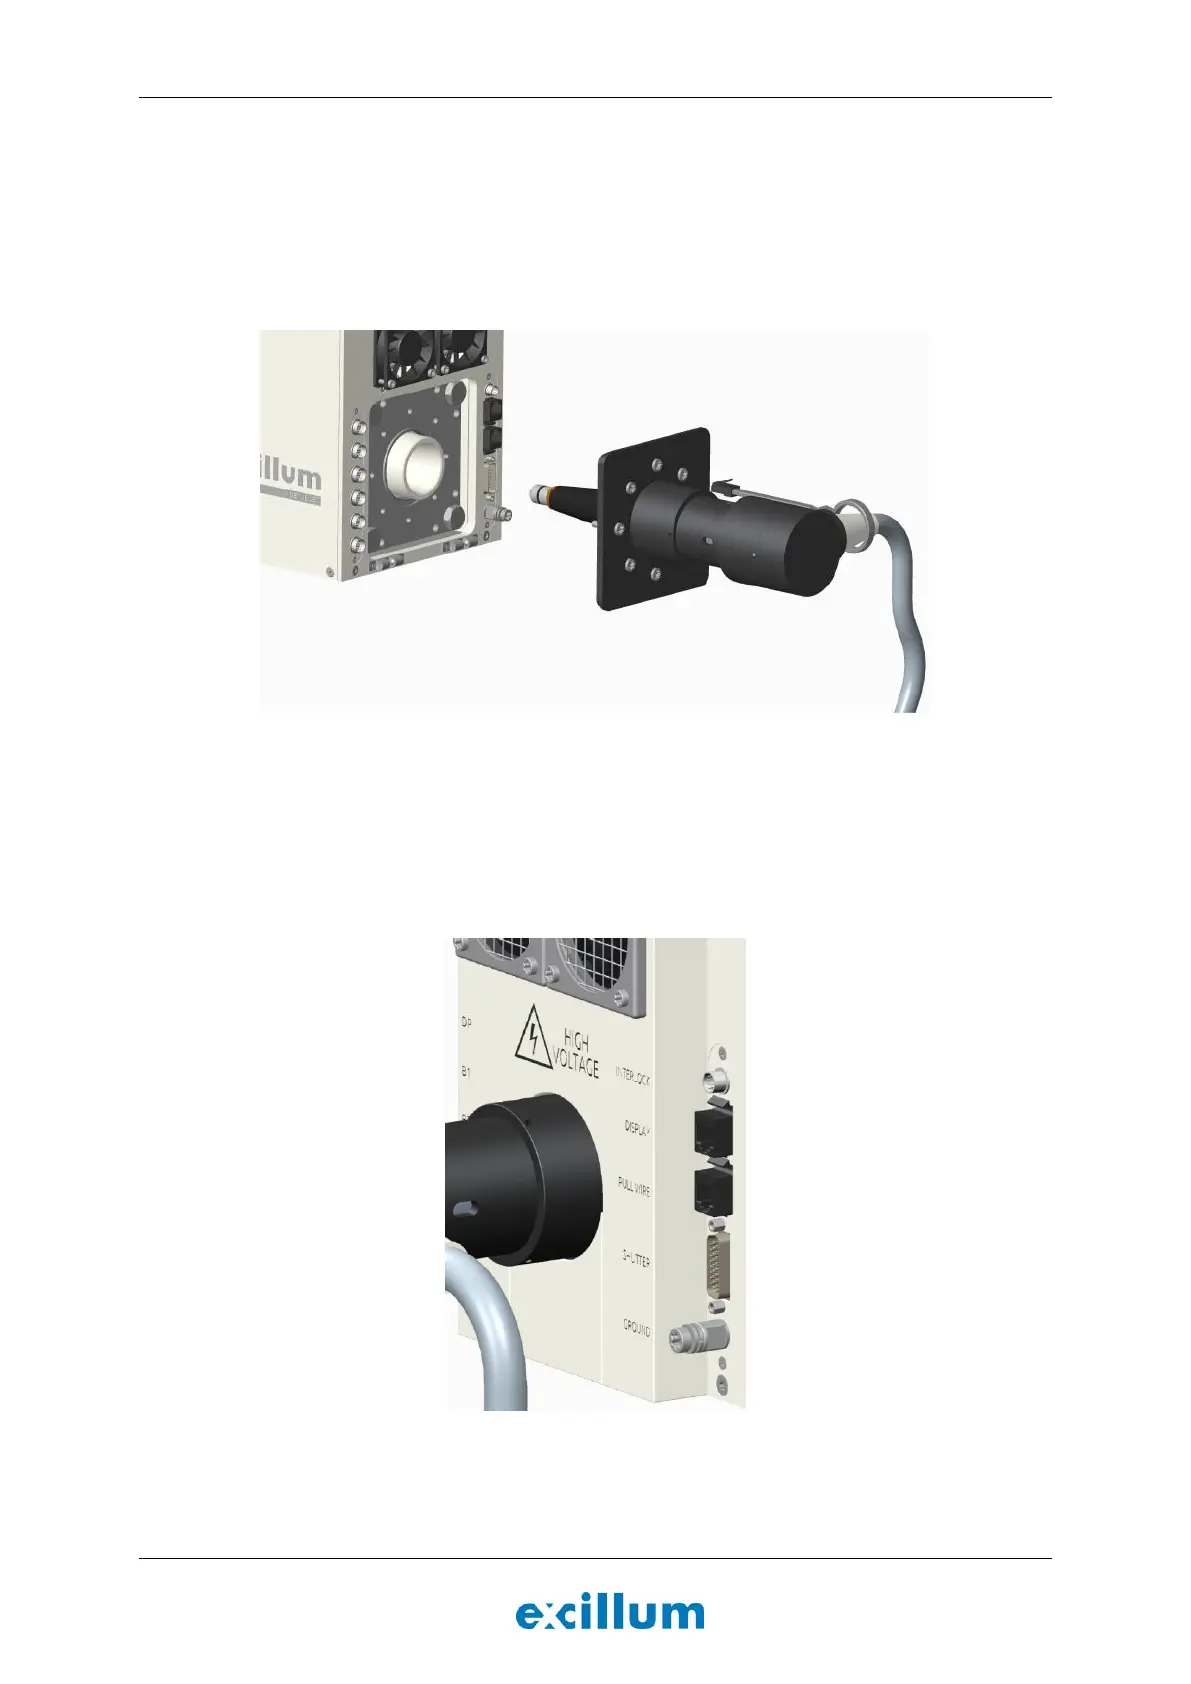
2. Connect the cable labeled “E-009-0065 RC” to the RJ45 socket labeled “Pull wire”.
Note: The purpose of the pull wire is to prevent users from removing the high-voltage cable without
removing the pull wire. Presence of the pull wire can be detected by an external safety system.
Figure 4-19. X-ray head from behind (right side) showing the connectors for the safety system interface.