Software- and Web Page-based Setup and Control, cont’d
4-4
PRELIMINARY
MLC 226 Series • Software-and Web Page-based Setup and Control
4. Write down the PC’s current IP address and subnet mask below. If your PC
is set to “Obtain an IP address automatically,” make a note of that, instead.
You will need to restore these settings to the PC later.
IP address:
. . . .
Subnet mask:
. . . .
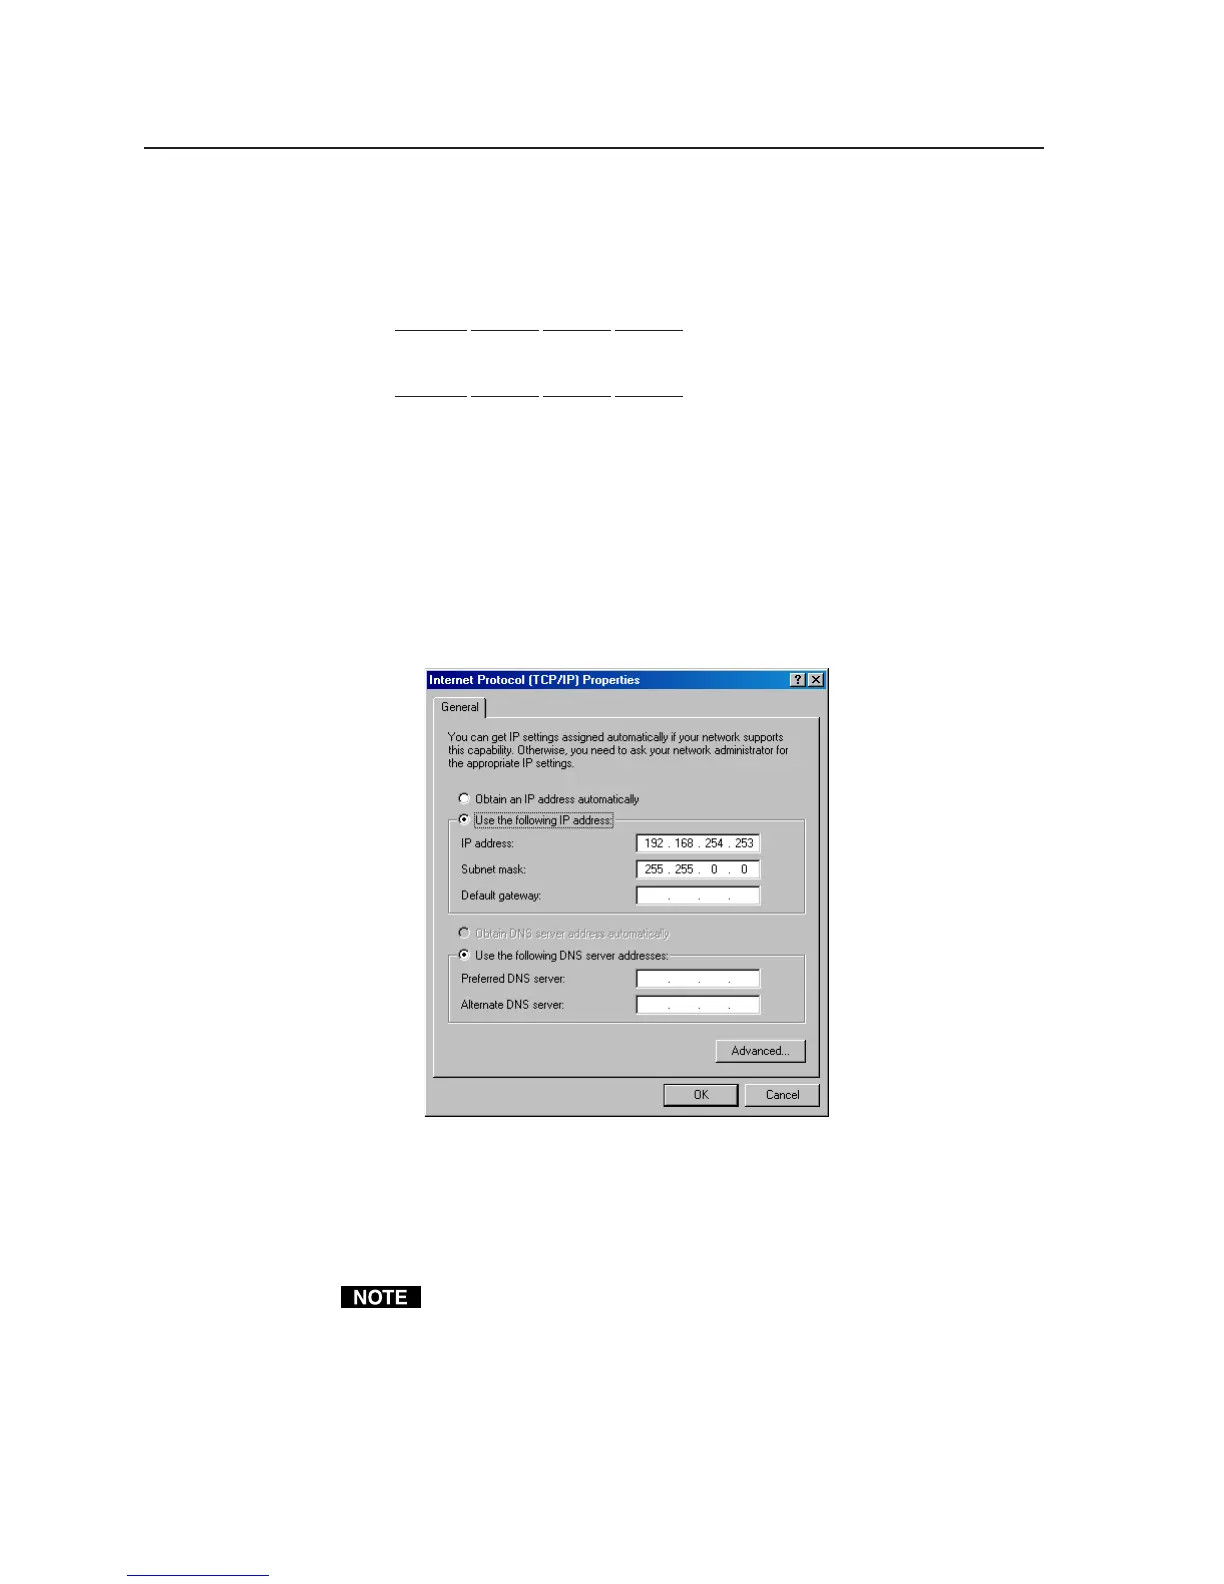
5. Change the PC’s IP address so it can communicate with the MLC 226 IP and
change the controller’s IP settings.
a. Select the “Use the following IP address:” radio button.
b Enter the following values, as shown below:
IP address: 192.168.254.253
Subnet mask: 255.255.0.0
Default gateway: blank or 0.0.0.0
c Click on the OK button to save the changes and exit the network setup.
Reboot the PC, if required, for the changes to become effective.
6. Plug one end of a Category 5 network/Ethernet crossover cable into the
MLC’s Ethernet (LAN) connector. Refer to chapter two for RJ-45 LAN
connector wiring. Plug the other end of the Ethernet cable into the Ethernet
port on the PC.
If a network hub or switch is used between the PC and the MLC 226 IP, use a
straight-through Category 5 cable instead of a crossover cable.
7. Set up the MLC’s IP address. See “Setting up the MLC 226 IP (at initial start-
up) for IP communication” below.
8. Restore the PC’s previous IP configuration by following steps 1, 2, 3, and 5 but
using the PC’s original IP address settings you wrote down in step 4.