Room Scheduling System • Room Agent Installation and Configuration 20
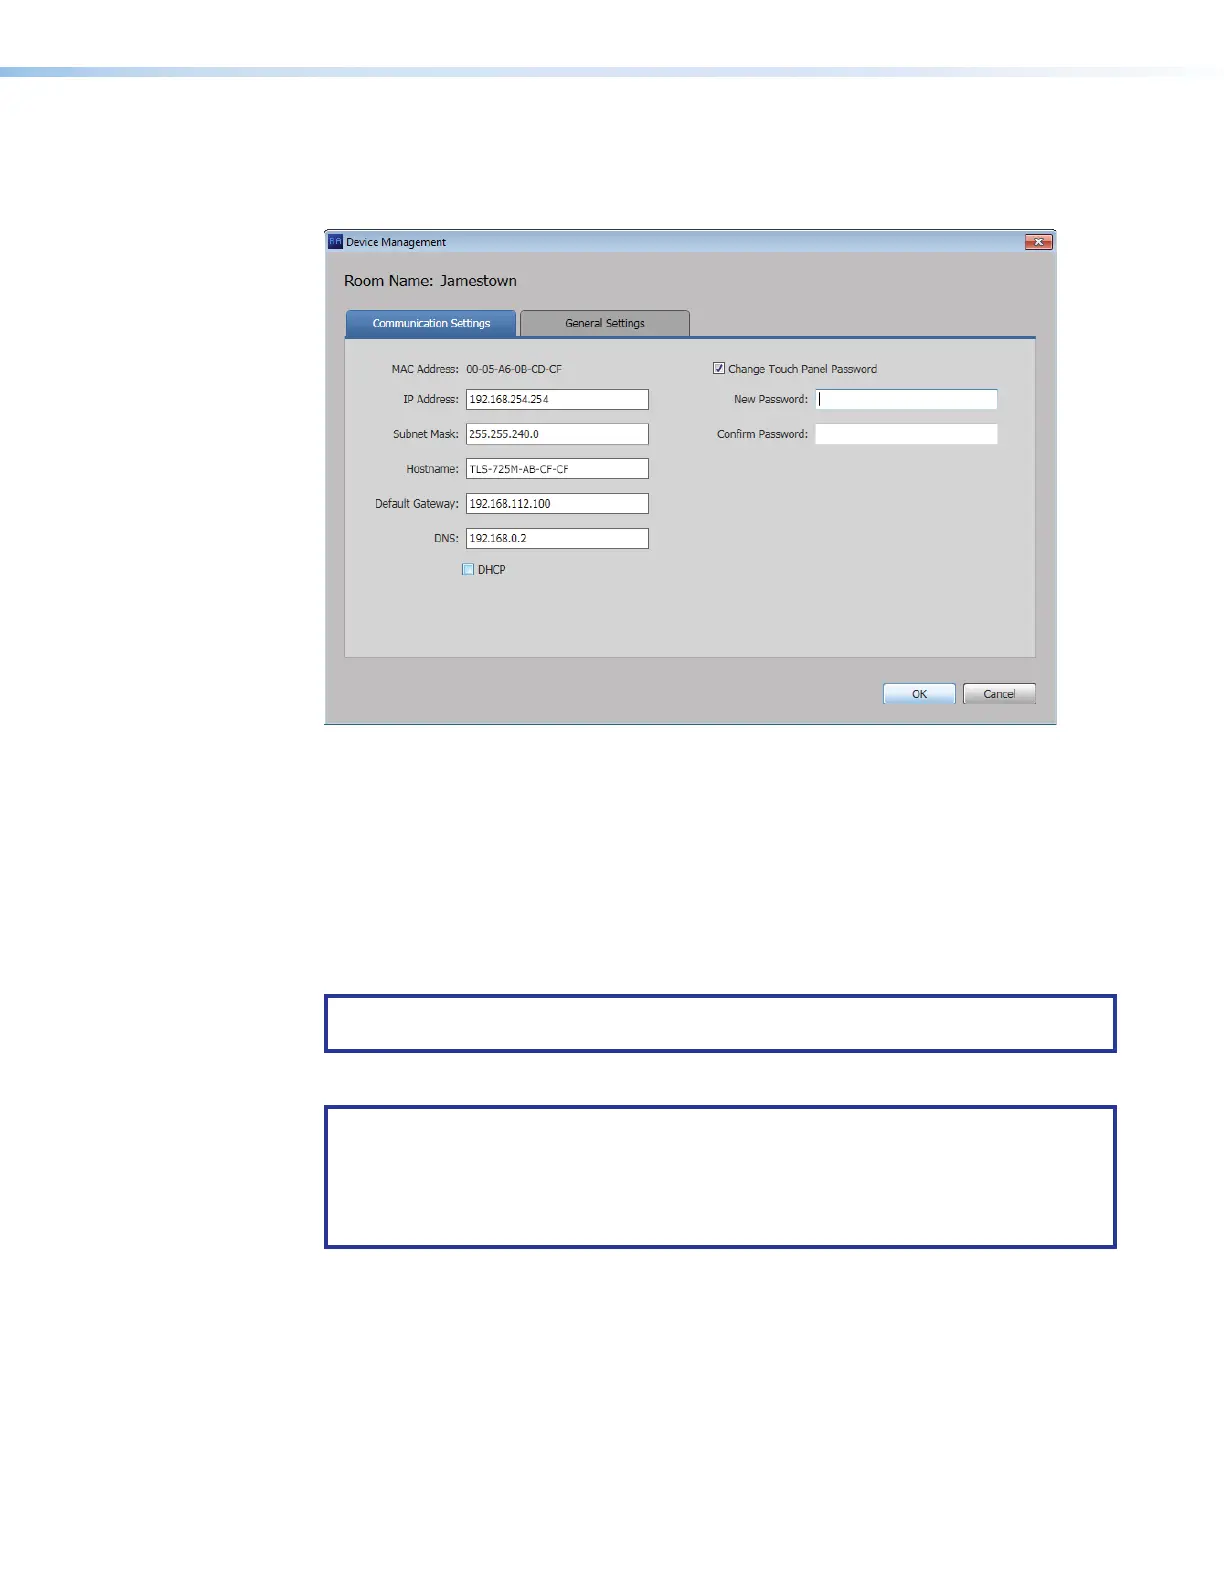
Communication Settings window
The Communication Settings tab on the Device Management window (see figure 15)
provides a set of tools for managing the following internet settings of the connected panel:
8888888888
8888
9999999999
9999
¢¢¢¢¢¢¢¢¢¢
¢¢¢¢
££££££££££
££££
¤¤¤¤¤¤¤¤¤¤
¤¤¤¤
7777777777
7777
5555555555
5555
4444444444
4444
6666666666
6666
3333333333
3333
2222222222
2222
1111111111
1111
Figure 15. Device Management Window, Communications Settings
1
MAC Address (displayed only)
5
Default Gateway
2
IP Address
6
DNS (Domain Name System) server
3
Subnet Mask
7
DHCP (Dynamic Host Configuration Protocol)
4
Hostname
When the DHCP checkbox (see figure 15,
7
) is selected, only the Hostname can be edited.
All other settings (other than DHCP itself) are displayed only and unavailable for editing. To
edit all settings (other than the MAC address), DHCP must be deselected (unchecked).
NOTE: If you configure the panels with a static IP address and you use a host name for
the exchange server, ensure that you provide the DNS server address.
The Communication Settings tab also allows users to change the password of the panel.
NOTES:
• The factory configured passwords for all accounts on this device have been set to
the device serial number. Passwords are case sensitive.
• If the device is reset to default settings, the password will be the default password
configuration. The default password is extron.
Change the password as follows:
1. Select the Change Touch Panel Password checkbox (
8
).
2. Enter the new password in the Password (
9
) and Confirm Password (
¢
) fields.
Once you have made all desired changes available from the Communication Settings
tab, click either the OK button (
£
, the Device Management window closes) or the General
Settings tab (
¤
, then general settings are displayed, see figure 16 on the next page).
figure 15