478182
68
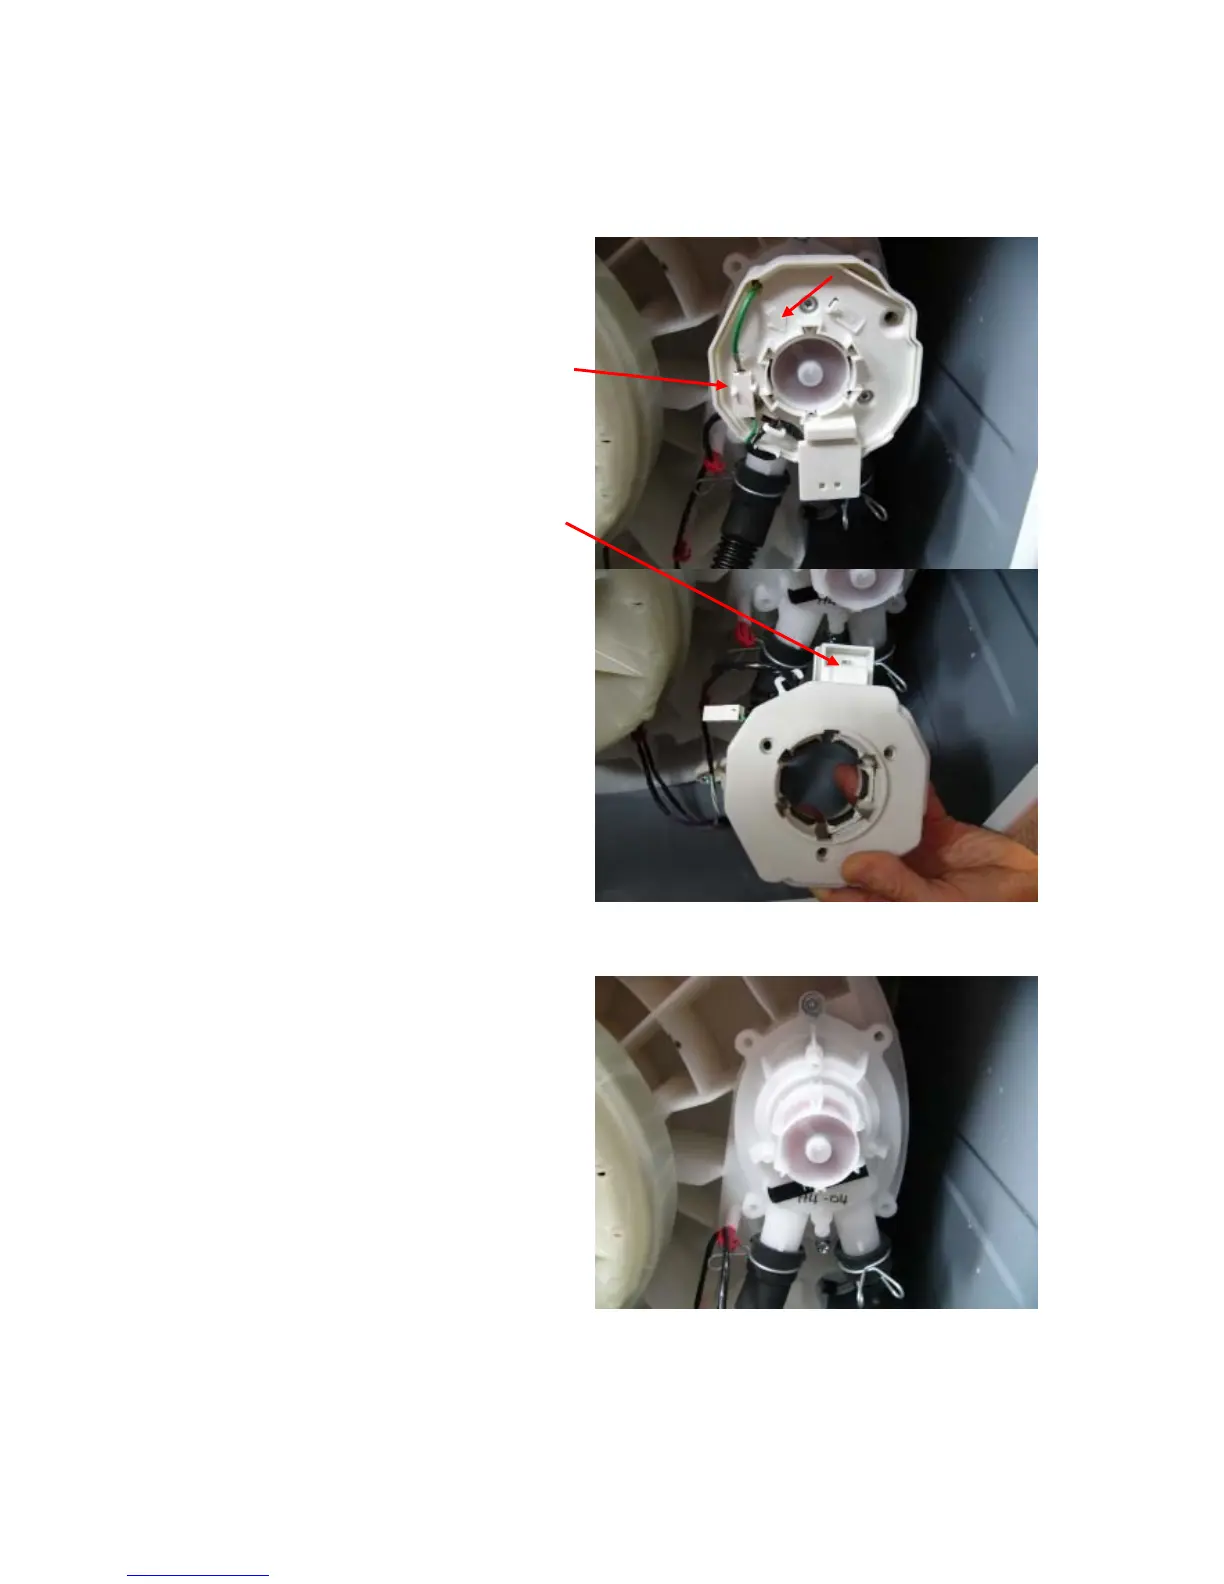
10.19 Removal of Stator (SmartPump™) – Testing /
Inspection Purposes Only
Note: The stator is not available as a separate spare part, Use this procedure for inspecting
and testing the stator only.
(a) Tilt the rear of the machine carefully against
the wall ensuring that the machine is stable
and locked in position, take necessary
precautions not to damage the wall or the
machine.
(b) Disconnect earth by sliding connector apart.
(c) Remove the three screws holding the Stator
assembly to the Housing Pump.
(d) Lower the stator assembly.
(d) Unclip the wiring harness cover by
releasing the two tabs from the topside of
the stator shield and unplug the harness
from the stator.
(e) The stator can now be electrically tested. If
a fault is shown and the stator needs to be
visually inspected, the shield cap can be
removed.
Reassembly:
Refit in reverse manner.
Note: Alignment arrows are moulded into the
stator shield and the rotor housing to aid in the
refitting process.
10.20 Removal of Pump Housing
(a) If the bowl is full of water, drain or bail as
much of the water as possible from the
machine prior to continuing. To assist with
bailing the water, the inner bowl can be
removed.
(b) Tilt the rear of the machine carefully against
the wall ensuring that the machine is stable
and locked in position, take necessary
precautions not to damage the wall or the
machine.
(c) Remove the hose clamps from the Drain &
Recirculation Hoses. Carefully remove the
two hoses while holding a container under
the hose to catch the remaining water
trapped in the hoses and pump.
(d) Undo the two screws holding the pump to
the outer bowl. The pump can now be
removed from the bowl by pulling down on
the two port tubes.
Alignment arrows
 Loading...