6 Mounting
6.1 Transmitter FLUXUS F502TE
2020-05-29, UMFLUXUS_F502TEV1-5EN
24
6.1.2 Installation of the transmitter
6.1.2.1 Wall mounting
• Loosen the screws of the transmitter housing (see Fig. 6.1).
• Open the housing cover of the transmitter.
• Fix the transmitter with 4 screws to the wall (see Fig. 6.2).
6.1.2.2 Pipe mounting
Mounting on a 2'' pipe
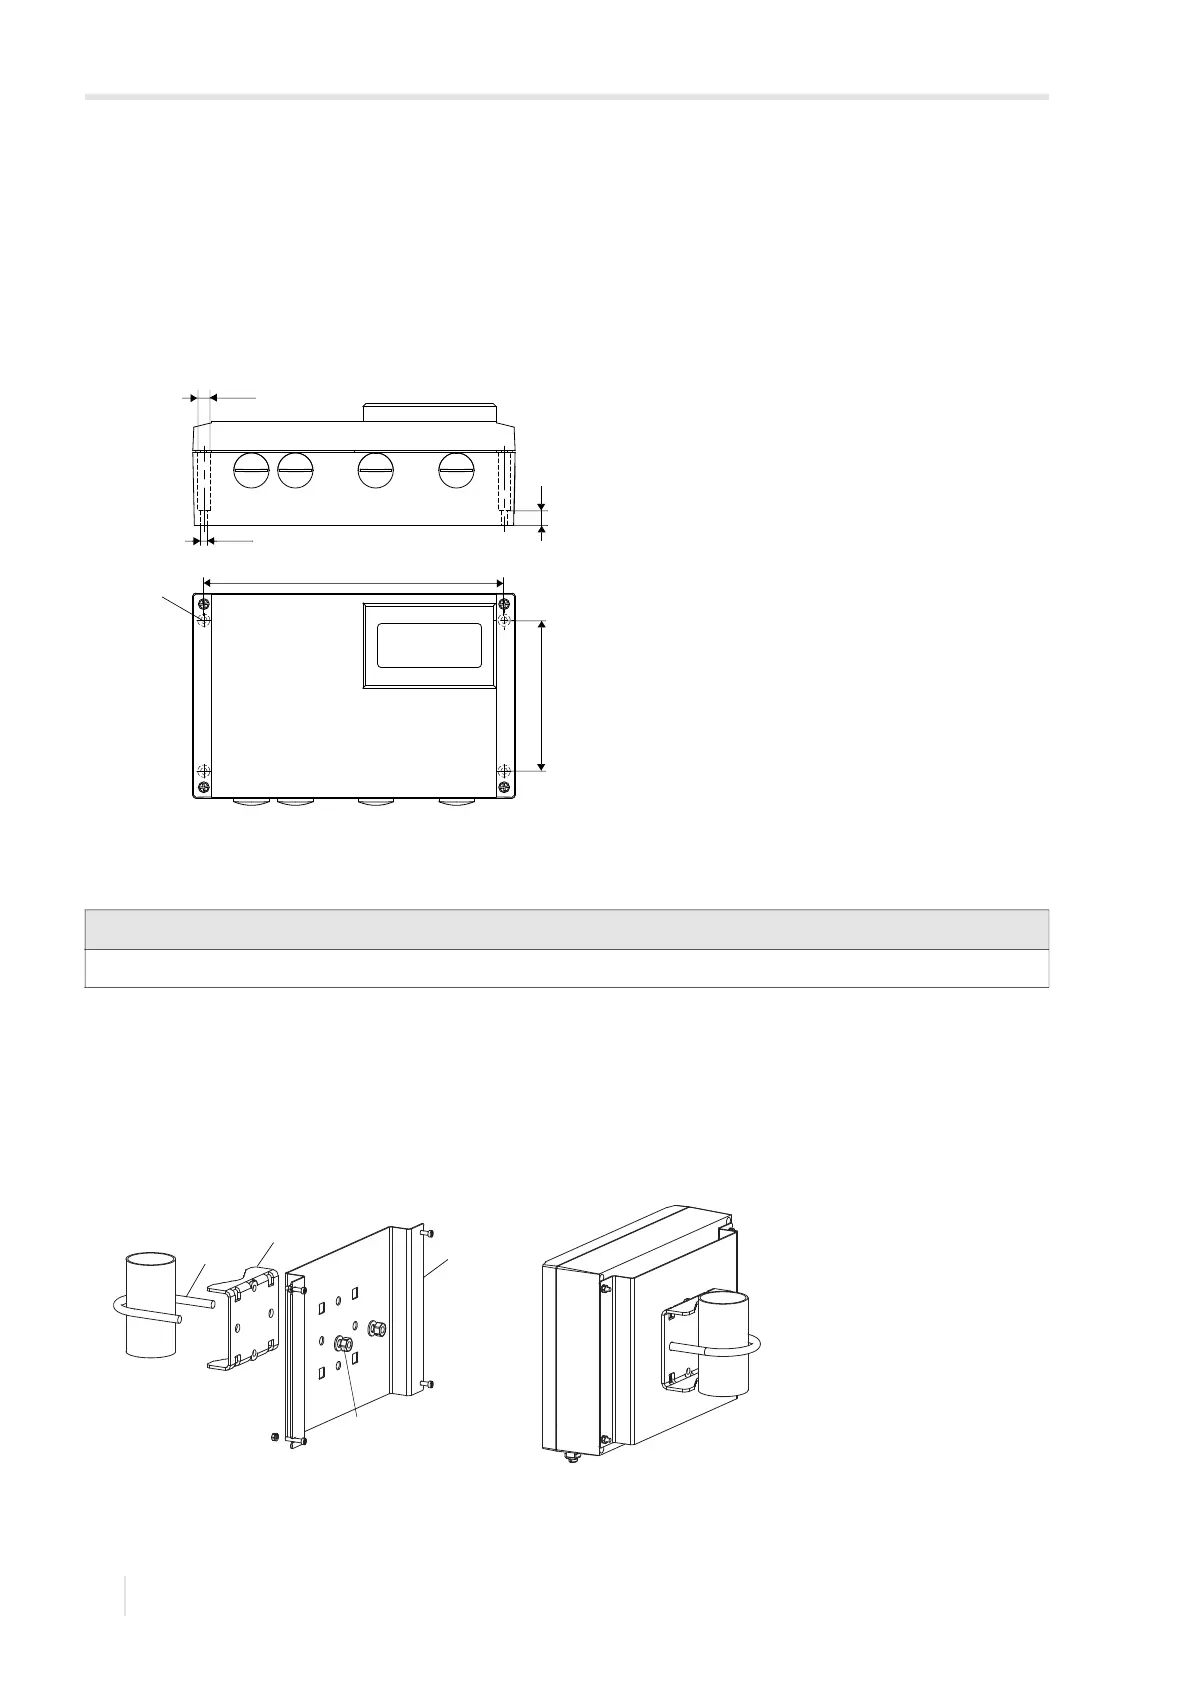
The pipe mounting kit is fixed to the pipe using a shackle (see Fig. 6.3).
• Fix the pipe mounting plate (2) and the instrument mounting plate (3) to the pipe using the nuts (4) and the shackle (1).
• Use the screws to fix the transmitter to the instrument mounting plate.
Fig. 6.2: Transmitter (dimensions in mm)
1 – fixing holes for wall mounting
Important!
The pipe has to be sufficiently stable to withstand the pressure exerted by the transmitter and the shackles.
Fig. 6.3: Pipe mounting kit
1 – shackle
2 – pipe mounting plate
3 – instrument mounting plate
4 – nut
1
Ø 8.4
10
Ø 4.5
205
103
3
1
2
4
 Loading...