Troubleshooting Tips
432-0012-00-10 Version 100 December 2015 58
the camera, the camera ID appears in the JCU II display, and the camera responds to JCU II input
(for example, pan/tilt movements).
If the camera will not produce an image, check the video connection at the camera and at the
display. If the connectors appear to be properly connected but the camera still does not produce
an image, ensure that power has been properly applied to the camera and circuit breaker is set
properly. If a fuse was used, be sure the fuse is not blown.
Check the wiring at both the electrical panel and at the termination to the JCU II. Ensure that the
contacts are clean, dry and free from corrosion. If maintenance on the wiring connection is
required, have an authorized service representative make the appropriate repairs.
If the camera still does not produce an image, contact the FLIR dealer or reseller who provided the
camera, or contact FLIR directly (contact information is provided on the rear cover of this manual).
Cleaning
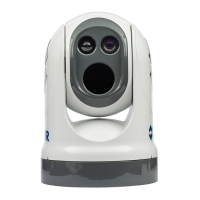
Warning: The M400 camera body is a remotely and automatically controlled device. Ensure
camera motion has been disabled before cleaning surfaces that can cause pinch hazards.
If the camera lens has become smudged or dirty, clean it with low-pressure fresh water and a soft
cloth. Improper care of the camera window can cause damage to its anti-reflective coating,
degrade the camera’s performance, and void the camera warranty.
The camera housing has a durable marine coating. Rinse the camera housing with very low-
pressure fresh water to keep it clean. If the front window of the camera gets water spots, wipe it
with a clean lens cloth folded in fourths and dampened with fresh water.
Video not switching between thermal and visible
On dual payload models, the display can be switched between the thermal camera and the visible
camera either by pressing and holding the Scene button, or, if the User Programmable Button is
set to Switch IR/VIS Video, pressing the User button. If neither of these operations causes the
display to switch from the thermal camera to the visible-light camera, be sure the proper input
channel is selected on the display, and be sure the cable labeled VIS/IR is connected to the
display.
Noisy image
A noisy image is usually attributed to a cable problem—too long or inferior quality—or the cable is
picking up electromagnetic interference (EMI) from another device. Although coax cable has built-
in losses, the longer the cable is or the smaller the wire gauge/thickness, the more severe the
losses become; and the higher the signal frequency, the more pronounced the losses.
Unfortunately this is one of the most common and unnecessary problems that plagues video
systems in general.
Cable characteristics are determined by a number of factors such as core material, dielectric
material and shield construction, among others and must be carefully matched to the specific
application. Moreover, the transmission characteristics of the
cable will be influenced by the
physical environment through which the cable is run and the method of installation. Use only high
quality cable and ensure the cable is suitable to the marine environment.
Check cable connector terminations. Inferior quality connections may use multiple adapters that
can cause unacceptable noise.

 Loading...