Page 67CWT Compact S4 Touch Installation & Maintenance Manual for CWT 1.0-0Issue 3
Preventive maintenance
As the holder is made from a material impervious to most industrial solvents, you
may use almost any cleaning solvent at hand (isopropyl alcohol is recommended).
Flowbird recommends wearing cotton or latex gloves when replacing batteries in
order to prevent fingerprints on the battery surfaces. It is also recommended to
inspect the positive spring contact to establish that it has not been bent upwards
to such an extent that the pushing force has been affected, even as it is made out
of spring steel.
To prevent excessive bending of the positive contact spring, Flowbird
recommends using of a pair of plastic (or otherwise insulated) pliers when
mounting new batteries. The coin cell should be pushed in such that the cell is in
contact with the plastic housing of the battery holder, not bending the positive
contact spring upwards more than necessary.
The CPU board contains a lithium battery (button cell) that should be returned for
recycling if required according to local laws and regulations. The battery (CR2032,
3 V, 210 mAh, 20 mm diameter) supplies backup voltage to the real-time clock in
case of interrupted power supply from the 12 V batteries.
Important:
To ensure uninterrupted terminal operation; replace the battery every 5 years.
Warning:
Lithium batteries can be dangerous because they can explode if short-circuited.
Handle batteries in accordance with local laws and regulations.
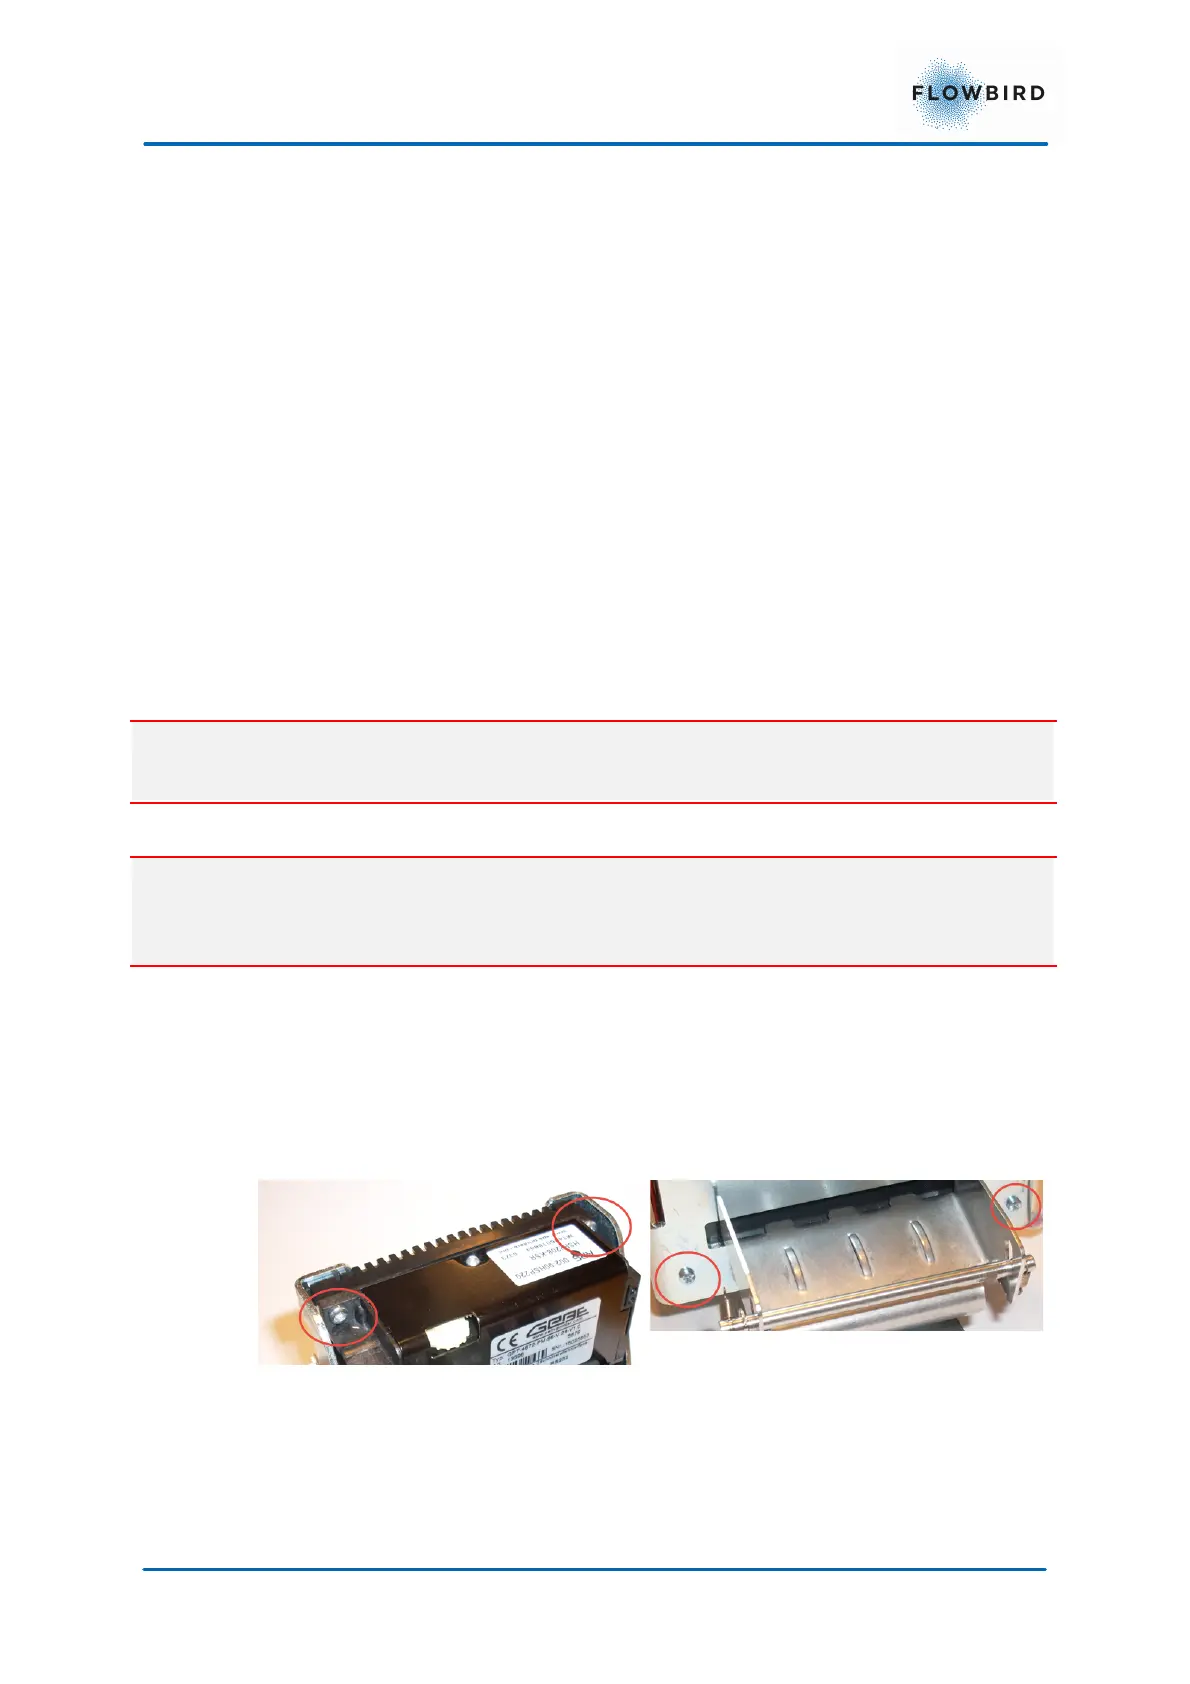
7.2 GeBe Printer GTP4672
7.2.1
Print head
The print head and the black mark sensor can be access by dismounting the
printer from its casing when installed on the printer shelf version 1.
Figure 44, Mounting screws on printer shelf version 1
Remove the 4 screws from the top front of the printer and the bottom back of the
casing