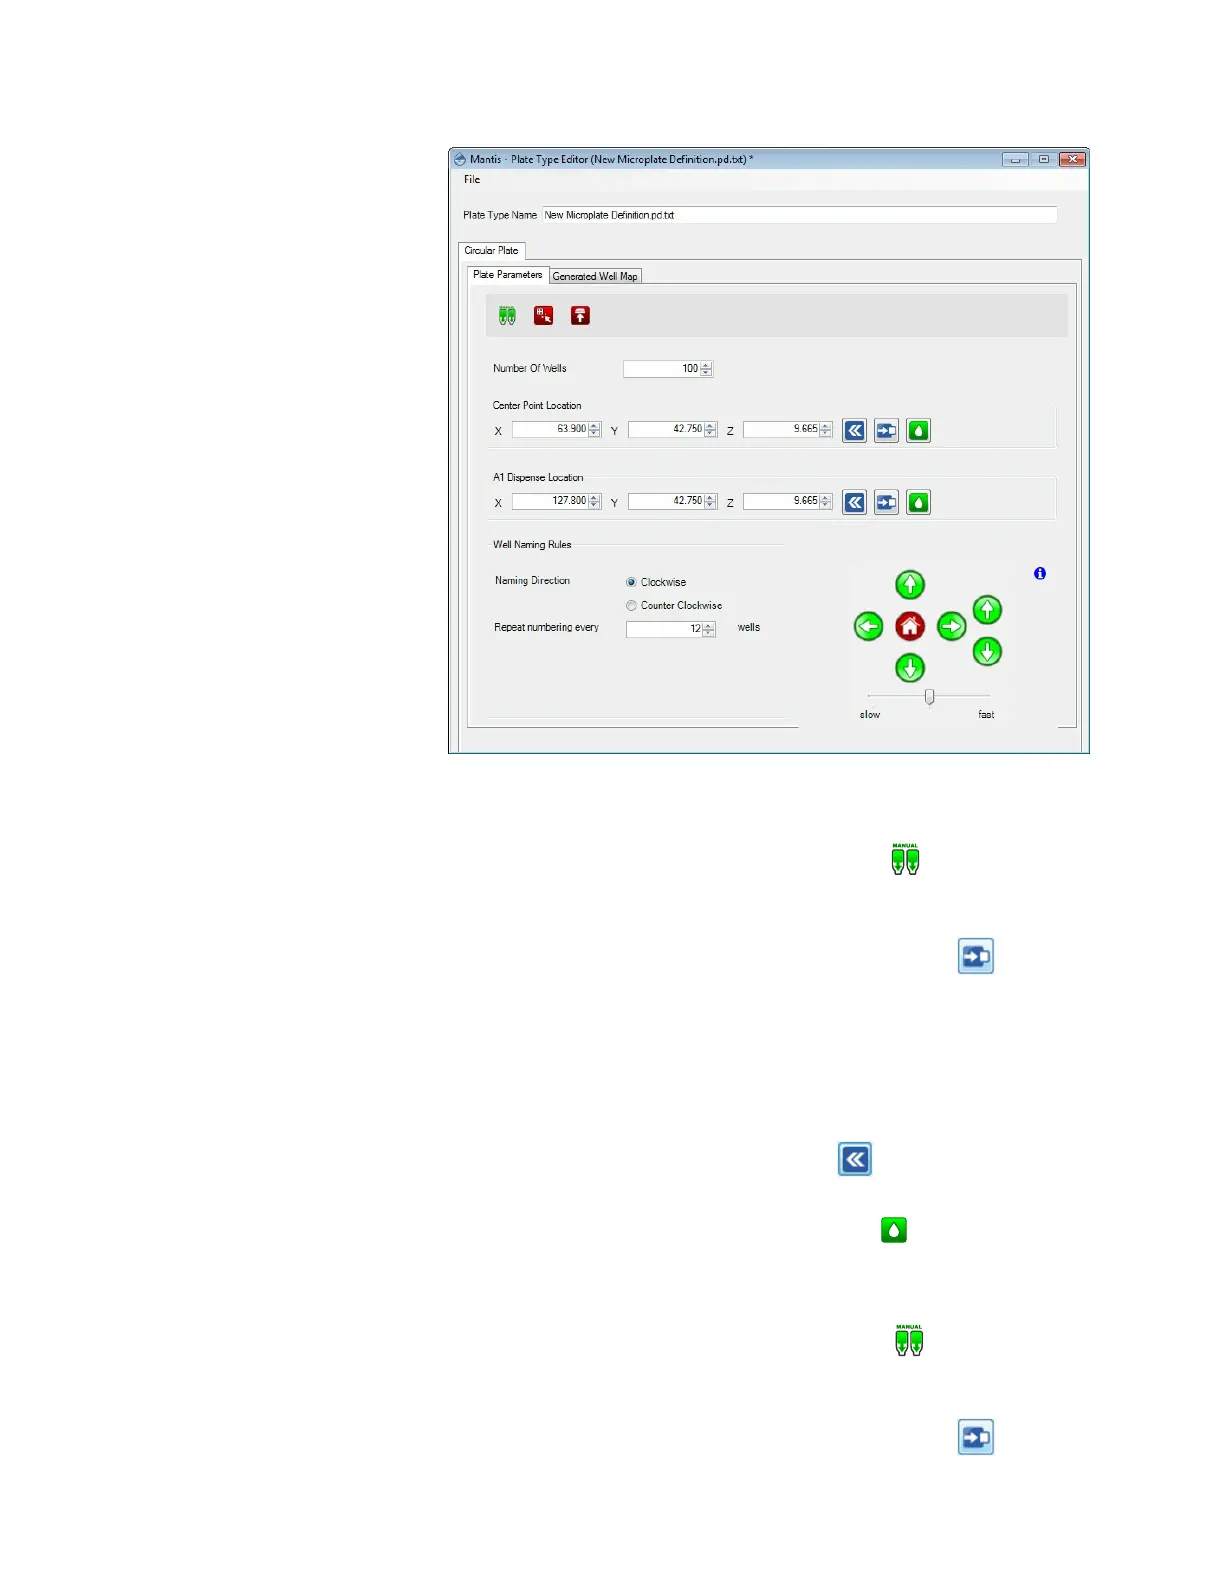
7. To set the plate’s center point:
a. Optional: Click and hold the Manual Prime button until the chip begins
dispensing drops.
b. Type the Center Point Location of the X, Y, and Z axis in the available boxes.
Then, click the Move to Specified Center Position button to check the
location.
c. Use the Motion Control Pad at the lower right of the Plate Type Editor to
modify the A1 well position. Use the arrow keys to maneuver the MANTIS
hand to the A1 location of your plate. View the plate from both the side and
the front to ensure your center location is correct. View the plate from both
the side and the front to ensure your center location is correct.
d. Click the Set Current Position as A1 button once you are satisfied with
the position.
e. Click the Test Dispense on Center On A1 button to dispense a test drop.
The drop should be at the center position of your plate.
8. To set the A1 dispense location:
a. Optional: Click and hold the Manual Prime button until the chip begins
dispensing drops.
b. Type the A1 Dispense Location of the X, Y, and Z axis in the available boxes.
Then, click the Move to Specified Center Position button .
MANTIS User's Guide | Chapter 6: Initial Setup
Plate Parameters Tab