4. In the Target Plate option:
● Select the plate type you want to use for dispense from the plate list.
● Determine the well numbering convention by selecting either the Well
number increments by Row: A1, A2, A3 or by Column A1, B1, C1 option.
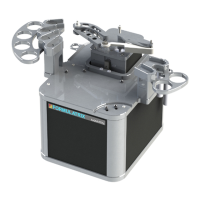
q Well increments by Row: A1, A2, A3 means that the wells in your plate
design are numbered left-to-right in rows. For example, wells A1 through
A12 are numbered 1 to 12 and are represented by the first 12 data rows of
your .CSV file. Wells B1 through B12 are numbered 13 to 24 and so on.
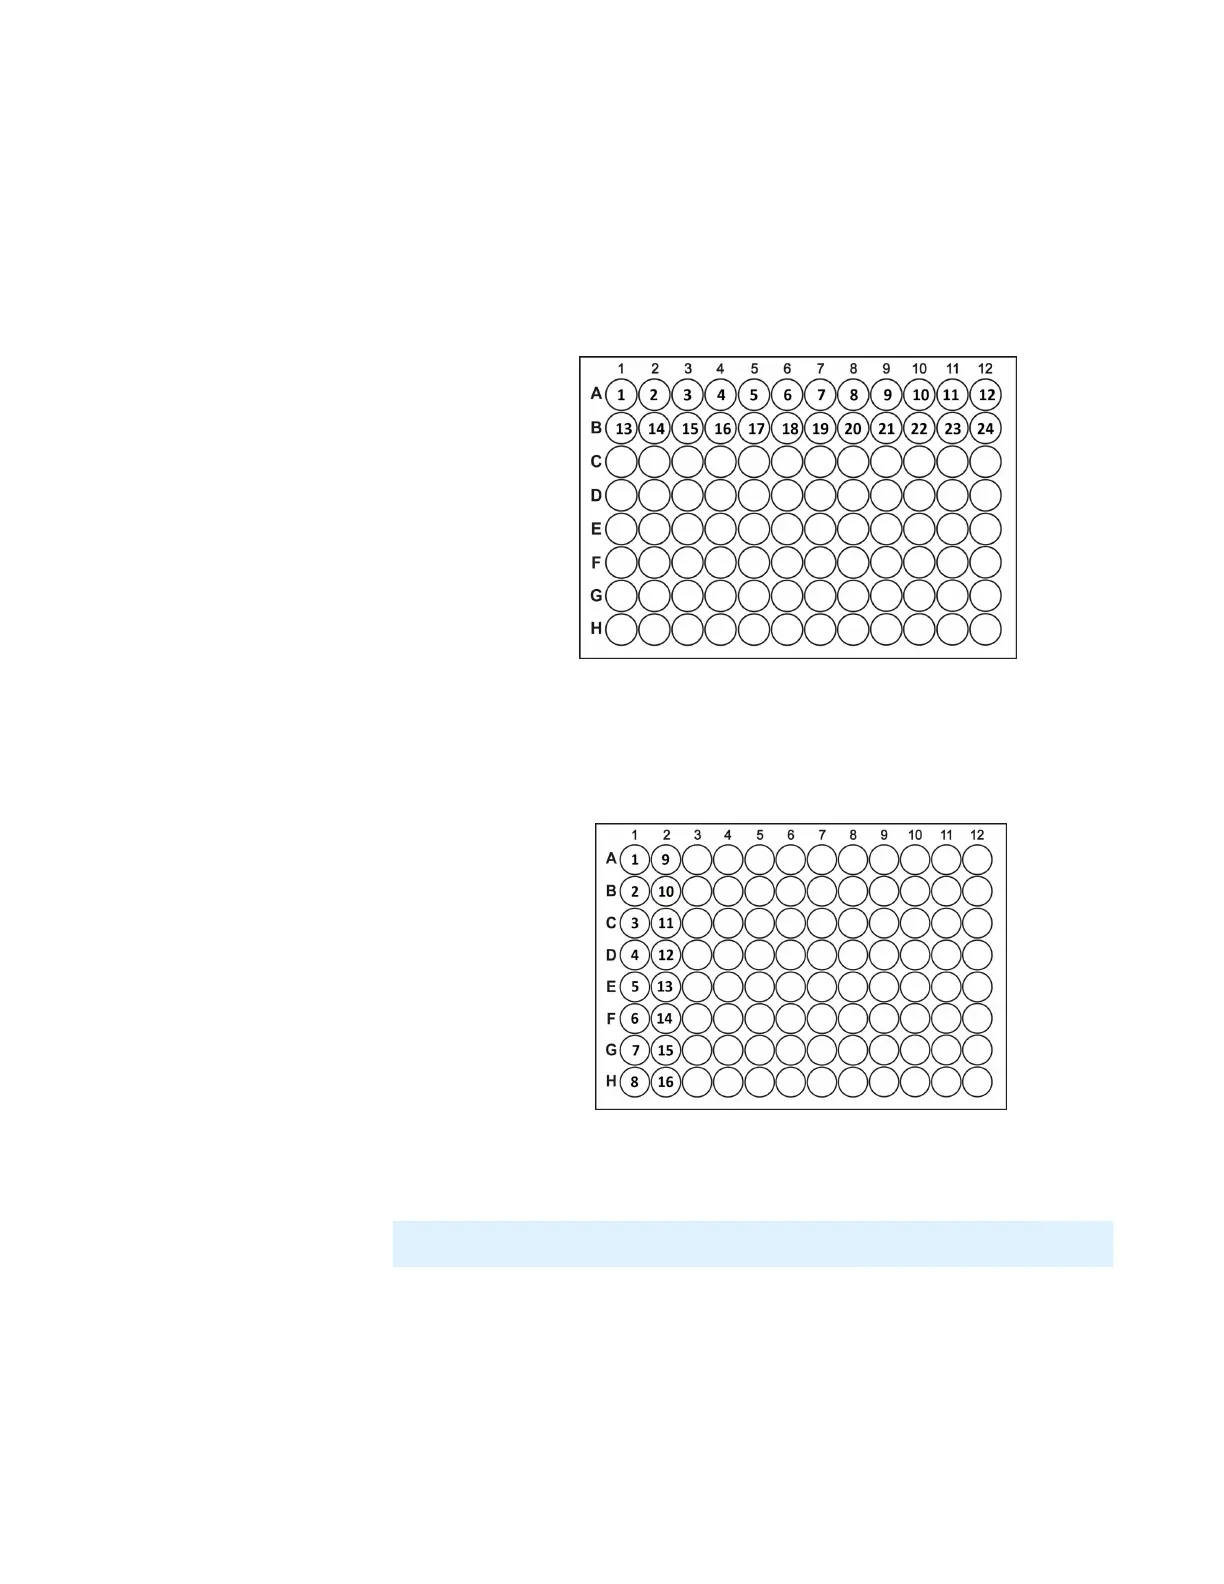
q Well increments by Column: A1, B1, C1 means the wells in your plate
design are numbered top-to-bottom in columns. For example, wells A1
through H1 are numbered 1 to 8 and are represented by the first 8 data
rows of your .CSV file. Wells the next column A2 through H2 are
numbered 9 to 16 well, and so on.
5. Select the concentration data that you want to import in the data columns list. Then,
click Next.
6. Determine the value in the Data Preview:
● Specified Concentration: By default, the Specified Concentration value is taken
from the well with the lowest concentration. You can also set a different target
concentration value by typing the desired value in the box. Any wells with
concentration lower than the Specified Concentration will be excluded from
the normalization process.
Well Number Incrementing by Row
Well Number Incrementing by Column
MANTIS User's Guide | Chapter 9: Dispensing With the MANTIS
Note: If the data column contains error(s), you will not be able to select the column.