3
Depending on the application, hold the welding torch in the dipping bowl for
approximately 1 - 4 seconds so that any air in the torch can escape and the
torch can cool sufficiently
4
Raise the welding torch back to its original position above the dipping bowl
5
Allow the welding torch to drip for approximately 1 - 4 seconds or blow down
it with compressed air using the hosepack before bringing it back to its ori-
ginal position for cleaning
Cleaning the gas
nozzle tip - de-
tailed descrip-
tion
NOTE!
During the cleaning operation, blow out the welding torch with compressed air
through the hosepack - any remaining dirt or parting agent is removed.
NOTE!
Ensure that the gas nozzle does not touch the housing components of the clean-
ing opening at any time.
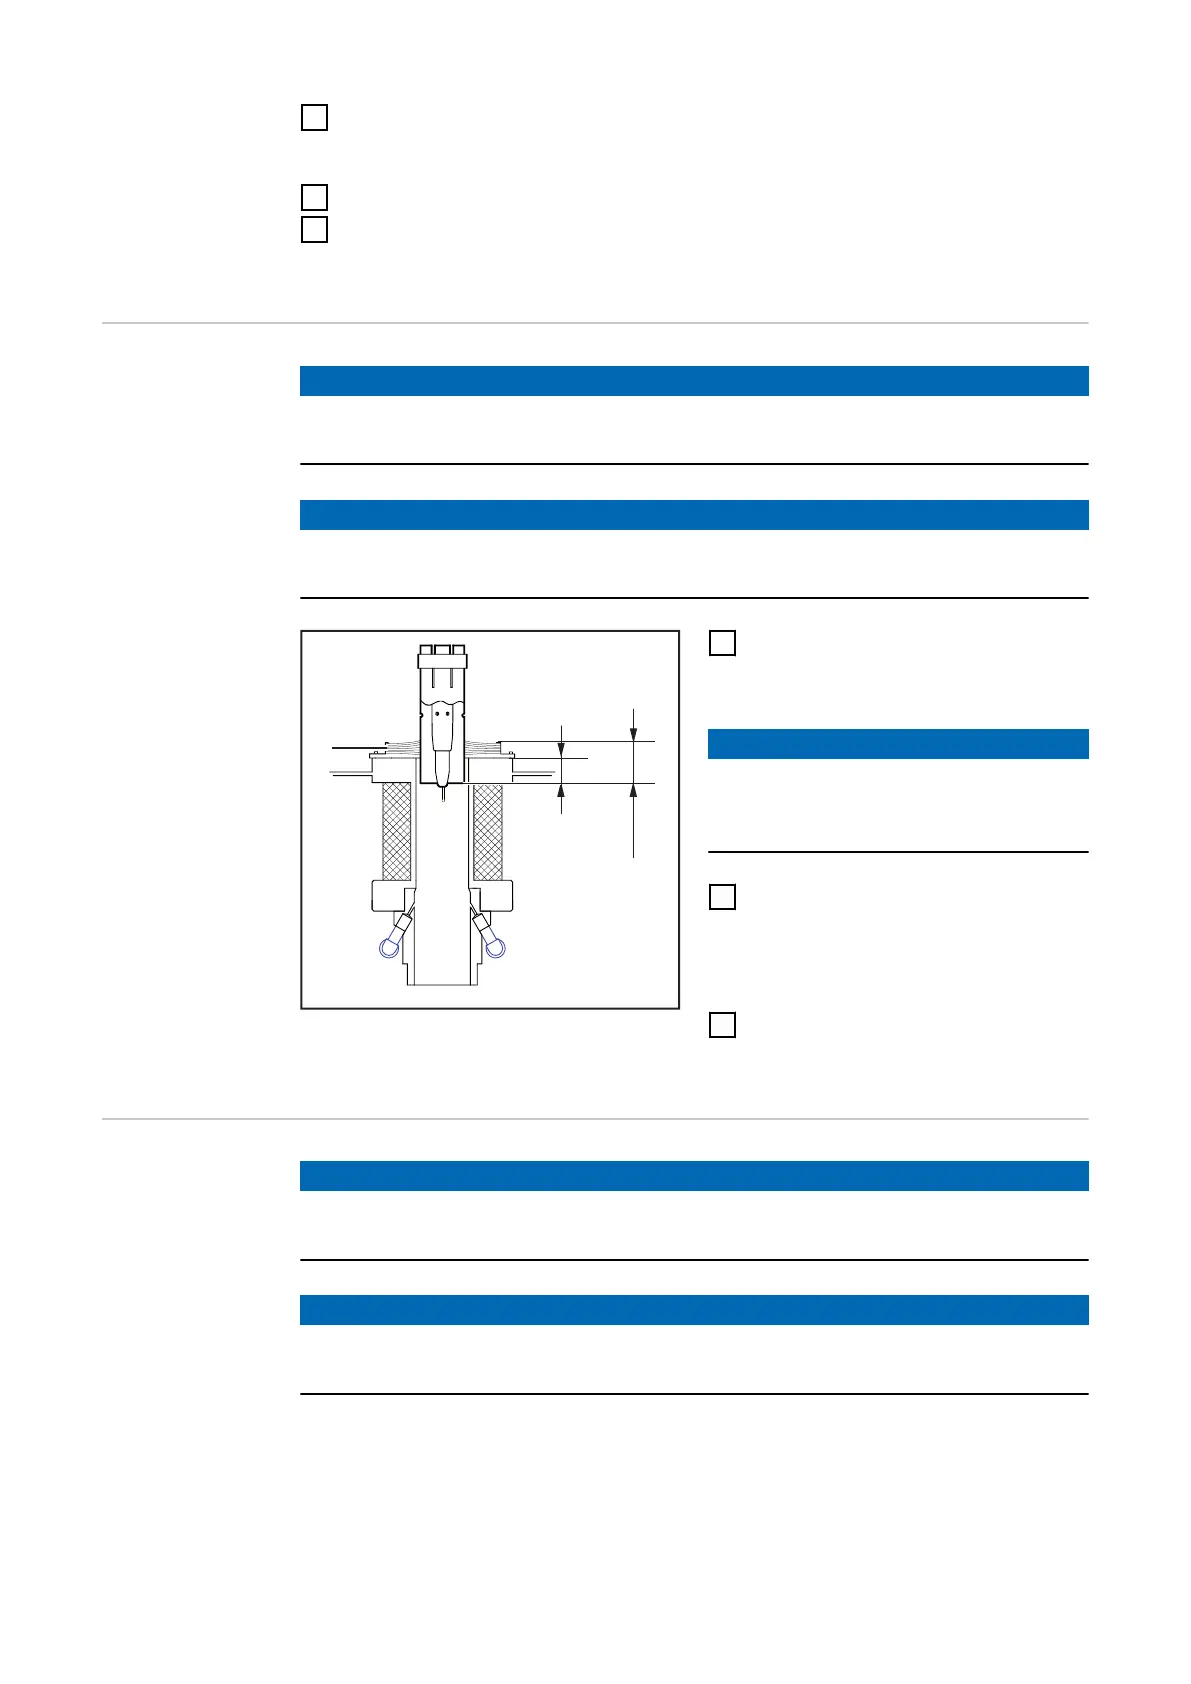
25 mm
(0.98 in.)
15 mm
(0.59 in.)
(1)
1
Position the welding torch approx.
40 mm (1.57 in.) centrally above
the middle of the cleaning opening
NOTE!
If the brush seal (1) is not fitted, note
the changed reference point when po-
sitioning the welding torch.
2
Insert welding torch vertically into
cleaning opening.
-
The optimum immersion depth
for the tip of the gas nozzle is
25 mm (0.98 in.)
3
Begin cleaning and hold the weld-
ing torch in the cleaning position
for approximately 1 second
Cleaning the
nozzle fitting -
detailed descrip-
tion
NOTE!
During the cleaning operation, blow out the welding torch with compressed air
through the hosepack - any remaining dirt or parting agent is removed.
NOTE!
Ensure that the gas nozzle does not touch the housing components of the clean-
ing opening at any time.
66