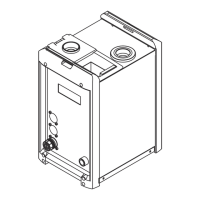
15 mm
(0.59 in.)
25 mm
(0.98 in.)
(1)
1
Position the welding torch approx.
40 mm (1.57 in.) centrally above
the middle of the cleaning opening
NOTE!
If the brush seal (1) is not fitted, note
the changed reference point when po-
sitioning the welding torch.
2
Insert welding torch vertically into
cleaning opening. Immerse the
torch so that the gas nozzle holes
are approx. 25 mm (0.98 in.) inside
the cleaning opening
3
Begin cleaning and hold the welding torch in the cleaning position for approx-
imately 1 second
Spraying parting
agent - detailed
description
Applying parting agent evenly has the following advantages:
-
shorter cleaning time
-
prevents re-soiling
NOTE!
Ensure that the gas nozzle does not touch the housing components of the clean-
ing opening at any time.
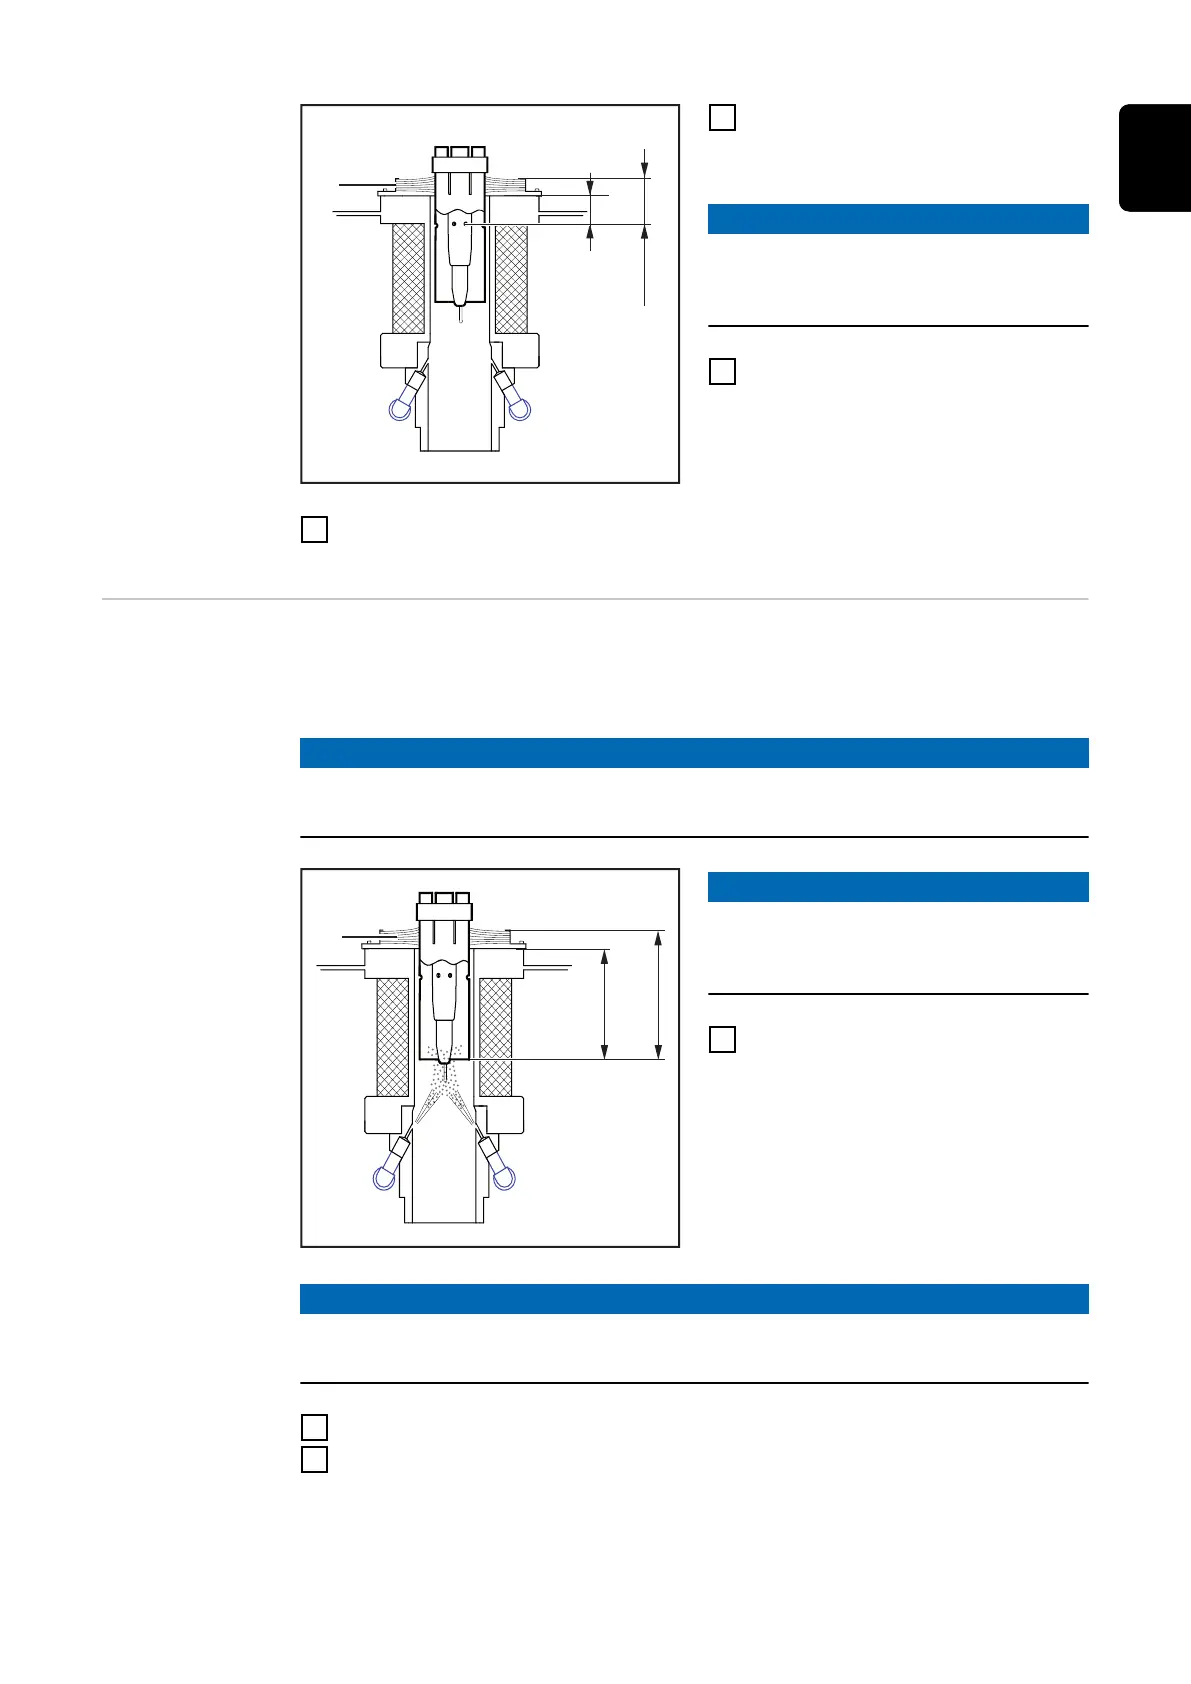
75 mm
(2.95 in.)
65 mm
(2.56 in.)
(1)
NOTE!
If the brush seal (1) is not fitted, note
the changed reference point when po-
sitioning the welding torch.
1
Place the welding torch in the
spray position
-
see figure
NOTE!
During the spraying process, ensure that compressed air is not blown out
through the welding torch.
2
Spray welding torch with parting agent for approximately 0.7 seconds
3
Move the welding torch to the start position above the cleaning opening - ap-
prox. 40 mm (1.57 in.) centrally above the middle of the cleaning opening
-
The cleaning operation is complete and the welding torch is ready for use
again
67
EN