50
2.13 How to use the Scanner Driver
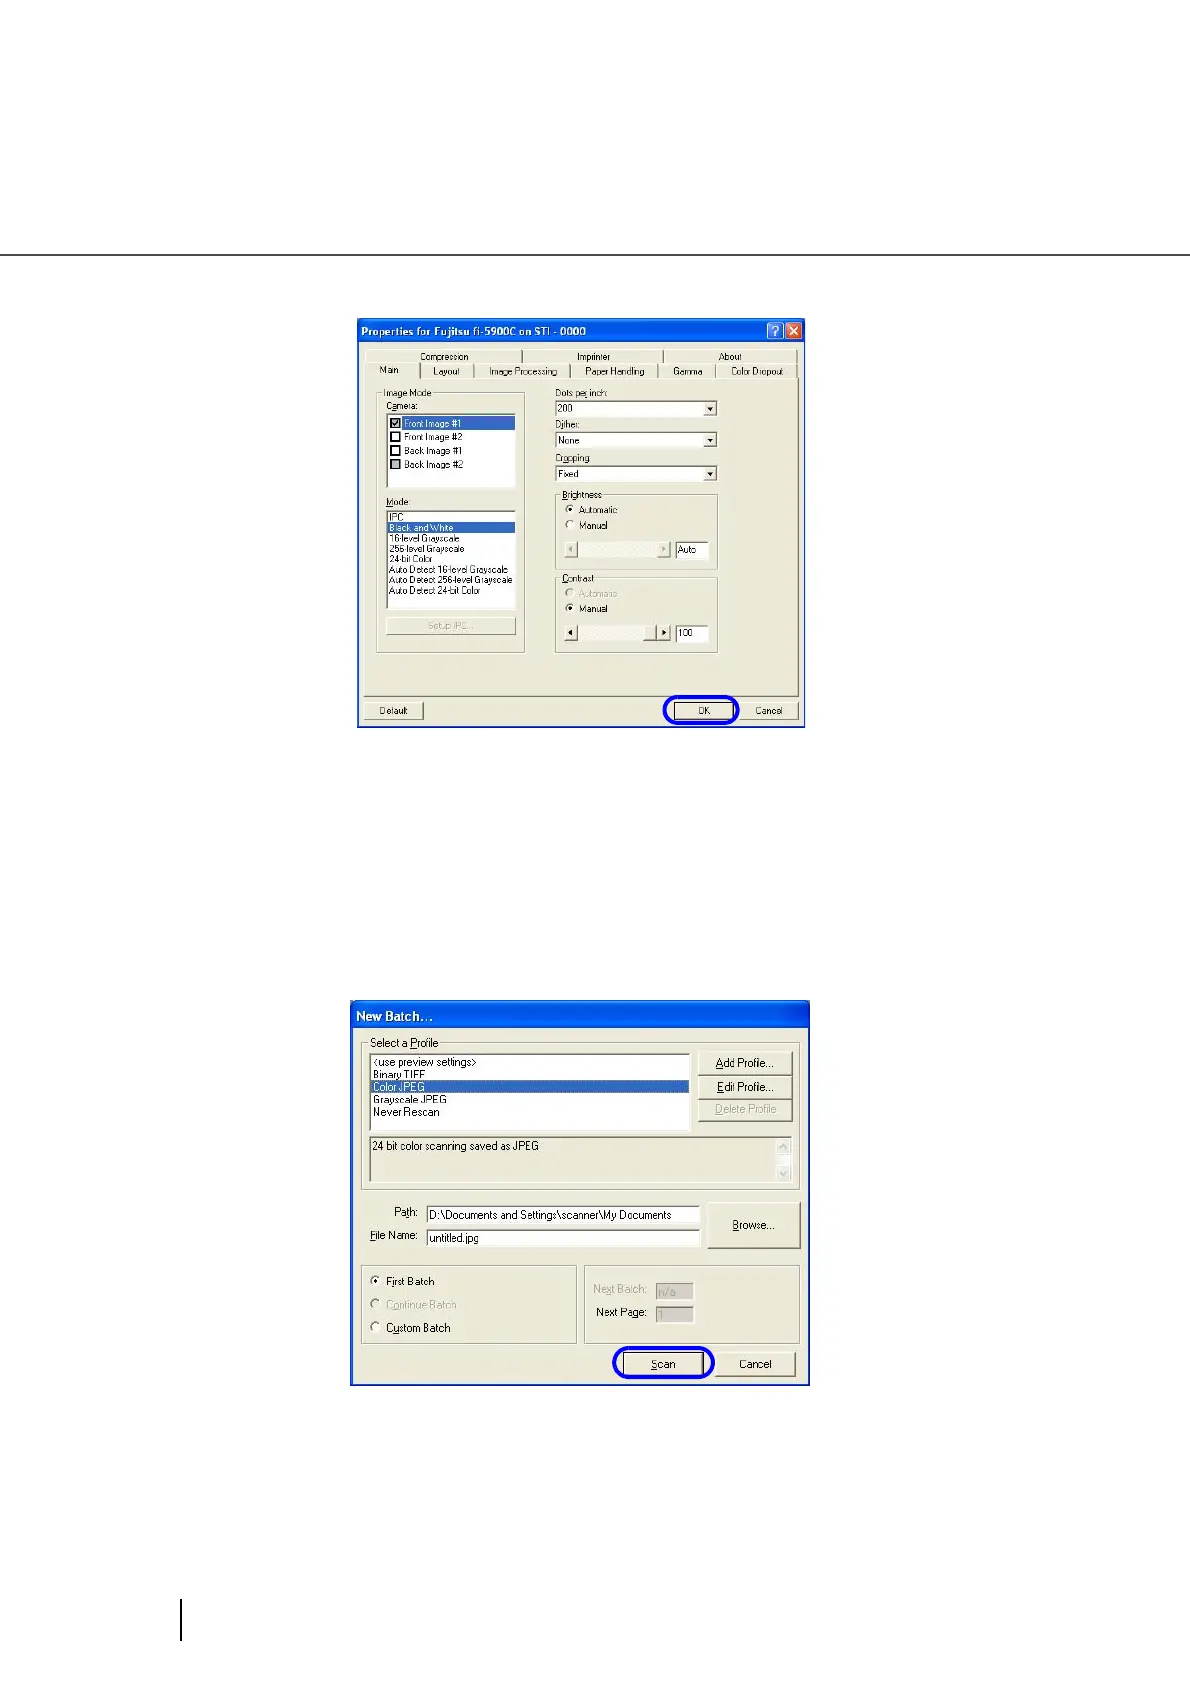
7. Configure settings for scanning and click the [OK] button.
For details on this dialog box, refer to "Configuration Window of FUJITSU ISIS Scanner
Driver" on page 51.
8. On the [Profile Editor] window, click the [OK] button to return to [New
batch...] dialog.
9. Load the documents on the hopper.
10. Click the [Scan] button to start scanning.
⇒ Scanned images are displayed on the window.
Refer to the “QuickScan Overview” or the “QuickScan Help” for further information on
functions and operations of QuickScan. After the installation of QuickScan, it is registered in
the [Start] menu.