5. OPERATION
5-16
3. Use the Cursorpad ( or ) to select [Rings Brill] and press the ENTER
key.
4. Use the Cursorpad ( or ) to select an option and press the ENTER
key. [4] is the brightest. [Off] turns off the range rings.
5. Press the MENU/ESC key to close the menu.
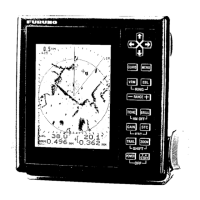
5.15.2 How to measure the range with a VRM
There are two VRMs, No. 1 and No. 2. The VRMs are dashed rings so that you can
identify the rings from the fixed range rings. You can identify VRM 1 from VRM 2 by
different lengths of dashes. The dashes of the No. 1 VRM are shorter than those of
the No. 2 VRM.
1. Press the MODE key to show the [Mode] window.
2. Use the Cursorpad to select [VRM] then press the
ENTER key.
3. Select [VRM 1] or [VRM 2] as required, then press
the ENTER key. The VRM indication appears at the
bottom right corner, inside a rectangle.
4. Use the Cursorpad to align the VRM with the inner
edge of the target. Read the distance at the lower-
right corner of the screen. The size of the VRM ring
changes in proportion to the selected range scale.
5. To anchor the VRM, press the ENTER key. To re-
activate the VRM, select it from the [Mode] window.
6. To erase a VRM, press the MODE key to open the [Mode] window, select [VRM],
then select the VRM to erase. Press the MENU/ESC key to erase the VRM and
its indication. (If a VRM’s indication is already in a rectangle, simply press the
MENU/ESC key to erase the VRM and its indication.)
How to measure the range with the VRM
VRM 1
Cursor range and bearing
VRM 2
Target
+
VRM
5.044NM
2.082NM
Cursor (+)
VRM 1 range
VRM 2 range
+
The currently active VRM
is in a rectangle.
37.4
° R
5.044
NM
VECT
TRUE
05:00