94
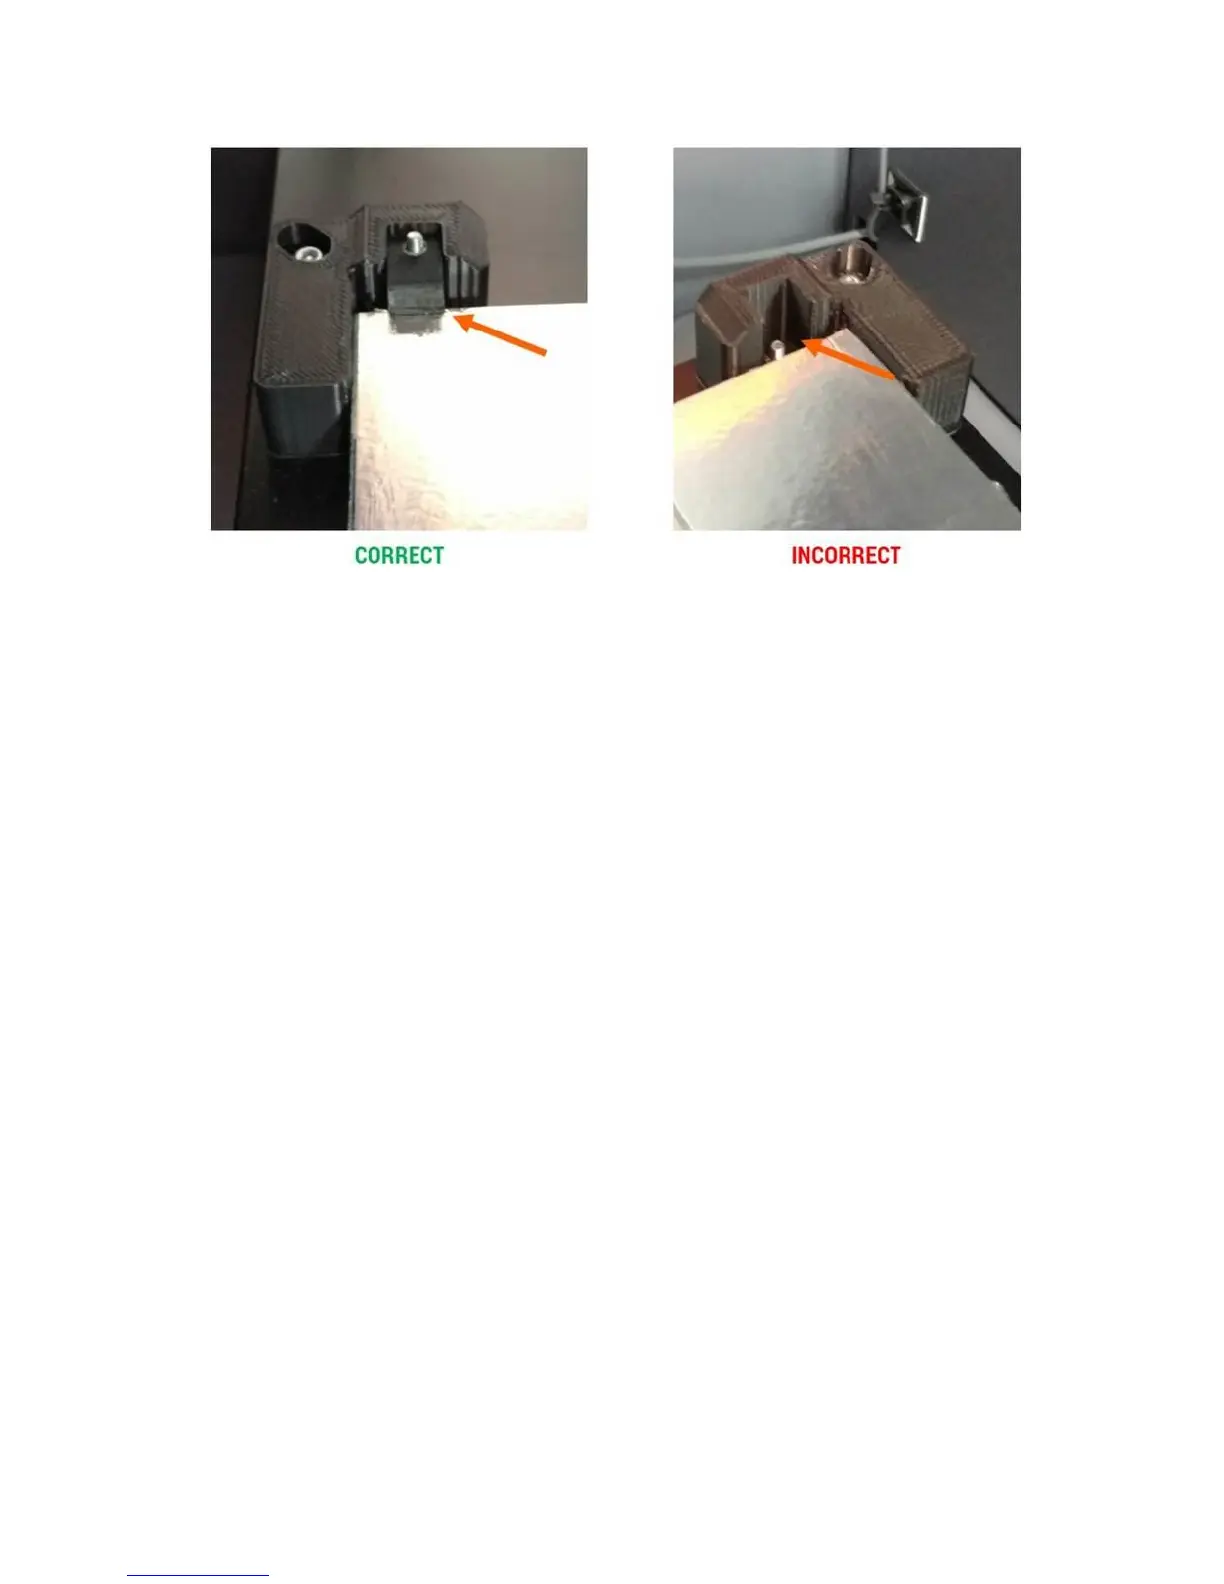
NOTE: The glass is not square, so it matters which way you install it.
NOTE: There will be some variation in the size of the glass. If you find your new piece won’t fit in
between the corner clips, simply loosen the M3 screw holding the “L” shaped clip in place, and slide it to
adjust the fit. These clips are adjustable for this reason.
Re-install the “L” clips. Adjust them so the bed can slide freely up and down, but has little to no wiggle
side-to-side.
While this procedure usually results in the new bed being level, we recommend you run the manual bed
leveling sequence (section 10.4).
12.10 Removing & Installing a Print Head
IF YOUR PRINT HEAD IS JAMMED, please see section 13.3.
Setup:
If possible unload the filament from the printer. If you are attempting to recover from a jam, you
won’t be able to unload the filament; that’s ok.
Print head should be COLD
Printer should be POWERED OFF
12.10.1 Removal
Use the 2.5mm hex wrench to remove the 2 M3 screws shown below.