144
ڀ ŪŲŃƗƒŃŷŤťůŨŃŲũŃŦŲűŷŨűŷŶ
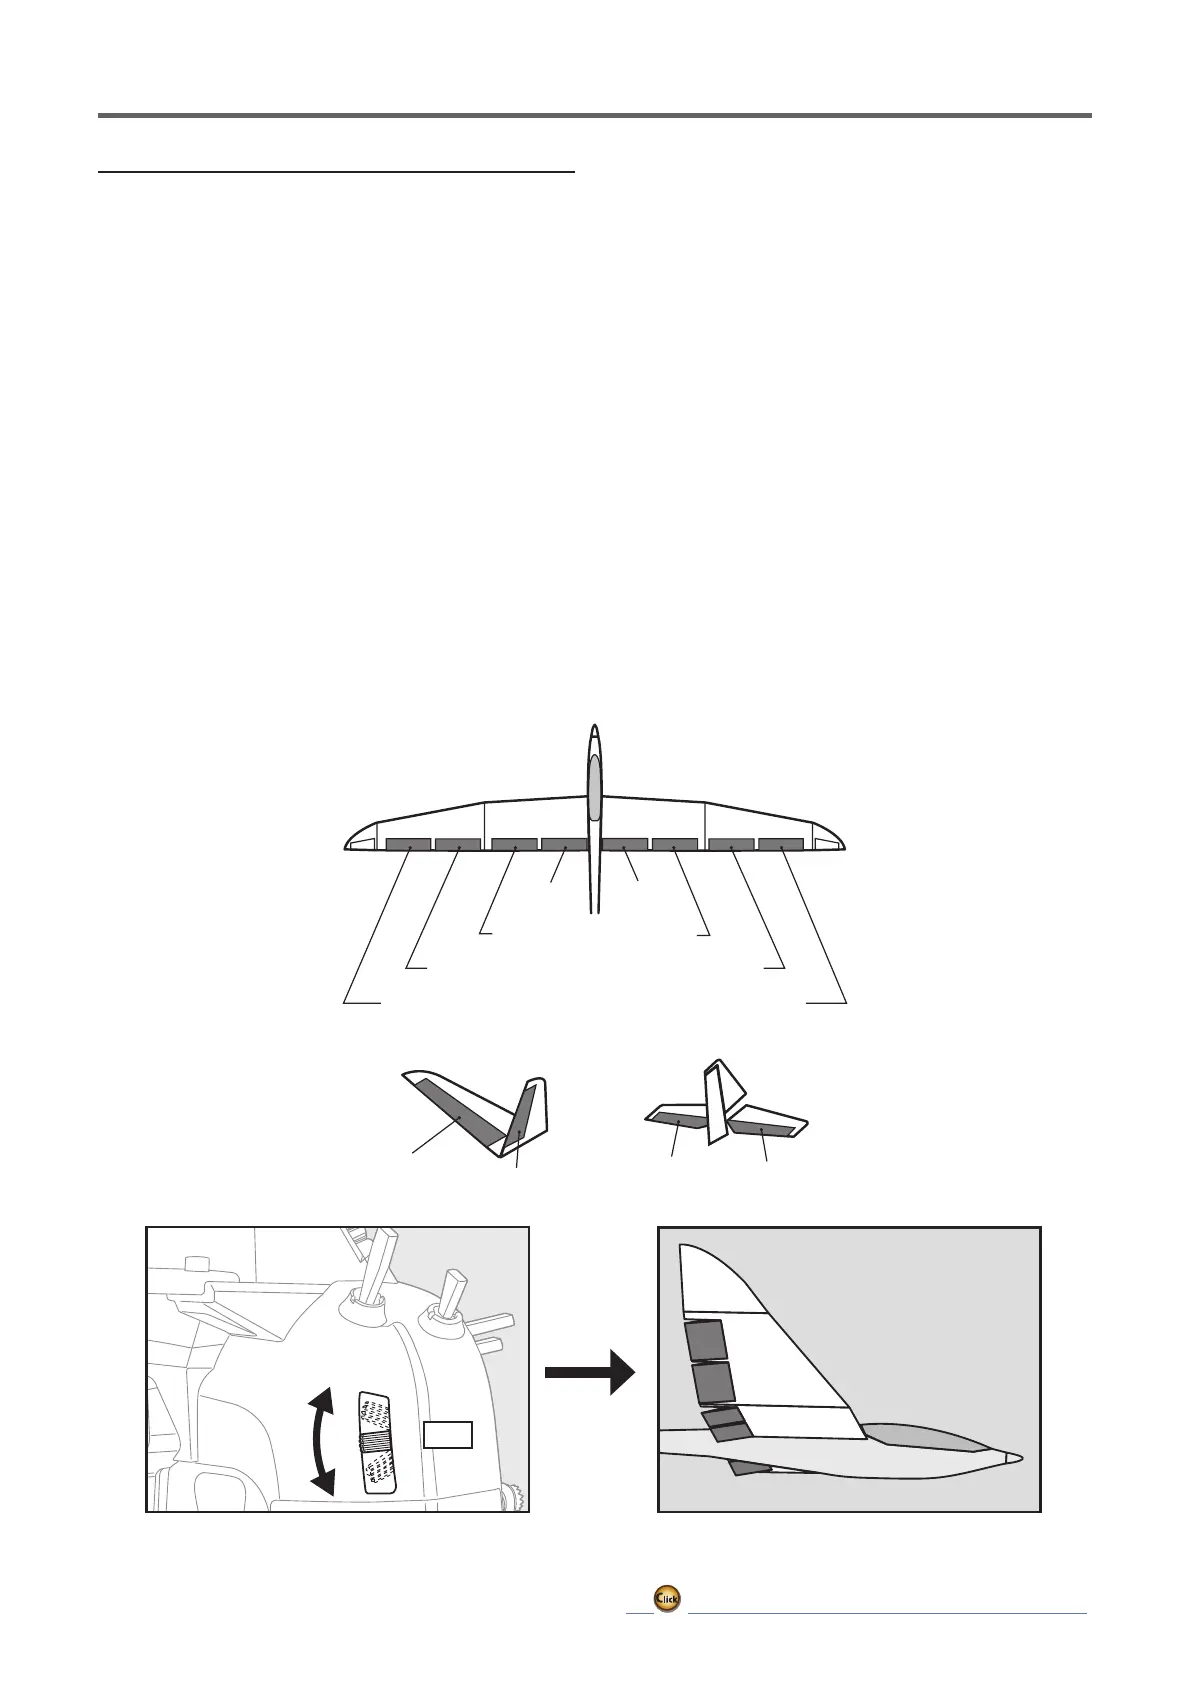
AIL3
(ChipAileron)
AIL4
(ChipAileron)
AIL1
(MainAileron)
AIL2
(MainAileron)
FLP2
(CamberFlap)
FLP1
(CamberFlap)
ELEVATOR
ELEVATOR2
V-TAIL
ELEVATOR
ELEVATOR2
AILVATOR
FLP3
(BrakeFlap)
FLP4
(BrakeFlap)
ŶƈƗƗƌƑƊŃƐƈƗƋƒƇ
ŏ7DS>,1+@
(ON is displayed.)
ŏ:KHQVHWWLQJDVZLWFKWDSWRWKH>@LWHP
of the switch and tap the screen to call the
selection screen, and then select the switch
and set its ON direction. (Always ON at "--"
setting)
(For a description of the switch selection
method, see the description at the back of
this manual.)
ŏ:KHQVHWWLQJDFRQGLWLRQGHOD\WDSWRWKH
[Condition delay] item.
Set the delay.
When setting a cut switch, tap [Cut-switch]
and tap the screen to call the selection
screen, and then select the switch and set its
ON direction. (Always ON at [--] setting)
(For a description of the condition delay
function, see the description at the back of
this manual.)
(Curve/rate setup screen)
ŏ7KHFXUYHDQGUDWHDUHDGMXVWHGE\FDOOLQJ
the aileron, flap, and elevator curve/rate
screens.
The rate and curve of each servo can be set
by calling each screen. (For a description of
the curve setting method, see the description
at the back of this manual.)
The servo speed can also be adjusted.
LS

 Loading...