G1000 / GFC 700 System Maintenance Manual - 300/B300 Series King Air Page 7-27
190-00716-01 Revision 4
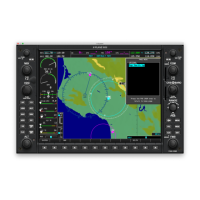
7.10 GCU 477 FMS Controller
Original GCU 477 Reinstalled
No software or configuration loading is required if the removed GCU 477 is re-installed. This does not
include units that were returned for repair as their software and configuration files are deleted during the
repair testing process. Continue to the GCU 477 Test (Section 7.10.1).
New, Repaired or Exchange GCU 477 Installed
If a new, repaired or exchange GCU 477 is installed, the correct software and configuration files must be
loaded to the unit. See Section 3.9 and then continue to the GCU 477 Test (Section 7.10.1).
7.10.1 GCU 477 Test
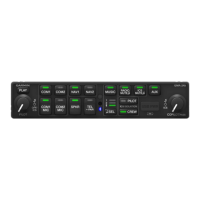
Perform the following key and knob presses and knob rotations on the GCU 477, and verify the actions
on the MFD.
1. Rotate the large FMS knob and verify that the page groups change.
2. Rotate the small FMS knob and verify that the pages change within the page groups.
3. Use the large FMS knob to display the MAP page group and the small FMS knob to display the
NAVIGATION MAP page.
4. Rotate the RANGE knob to the right and verify the map display zooms out.
5. Rotate the RANGE knob to the left and verify the map display zooms in.
6. Press the RANGE knob to get the pointer on the map display.
7. Move the RANGE knob to the left and verify the pointer moves to the left.
8. Move the pointer up, right and down and verify that the pointer moves accordingly.
9. Press the RANGE knob to stop displaying the pointer.
10. Press the left and right arrowheads of the SOFTKEY SELECT keys. Verify softkeys highlighting
on the MFD changes.
11. Press the SEL key to select one of the softkeys.
12. Press the key to display the DIRECT TO page.
13. Use the keypad to type KIXD and verify KIXD is displayed on the MFD.
14. Press the SPC key to add a space and then the BACK key to delete the space.
15. Press the CLR key to clear the field.
16. Type K34 and then press the ENTER key twice. Verify that the flight path to K34 is displayed on
the map.
17. Press the FPL key to open the ACTIVE FLIGHT PLAN page. Press the FPL key again to close it.
18. Press the PROC key to open the PROCEDURES page. Press the PROC key again to close it.
19. Press the MENU key to open the MENU page. Press the MENU key again to close it.
20. Press the COMM keyuntil 1 is lit. Verify the tuning box is present around the COMM 1 frequency
on PFD1.
21. Using GCU477 keypad, enter in a frequency of 123.450. Verify COMM1 frequency changes as
entered.
22. Press the COMM keyuntil 2 is lit. Verify the tuning box is present around the COMM 2 frequency
on PFD1.
23. Using GCU477 keypad, enter in a frequency of 123.450. Verify COMM2 frequency changes as
entered.
24. Press the NAV key until 1 is lit. Verify the tuning box is present around the NAV 1 frequency on
PFD1.
25. Using GCU477 keypad, enter in a frequency of 108.00. Verify NAV1 frequency changes as
entered.
 Loading...


