54 ADV200 SP • Quick start up guide - Specification and installation
At the end of the procedure, proceed to Step 3A (motor free to rotate and uncoupled from transmission) or to
Step 3B (motor coupled to transmission).
Step 3 - Autotune of the motor
The drive carries out the motor autotune procedure (real measurement of motor parameters).
Autotune may last a few minutes.
Note ! If this operation generates an error message (example Error code 1), check the connections of the power and control
circuits (see Step 1 - Connections), check motor data settings (see Step 2 – Motor data setting) and then repeat the
Autotune procedure (or, alternatively, select a different type of procedure (Rotation or Still)
3B):
Step 3A - Self-tuning with rotating motor (Autotune rotation)
Use this procedure when the motor is not coupled or the transmission does not represent more than 5% of the
Note ! Autotuning can be cancelled at any time by pressing
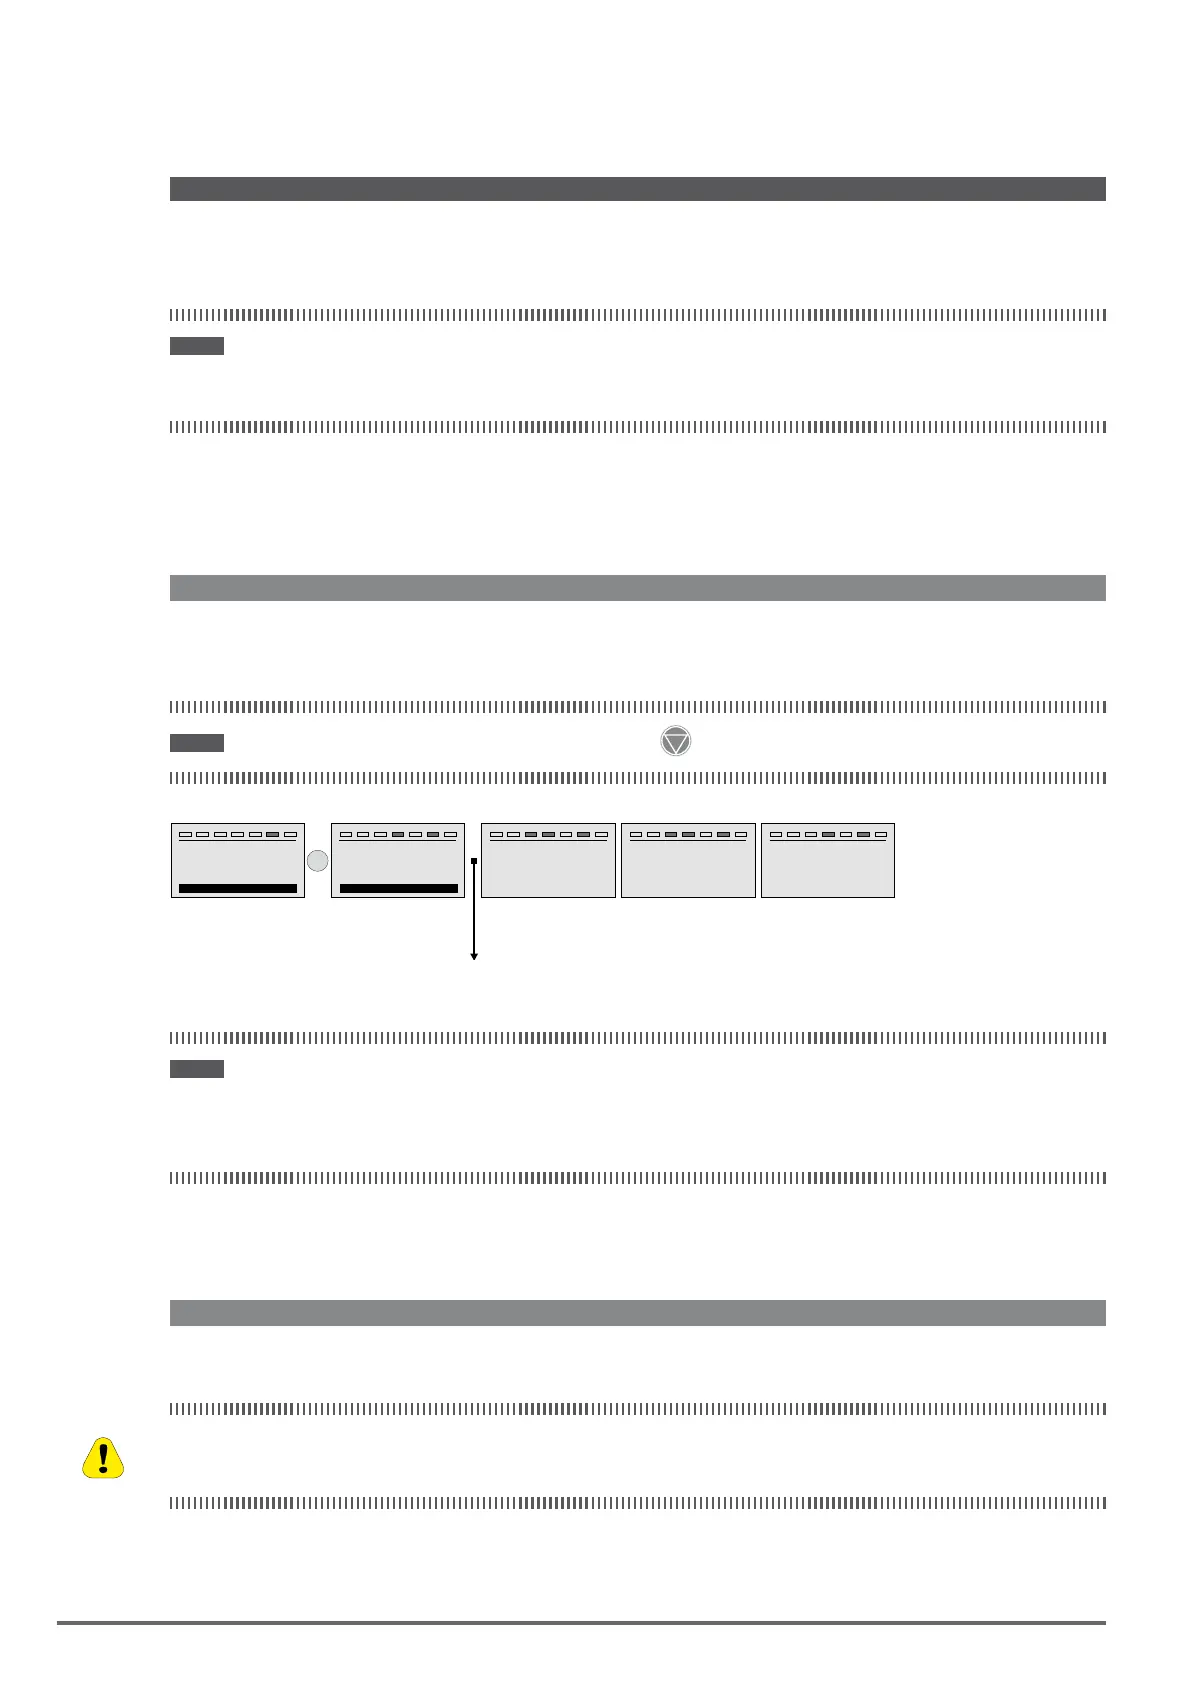
T+ T- EN LO C ILim n:0 AL
STARTUP WIZARD
Run autotune rot ?
E=Yes Down=Next
E
T+ T- EN LO C ILim n:0 AL
STARTUP WIZARD
Close Enable input
Esc=Abort
T+ T- EN LO C ILim n:0 AL
Autotune rotation
SEQ.01
PA R: 2022
PressEto execute
T+ T- EN LO C ILim n:0 AL
Autotune
Press Esc to abort
Progress 5%
T+ T- EN LO C ILim n:0 AL
STARTUPWIZARD
Open Enable input
).
To interrupt this operation, press the ESC key.
Note ! At the end of the self-tuning procedure there is a request to open the Enable contact (terminals 7 – S3); the Take tune
parameters command (menu 16 MOTOR DATA, PAR: 2078) is automatically executed.
The calculated parameters are saved in a RAM memory to enable the drive to perform the necessary calculations.
These data are lost if the device is switched off. To save the motor data follow the procedure described in Step 6.
Step 3B - Self-tuning with motor at stand-still or coupled to the load (Autotune still)
Use this procedure when the motor is coupled to the transmission and cannot rotate freely.
May cause limited rotation of the shaft.
Peut entraîner une rotation de l’arbre limitée.
 Loading...