Program Examples
Publication 21555, Rev. E, September 2002 A-49
A.11.2 Sensor Model Identification
A simple method of separating the manufacturer sub-string from the three following numeric items
requires reading the manufacturer alphabetical letters into a string variable of limited size. Use a DIM or
a REDIM statement to limit size to 12 characters. Thus Model and Software Version can easily be read
into numeric variables. No is always 0; it is placed in the *IDN? command output as called for by the
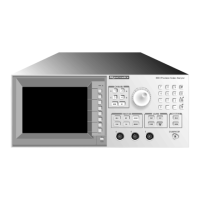
IEEE 488.2 Standard. The 58542 can not report it’s serial number - which is printed on a label
positioned on the side of the instrument - over the bus. If preferred, there is space on the 58542’s front
panel for the serial number label. The factory will place it there upon request.
The following example reads the model number and serial number of the power sensor currently in use.
What does currently in use mean? It means that this was the last sensor connected to this meter input. It
does not mean that the sensor is currently attached or that the sensor is calibrated. For in-program
checking for sensor attachment or completed power sweep calibration, see the Error Control Examples
in SectionA.3.3 or the Reading Power Measurements in Section A.4. By operating in this manner, if
preferred use a simple WHILE/UNTIL loop in the program to detect when the operator connects the
correct power sensor.
Tracking the model number allows the user to be sure that a sensor is being used which is appropriate for
measurement application. For example, some user measurement routines may require the use of Peak
Power Sensors rather than CW Power Sensor or use of high power sensors rather than standard sensors.
The user’s program can automatically check for the appropriate sensor and prompt to
Please connect
Giga-tronics Sensor model #####, if necessary.
240 !
250 GOSUB Pwr_amp_test
260 !
270 GOSUB Store_results
280 !
290 END LOOP ! Return to beginning of main program.
300 !
310 Pwr_amp_test: ! Output is 30 to 40 Watts, TOO HIGH for Standard Sensors
320 !
330 Reqd_snsr1_mdl=80355 ! Actual 50W Peak Power Sensor model is 80355A.
340 ! The A is ignored in Gigatronics software to simplify programs like
! this one.
350 Reqd_snsr2_mdl=80350 ! Standard 80350A Peak Power Sensor on input
360 !
370 !
380
!##############################################
390 !
400 ! Read and compare sensors for correct model number
410 !
420 OUTPUT @Pwr_mtr;SENS1:CORR:EEPROM:TYPE?
! responds with model and serial numbers
430 ENTER @Pwr_mtr;New_snsr1_model,New_snsr1_serno
440 OUTPUT @Pwr_mtr;SENS1:CORR:EEPROM:TYPE?
! responds with model and serial numbers
450 ENTER @Pwr_mtr;New_snsr1_model,New_snsr1_serno
460 !
470 IF Reqd_snsr1_mdl=New_snsr1_model THEN
480 ELSE
490 PRINT The amplifier’s high power output must be attenuated for this test.,
500 PRINT Connect a Gigatronics model;Reqd_snsr1_mdl;to the channel 1 power sensor cable.,
510 INPUT Then press ENTER,Dmy
520 PRINT""
530 GOSUB Pwr_swp_call
540 END IF
550 !
560 IF Reqd_snsr2_mdl=New_snsr2_model THEN
570 ELSE