132 Detail program description - Channel 1 curve | Helicopters
the range -125 % to +125 %, and without infl uencing
the neighboring reference points.
Example:
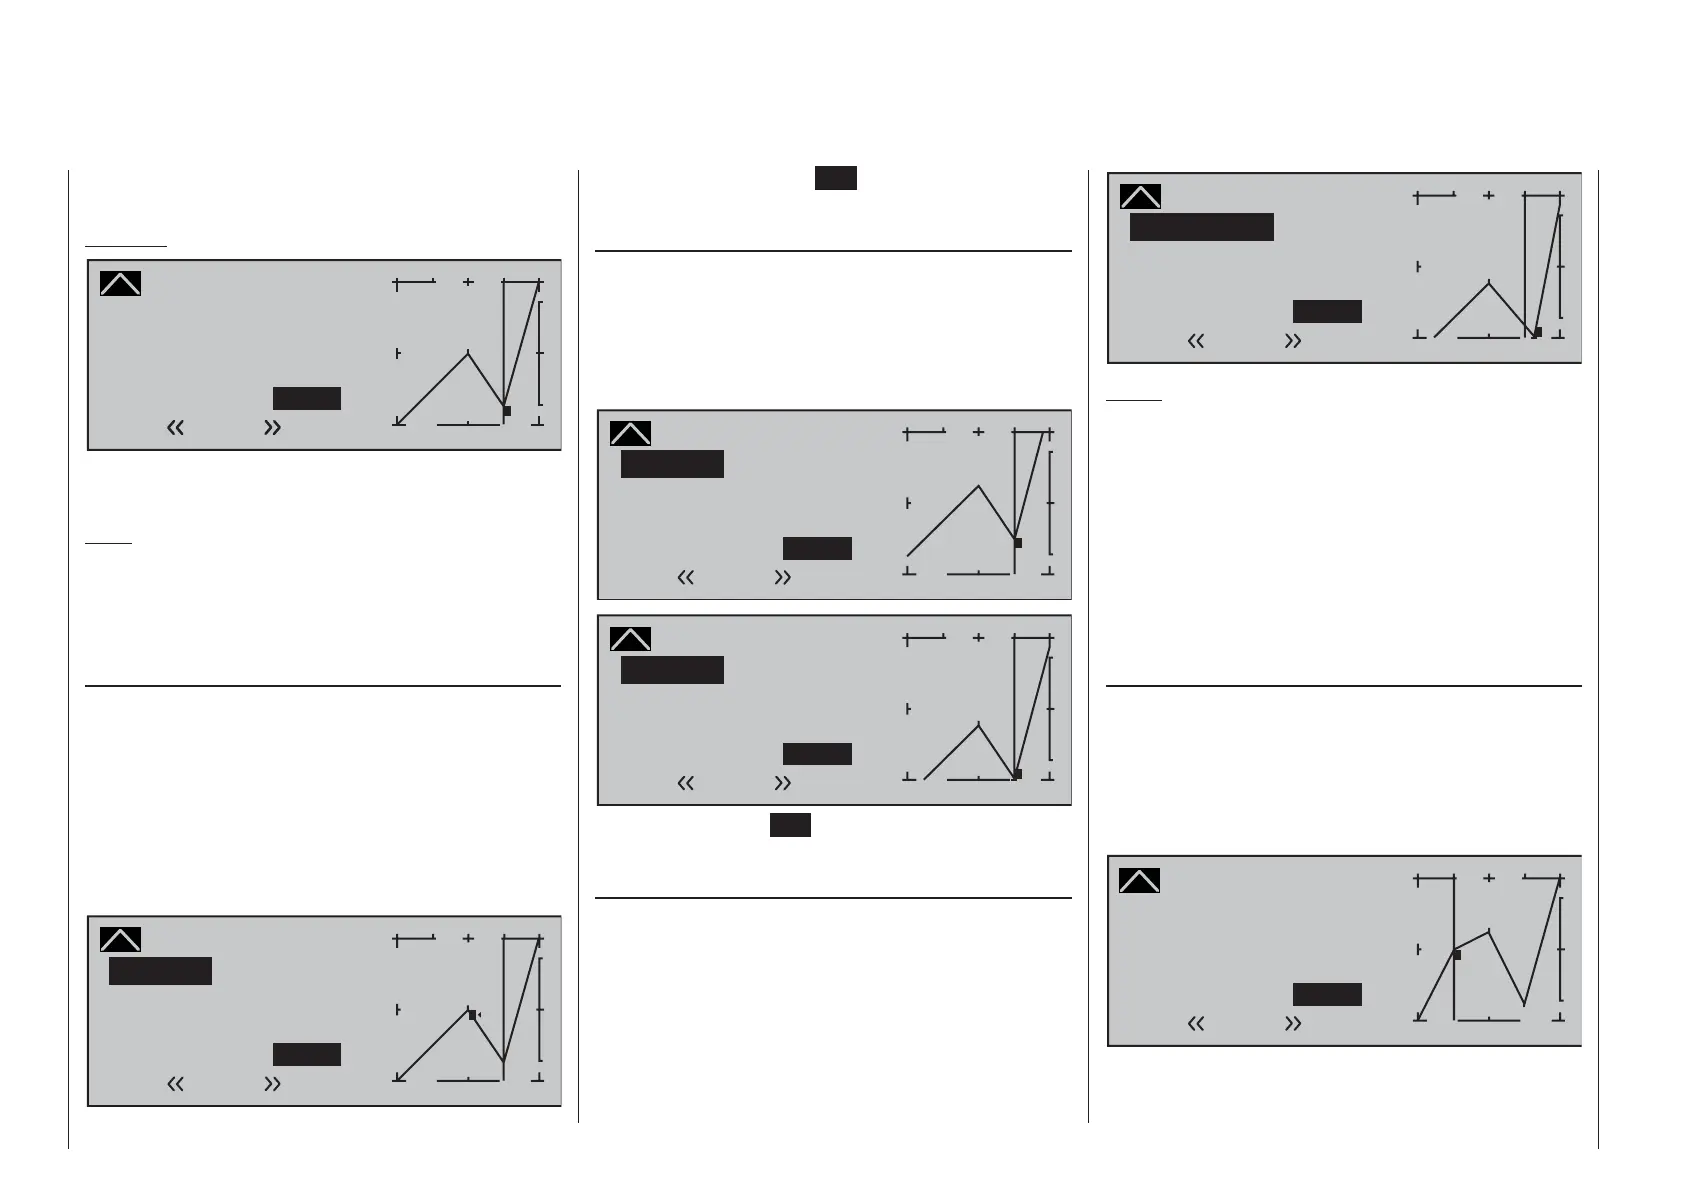
Channel 1 C U R V E
Curve
off Point
Output
Input +50%
–75%
2
+
–
100
¼ O U T P U T
1
–75%
Normal
2
In this sample screen image, reference point "2" has
been set to -75 %.
Note:
If the joystick does not coincide with the exact
reference point, please note that the percentage
value on the "Output" line always relates to the
current joystick position.
Trim point function
Alternatively, jumping through set reference points can
be done with the ef selection keys of the left touch
pad in either ascending or descending order, whereby
the number of the jump's destination reference point
in the graph will be marked with the point's number,
1 … max. 6, in inverse video. The selection keys on
the right touch pad can then be used to change the
reference point jumped to as described above, entirely
independently of the control position.
Channel 1 C U R V E
Curve
off Point
Output
Input +50%
–75%
1
+
–
100
¼ O U T P U T
0%
2
Normal
Trim point
1
One touch on the center ESC key of the left touch
pad terminates this trim point function.
Trim offset function
When a value fi eld is active, i.e. in inverse video, it is
not only possible, as previously described, to jump to
and change a reference point already set with the ef
selection keys of the left touch pad but also an existing
curve can be vertically repositioned with the cd keys
of the left touch pad within a range of ±25%.
Channel 1 C U R V E
Curve
off Point
Output
Input +50%
–50%
2
+
–
100
¼ O U T P U T
–50%
1
Normal
Trim offset
2
Channel 1 C U R V E
Curve
off Point
Output
Input +50%
–100%
2
+
–
100
¼ O U T P U T
–100%
1
Normal
Trim offset
2
A tap on the center ESC key of the left touch pad will
also terminate this function.
Trim x-axis function
This function is activated by tapping the left (e) or
right (f) selection key of the right touch pad with
an active (i.e. inverse video) value fi eld. You can
then use the selection keys on the right touch pad to
reposition the active point horizontally or vertically as
you wish.
Channel 1 C U R V E
Curve
off Point
Output
Input +50%
–83%
2
+
–
100
¼ O U T P U T
–100%
1
Normal
Trim X-axis
2
Notes:
If the point is repositioned horizontally further •
away from the current control position than
approx. ±25 %, a "?" sign will reappear in the line
Point. This question mark does not refer to the
repositioned point, however: instead, it signifi es
that a further point can be set at the current
control position.
Please note that the percentage value on the •
"Output" line always relates to the current joystick
position and not to the position of the point.
Smoothing the Channel 1 curve
In the example below, sample reference points have
been set:
reference point 1 to 0 %,
reference point 2 to +25 % and
reference point 3 to -75 %
as described in the last section.
Channel 1 C U R V E
Curve
off Point
Output
Input –50%
0%
1
+
–
100
¼ O U T P U T
0%
2
3
Normal
1
This "jagged" curve profi le can be smoothed
automatically simply by pressing a button.

 Loading...


