284
Programming examples - Timer confi rmation with control or switch
SEL
0%
0%
0%
C1
C2
C3
–––
C4
CONTROL SWITCH
Cnt. 1
free
–85%
STO
–––
–––
–––
SEL
C1
C2
C3
C4
free
free
In order to assign the control switch you just crated to
the desired timer, switch to the menu …
»Timers (in general)« (page 152 … 154)
… and select the line "Top" with the selection keys.
This is the standard line assigned to the stopwatch.
In this line, move the marker frame over the "Timer"
column to the right, to the column above the switch
symbol, using the appropriate selection key of the left
or right touch pad. Now tap twice on the center
SET
key of the right touch pad: The fi rst tap will activate
the switch assignment, the second tap will call up the
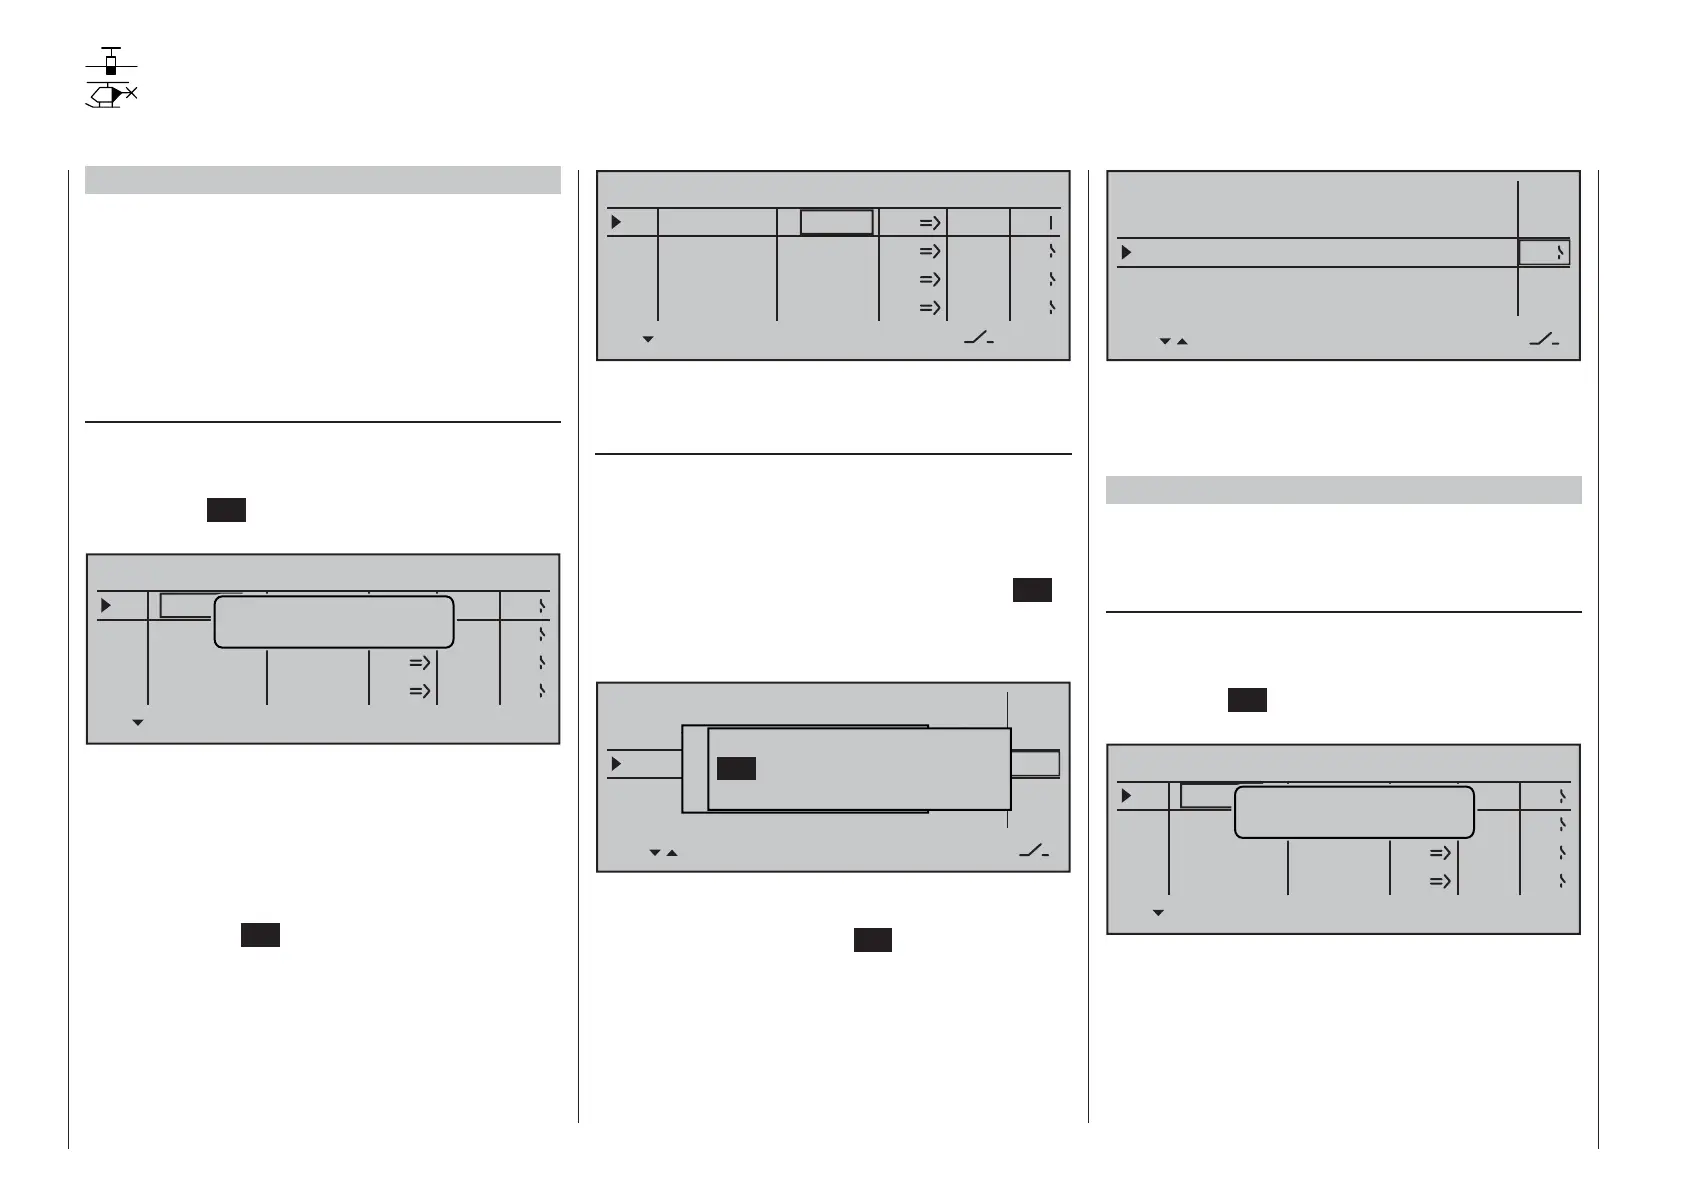
list of "expanded switches":
Model time
Batt. time
Timer
–––12:34h
1:23h
0:00
0:00
0s
0s
–––
–––
Alarm
Timer
Top :Stoppuhr
Centr.Mitte :Flugzeit
Movwünschten Schalter
to die EIN Position
(erw. Schalter: SET)
Control/Logic/fix switch
C2 C4 C5 C6
C7
C8
FX FXi L1 L2
C3C1
Now select the previously programmed control
switch, C1 in the example, and assign it to the timer
with a brief tap on the center
SET key of the right
touch pad:
Modeltime
Batt. time
Timer
–––12:34h
1:23h
0:00
0:00
0s
0s
–––
Alarm
Timer
Top : Stop watch
Centr: Flight tim
C1
The timer in the base screen now starts with
movement of the C1 joystick toward full throttle
and stops if you pull the C1 joystick back over the
switching point.
Example 1 of the preceding pages
If you have decided to continue with the model
programming described on the previous pages in
Example 1 on page 276, fi rst switch to the menu …
»Control switch« (page 135)
… and select the line of a control switch which has
not been assigned yet with the selection keys. After
activation of the control assignment with a brief tap
on the center
SET key of the right touch pad, the
following window will appear:
SEL
0%
0%
0%
C1
C2
C3
–––
C4
CONTROL SWITCH
Geb. 1
0%
STO
–––
–––
–––
SEL
C1
C2
C3
C4
frei
free
free
frei
Move desired
control adj.
Now simply move the respective proportional control,
e.g. the left side proportional rotary control from
its motor "OFF" position toward the motor "ON"
direction.
Thereafter, change to the column above STO by
using the appropriate selection key, move the
selected control near its motor "OFF" position then
Examples 4 and 5 of the preceding pages
If model programming is to be continued for
Example 4, page 279 or Example 5, page 282
as described on previous pages or, completely
independent of this example programming, the
C1 joystick (throttle/brake joystick) is to be used for
power regulation, then a control switch can be used
to automatically start and stop the stopwatch. For this
purpose, fi rst switch to the menu …
»Control switch« (page 135)
… and select the line of a control switch which has
not been assigned yet with the selection keys. After
activation of the control assignment with a brief tap
on the center
SET key of the right touch pad, the
following window will appear:
SEL
0%
0%
0%
C1
C2
C3
–––
C4
CONTROL SWITCH
Geb. 1
0%
STO
–––
–––
–––
SEL
C1
C2
C3
C4
frei
free
free
frei
Move desired
control adj.
Now simply move the C1 joystick (throttle/brake
joystick) from the motor "OFF" position in the motor
"ON" direction.
Thereafter, change to the column above STO by
using the appropriate selection key, move the C1
joystick close to its motor "OFF" position then set
the switch-point at the selected position with a brief
tap on the center
SET key of the right touch pad.
The switch's state will be displayed at the right of the
control number, e.g.:
Timer confi rmation with control or switch

 Loading...


