211
Detail program description - Teacher/pupil
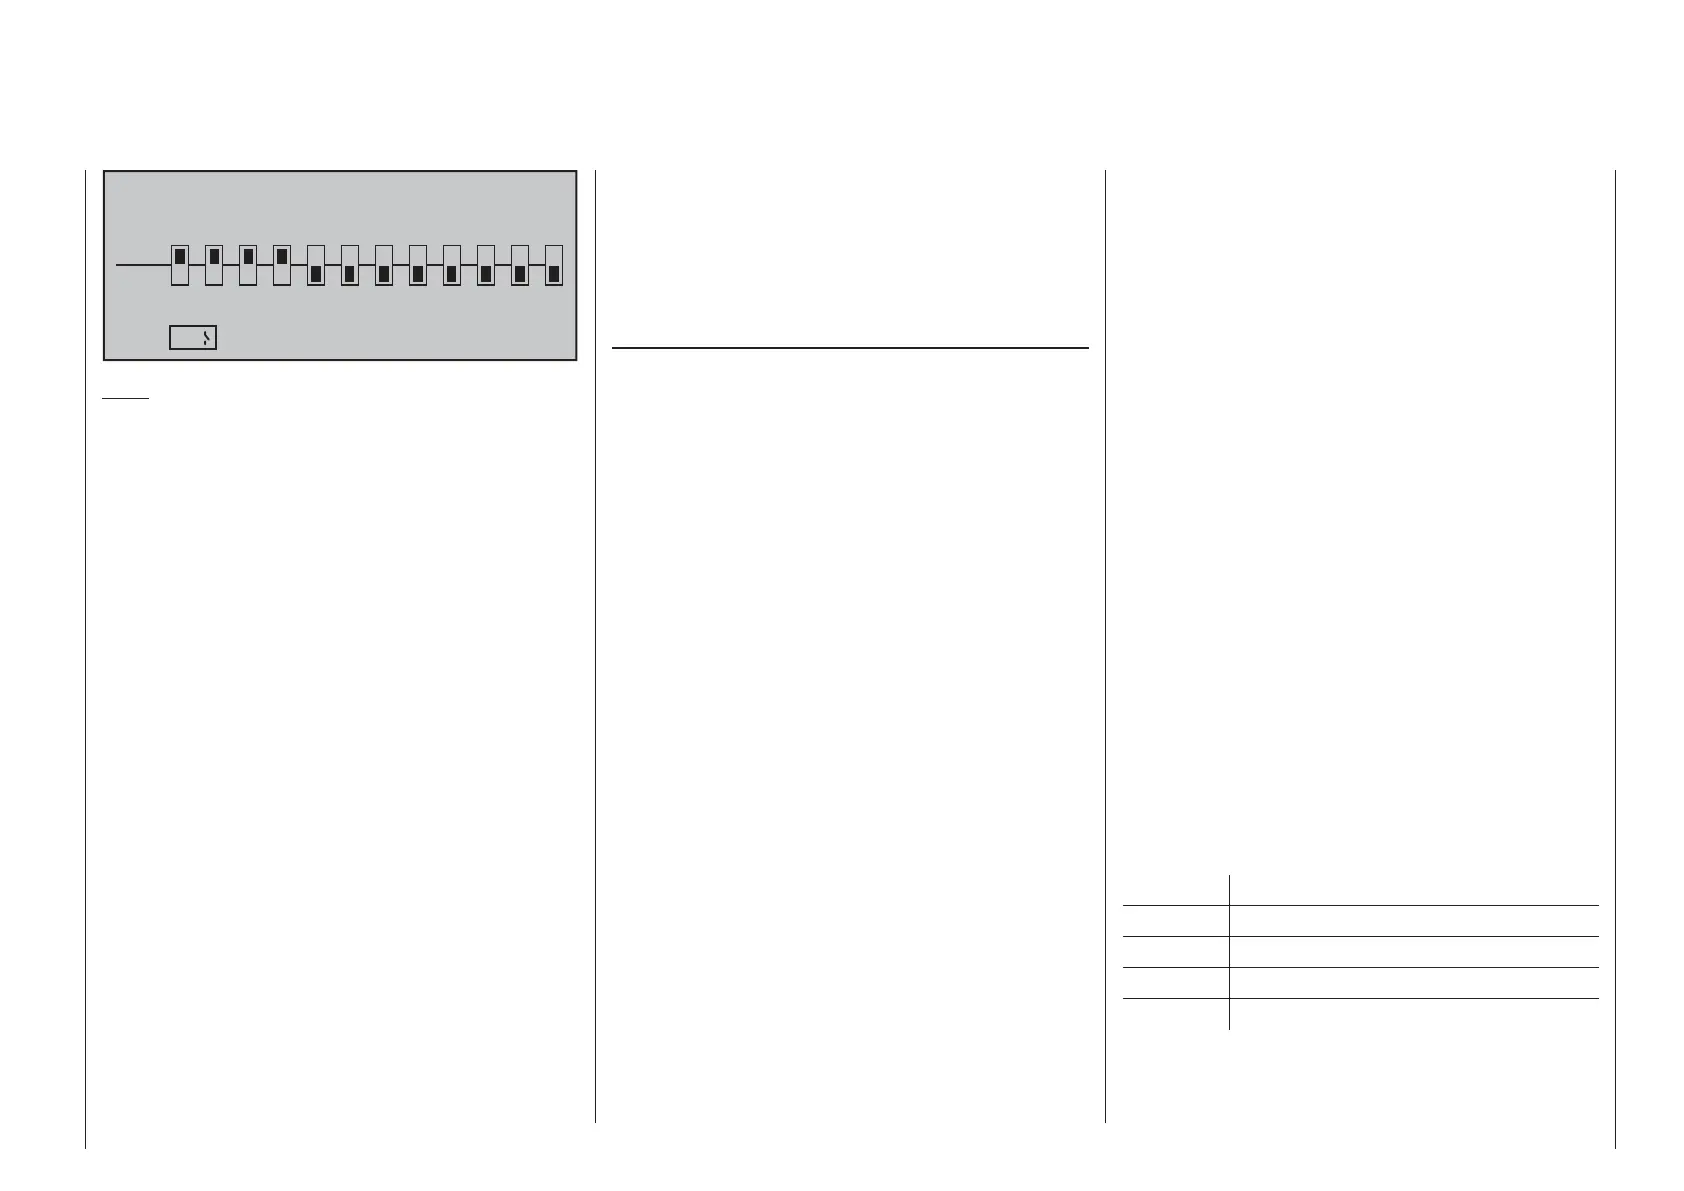
TRAINER /Teacher
P
T
23
4
5
BIND:
SW:
1
n/a
678910
11 12
9
Ä
Note:
The switch assignment just described also
determines the transmitter used to issue the teacher
and pupil functions, respectively. For this reason, a
pupil transmitter must NEVER be assigned a switch
on this menu. The header line therefore also
switches from "Teacher / Pupil" to "Teacher /
Teach" once a switch has been assigned.
The model to be controlled by the pupil must be
programmed completely – i.e. with all its functions
including trims and any mixer functions – in one of
the model memories of the
mc-20 HoTT teacher
transmitter. The HoTT receiver of the model in
question must also be "bound" to the teacher
transmitter, since the latter ultimately controls the
model, even in pupil mode.
ALWAYS ENSURE YOU SWITCH ON THE
mc-20
HoTT teacher transmitter FIRST BEFORE
PLUGGING THE CONNECTION CABLE INTO
THIS UNIT. Otherwise the RF module will not be
activated.
The
mc-20 HoTT teacher transmitter can be
connected to any suitable pupil transmitter, even
transmitters using the "traditional" 35/40 MHz range.
This means, for example, that a
mc-20 HoTT
teacher transmitter can indeed also be connected to
a mc-24 pupil transmitter.
However, if the pupil-side connection is NOT made
via a two-pole DSC socket but rather via a three-
pole trainer socket (for example, out of the Graupner
product line), then the basic prerequisite for a
correct connection to a pupil transmitter which is
completely independent of the type of modulation
used in the teacher transmitter must ALWAYS be
set to modulation type PPM (10, 16, 18 or 24) in
the pupil transmitter.
Pupil transmitter set-up
The model to be controlled by the pupil must be
programmed completely, i.e. with all its functions
including trims and any mixer functions, in one
of the model memories of the teacher transmitter
and, if applicable, the HoTT receiver of the model
in question must also be "bound" to the teacher
transmitter. In principle, a
mc-20 HoTT pupil
transmitter can also be connected to a teacher
transmitter operating on the "traditional" 35/40 MHz
bands. This is possible because the PPM signal
required by the teacher transmitter is available in the
(pupil) transmitter's DSC socket.
Almost any transmitter with at least four control
functions from previous and current Graupner series
can be used as a pupil transmitter. More detailed
information can be found in the RC main catalog and
on the www.graupner.de website.
If required, the pupil transmitter should be fi tted
with the connection module for pupil transmitters.
This is to be connected to the transmitter board in
accordance with the supplied installation instructions.
Information on the pupil modules required in each
case can be found in the Graupner RC main catalog
and on the www.graupner.de website.
The connection to the teacher transmitter is made
using the appropriate lead; see the following
double page.
The control functions of the pupil transmitter
MUST act directly on the control channels, i.e. the
receiver outputs, without intermediary mixers.
If you are using an "mc" or "mx" series transmitter,
it is best to activate a free model memory with the
required model type ("Fixed-wing" or "Heli"). Assign
the model name "Pupil" and set up the stick mode
(mode 1 … 4) and "Throttle min. forward/back" to suit
the pupil's preferences. All other settings are left at
their default values, however. If you have selected
the "Helicopter" model type, you must also set the
throttle/ collective pitch direction and idle trim on the
pupil transmitter. All other settings, including mixer
and coupling functions, are confi gured exclusively on
the teacher transmitter, which in turn transmits them
to the model.
If the pupil transmitter is a mx-20 HoTT or
mc-20
HoTT series model then it may also be necessary
to adapt the type of modulation in the "DSC output"
line of the »Base setup model« menu in order to
accommodate the number of control channels to
be transmitted. For example, the signal packet for
modulation type "PPM10" contains only control
channels 1 … 5 but not channel 6. However, if this
channel is to be used by the pupil then a modulation
type must be selected in which it is included.
For transmitters of type "D" and "FM" it is necessary
to check servo operating directions and their control
correlations. It may be necessary to reconnect cables
appropriately. All mixers must also be switched off or
set to "zero".
When assigning control functions, the usual
conventions must be observed:
Channel Function
1 Motor throttle/collective pitch
2 Aileron/roll
3 Elevator/pitch-axis
4 Rudder/tail rotor
If other control functions are to be transferred to the
pupil transmitter in addition to the functions of the two