49
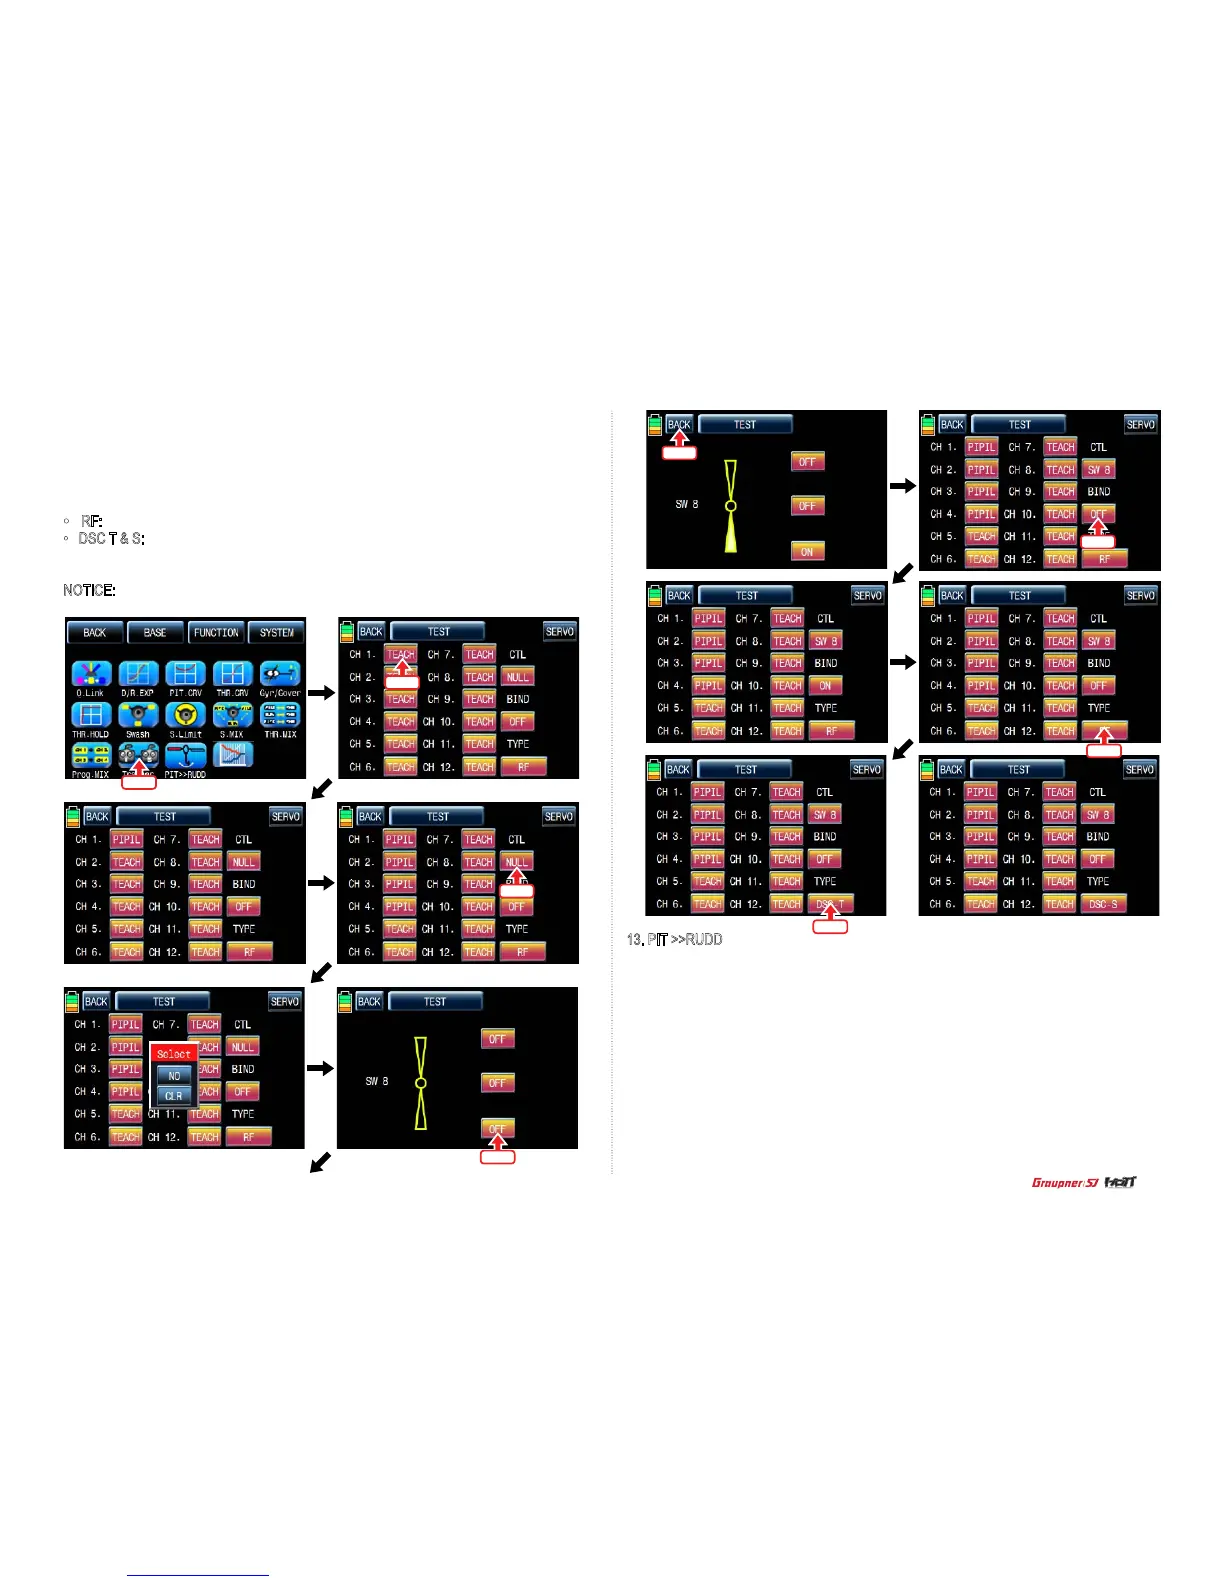
Now, you need to bind teacher transmitter and pupil transmitter. Turn on pupil’s transmitter and
receiver. Touch “OFF” icon in BIND line to switch to ON and touch “OFF” icon in Teacher trans-
mitter to switch to “ON” then Teacher transmitter is bound to pupil transmitter. Pupil transmitter
can control the channels only if Teacher trainer switch is on. You may select trainer type by
touch the value in TYPE line.
• RF: Teacher and pupil transmitters are connected by wireless
• DSC T & S: When teacher and pupil transmitters are connected by optional DSC code,
teacher transmitter should be set to DSC T and pupil transmitter should be set
to DSC S
NOTICE: Transmitter should be set to DSC S when it is use in the simulation program
Touch
Touch
Telemetry
Touch
Touch
Touch
Touch
Touch
13. PIT >>RUDD
This function is used to correct the unintended movement of rudder during the ight of a helicopter.
It is not necessary when you make use of heading lock gyro
Touch “PITT >> RUDD” icon in the function page to call PIT >> RUDD setup page. You need to
mark the point on graph rst and then adjust the operation curve with “DEC”, “INC”, X-axis and
Y-axis buttons.
Touch “ST OFF” icon to switch to “ST ON” then the pitch position line appears on graph. Move
throttle stick and place the line at the desired position between point “L” and “H” then touch “ENT”
icon on the bottom right. Now the new point is marked in graph. You may set ve points in your
favorable position.
Touch ST ON” to switch to “ST OFF” and complete the point setup. Now touch “DEC” or “INC”
button to select point and touch X-axis or Y-axis to activate and then touch DEC” or “INC” button
to adjust the operation curve. Turn on the preset Q.LINK switch then you may adjust the operation
curve of every Q.LINK as well.
Touch
 Loading...