Model G0824 (Mfd. Since 12/16)
-35-
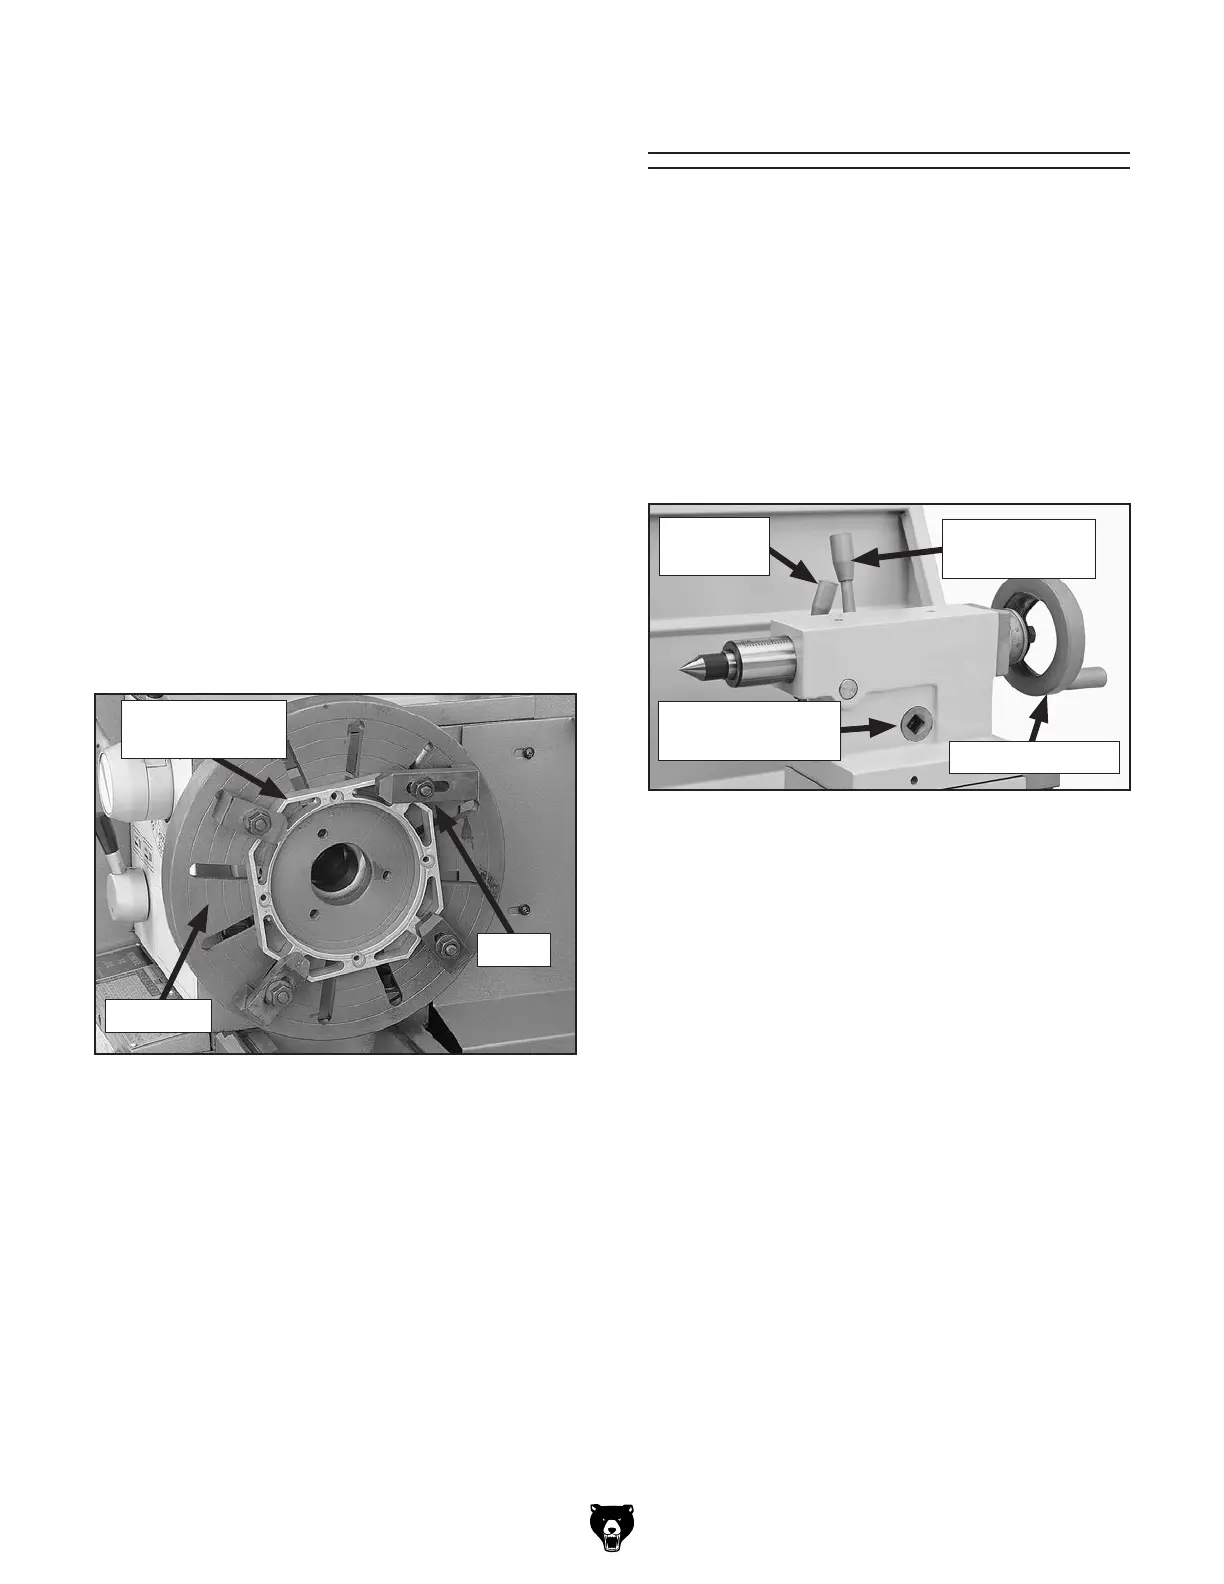
Figure 38. Generic picture of workpiece clamped
in a faceplate.
Faceplate
Non-Cylindrical
Workpiece
Clamp
To mount a non-concentric workpiece to a
faceplate:
1.
DISCONNECT MACHINE FROM POWER!
Position appropriate device
to protect them from any potential damage
from workpiece contact during installation.
With help from another person or holding
device to support workpiece, position it onto
faceplate and clamp it in place with a mini-
mum of three independent clamping devices
(see below for an example).
Be sure to take into account rotational and
cutting forces that will be applied to work-
piece when clamping it to faceplate. If neces-
sary, use counter-weights to balance assem-
bly and use a dial indicator to make sure
workpiece is properly positioned for your
Tailstock
The tailstock (see Figure 39) is typically used to
support long workpieces by means of a live or
dead center (refer to Centers on Page 39 in the
following section). It can also be used to hold a
drill or chuck to bore holes in the center of a part.
Custom arbors and tapers can also be cut on your
lathe by using the offset tailstock adjustment.
Also, a torque wrench can be used with the
tailstock for repeating super-accurate vertical
alignment.
Figure 39. Tailstock and quill lock levers in
locked position.
1
⁄2" Square Drive
Lock-Down
Graduated Dial
Increments
................................................. 0.001"
One Full Revolution
................................... 0.100"
Increments on Quill
Inch
...........................0"–4 " in 0.100" Increments
Positioning Tailstock
1. Rotate tailstock lock lever clockwise (facing
machine) to unlock tailstock from bedways.
Slide tailstock to desired position by pushing
it along the bedways.
Rotate tailstock lock lever counterclockwise
to lock tailstock against bedways.
Quill Handwheel
Quill Lock
Lever
Tailstock Lock
Lever
Optional: When doing precision work, the
1
⁄2"
square drive can be used to draw down the
tailstock and bring the chuck and tailstock centers
into more perfect alignment. This is a matter of
trial and error, and it requires the use of precision
measuring tools.
 Loading...