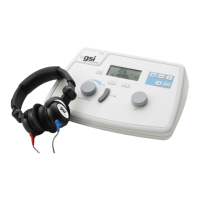
GSI TympStar Pro User Manual
D-0129427 Rev. B Page 33 of 162
Positioning the Probe Box
Position the shoulder mount for the probe box over the patient’s shoulder on the same
side as the ear to be tested. The Velcro strip should be facing away from the body. The
probe box is then positioned on front of the Velcro strip.
Probe Insertion
Ear canal examination with an illuminated otoscope is an essential prerequisite to
successful middle-ear testing. Such examination achieves the following
:
• Detects the presence of potentially obstructive cerumen.
• Assists in determining the proper angle of probe insertion.
• Helps to determine the proper size eartip to achieve an airtight seal of the ear canal.
NOTE: Before attempting to seal the entrance of the ear canal, visually inspect the
opening to make sure that the canal is free of any obstruction. If the canal is completely
plugged at the entrance or if fluid is running from the ear canal, tympanometry should
not be attempted until the condition is cleared.
Select the correct size eartip and position it fully on the probe. The eartip should be
pushed firmly onto the tip of the probe until it is fully seated. The probe tubes should be
nearly flush with the top surface of the eartip. Move any hair away from the ear. Insert the
probe tip securely into the ear canal with a back-and-forth twisting motion. Pull the pinna
upward and backward for adults, and down and back for children. The probe tip should sit
firmly within the ear canal without being held. If leakage occurs, a different size eartip may
be needed.
1. Select the desired test from the front panel of the instrument.
2. Make sure that the green lamp on the probe box is blinking.
3. Press the Start button on the instrument front panel or the button on the probe
box.
4. Watch the probe lamp. As soon as a good seal is obtained, the blinking green lamp
will change to a steady glow and remain steady while the test is in progress.
5. When the test is over, the green lamp on the probe will be blinking. You may
continue with another test or press the Stop button on the instrument. The test
result may be viewed on the instrument display. It is now appropriate to remove the
probe from the ear canal.
 Loading...