EasyManua.ls Logo

Heska element COAG+ - User Manual

Heska element COAG+
54 pages
Print Icon
To Next Page IconTo Next Page
Loading...
Veterinary Analyzer Product Manual

Questions and Answers

  • A
    Amber HillSep 8, 2025
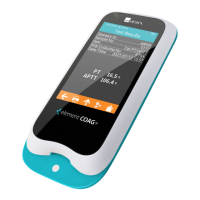
    What to do if Heska Pet Care Product indicates 'The temperature of the analyzer is too high'?
    • M
      Mitchell SilvaSep 8, 2025
      If the Heska Pet Care Product indicates that the temperature of the analyzer is too high, adjust the ambient temperature to between 50°F and 95°F (10°C–35°C). Turn off the analyzer for 5 minutes, then turn it back on and restart the test. If the problem continues, further assistance is needed.
  • A
    angela16Sep 7, 2025
    What to do if Heska Pet Care Product displays 'FIB calculation error'?
    • C
      Cody JonesSep 7, 2025
      If your Heska Pet Care Product displays a 'FIB calculation error', retest with a new test strip. If the problem continues, further assistance is needed.
  • W
    williamrodriguezAug 22, 2025
    What to do if Heska Pet Care Product indicates low battery?
    • Y
      Yolanda MullinsAug 22, 2025
      If your Heska Pet Care Product shows a low battery warning, use the power adapter or the base as a power source.
  • T
    Tyler BanksSep 4, 2025
    What to do if Heska Pet Care Product says 'The strip is defective or the sample is added improperly'?
    • A
      Ashley VargasSep 4, 2025
      If the Heska Pet Care Product indicates that the strip is defective or the sample was added improperly, retest with a new test strip. Add the sample exactly as specified in the instructions.
  • L
    Lori TranSep 3, 2025
    What to do if Heska Pet Care Product shows 'aPTT calculation error'?
    • M
      Michael AlvaradoSep 3, 2025
      If the Heska Pet Care Product displays an 'aPTT calculation error', retest with a new test strip. If the problem continues, further assistance is needed.
  • B
    Becky SchultzSep 1, 2025
    What to do if Heska Pet Care Product says 'The sample is added too early or the strip is a used one'?
    • C
      Christopher KrauseSep 1, 2025
      If the Heska Pet Care Product indicates that the sample was added too early or that the strip has already been used, retest using a new test strip. Add the sample only after the analyzer prompts you to do so.
  • J
    Jeremy DanielAug 31, 2025
    What to do if Heska Pet Care Product says 'The operation of sample adding has timed out'?
    • G
      gvasquezAug 31, 2025
      If your Heska Pet Care Product says that the operation of sample adding has timed out, ensure the sample adding is completed before the countdown ends.
  • J
    Jasmine KellyAug 30, 2025
    What to do if Heska Pet Care Product shows 'External QC failed'?
    • A
      Andre MillerAug 30, 2025
      If your Heska Pet Care Product displays 'External QC failed', make sure that the test strip and the control are still within their expiry period. Also, verify that you've entered the correct Codechip numbers for both the test strip and the control.
  • D
    debra19Aug 28, 2025
    What to do if Heska Pet Care Product shows 'Internal QC failed'?
    • B
      Brian WhiteAug 29, 2025
      If your Heska Pet Care Product displays 'Internal QC failed', use a test strip that hasn't expired and make sure you've entered the correct Codechip number for the test strip.
  • M
    Michael CervantesAug 27, 2025
    What to do if Heska Pet Care Product says 'The added sample is insufficient'?
    • C
      Corey LongAug 27, 2025
      If the Heska Pet Care Product indicates that the added sample is insufficient, retest using a new test strip. Make sure you add enough blood for the test.

Summary

Introduction

1.1 Before Starting

Instructions for initial preparation before using the Element COAG+ Analyzer.

1.2 Intended Use

Defines the purpose and application of the Element COAG+ Analyzer system.

1.3 Test Principle

Explains the method by which the Element COAG+ Analyzer measures coagulation.

1.4 Packaging

Details on how the Element COAG+ Analyzer is packaged and initial setup.

Product Overview

Front View

Illustrates and labels the front components of the Element COAG+ Analyzer.

Back View

Illustrates and labels the back components of the Element COAG+ Analyzer.

Left View

Illustrates and labels the left side components of the Element COAG+ Analyzer.

Right View

Illustrates and labels the right side components of the Element COAG+ Analyzer.

Top View

Illustrates and labels the top components of the Element COAG+ Analyzer.

Operation Summary

Before Testing

Precautions, Limitations and Warnings

5.1 Element COAG+ Analyzer Care

Instructions for proper handling, cleaning, and maintenance of the analyzer.

5.2 Test Environment Requirements

Specifies the environmental conditions necessary for optimal analyzer performance.

5.3 Patient Health Status

Explains how patient health factors can affect test results.

5.4 Performing a Test

Detailed steps and precautions for executing a test on the analyzer.

5.5 Collecting Sample

Guidelines for collecting blood samples for testing with the analyzer.

5.6 Warning Information on Built-In Lithium Battery

Safety information and warnings related to the analyzer's internal lithium battery.

Power ON;OFF

6.1 Battery and Charging

Details on charging the analyzer and battery management.

6.2 Power ON

Steps to power on the analyzer, including initial startup and login procedures.

6.3 Sleep Mode

How to activate and use the sleep mode to conserve battery power.

6.4 Power OFF

Procedure for safely shutting down the Element COAG+ Analyzer.

Settings

7.1 Enter Settings Screen

How to access and navigate the main settings menu of the analyzer.

7.2 Language

Instructions for selecting and changing the display language on the analyzer.

7.3 WIFI

Configuration steps for connecting the analyzer to a Wi-Fi network.

7.4 Test Parameter

Configuration options for test parameters like sample number and codechip.

7.4.1 Sample No.

Settings for automatic or manual sample numbering.

7.4.2 Codechip Strip

Procedure for installing and verifying test strip codechips.

7.4.3 Reference Range

How to enable/disable and set reference ranges for test results.

7.4.4 PT Units

Options for setting the display units for PT test results.

7.4.5 aPTT Units

Options for setting the display units for aPTT test results.

7.5 System Parameter

Configuration for system-wide settings like date, time, and display.

7.5.1 Date;Time

Procedure for setting the analyzer's date, time, and format.

7.5.2 Beeper

Settings for controlling the beeper volume and its activation conditions.

7.5.3 Screen Rotation

Options for rotating the analyzer's screen display.

7.5.4 Brightness Adjustment

Adjusting the screen brightness level on the analyzer.

7.5.5 Sleep Setting

Configuring the auto sleep timer for the analyzer.

7.5.6 Auto Upload

Enabling or disabling the automatic upload of test results.

7.5.7 Transport Mode

Instructions for enabling/disabling transport mode for battery preservation.

7.6 About the Device

Displays system information such as version and logs.

7.7 Operator ID

Setting up and managing operator accounts for analyzer access.

Sample Test

8.1 Choosing Test Type

Selecting the type of animal for the test (e.g., cat, dog).

8.2 Input Sample No.

Entering or automatically generating a sample identification number.

8.3 Insert Test Strip

Instructions for correctly inserting the test strip into the analyzer.

8.4 Input Test Strip Information

Entering or scanning the test strip's codechip number.

8.5 Install Codechip

Procedure for inserting and verifying the test strip codechip.

8.6 Heating

The analyzer's heating process before sample addition.

8.7 Add Sample

Instructions for adding the blood sample to the test strip.

8.8 Collecting a Sample

Notes and recommendations for collecting blood samples.

8.9 Peforming the Test

Detailed steps for applying blood to the test strip and running the test.

8.10 Test Results

Display and interpretation of the test results.

Quality Control

Onboard QC Test

Information about the analyzer's internal quality control methods.

Liquid QC Test

Using liquid controls to verify analyzer and test strip performance.

9.1 Insert Test Strip

Procedure for inserting the test strip for a QC test.

9.2 Input Test Strip Information

Entering or scanning the codechip for QC test strips.

9.3 Install Test Strip Codechip

Inserting and verifying the codechip for QC test strips.

9.4 Input QC Information

Entering codechip information for QC liquid.

9.5 Install QC Liquid Codechip

Procedure for installing the QC liquid codechip.

9.6 Heating

Heating process for QC tests.

9.7 Add Sample

Adding sample for QC testing.

9.8 QC Test

Performing the quality control test.

9.9 QC Test Results

Review and interpret the results of quality control tests.

Results

10.1 Results Channel

Navigating the results screen to view test and QC data.

10.2 Test Results

Viewing detailed information for individual test results.

10.3 QC Results

Viewing detailed information for quality control results.

Maintenance

11.1 Screen Care and Cleaning

Steps for cleaning and disinfecting the analyzer's screen and housing.

11.1.5 Cleaning and disinfecting the analyzer housing.

Detailed instructions for cleaning and disinfecting the analyzer exterior.

11.2 Precautions for Lithium-Ion Battery

Important precautions for the analyzer's built-in lithium-ion battery.

11.3 Servicing

Information on user-serviceable parts and professional servicing.

Troubleshooting

Error Code E001-E006

Troubleshooting steps for specific error codes related to battery, heating, and QC.

Error Code E008-E018

Troubleshooting steps for errors related to scanning, sample timing, and strip issues.

Error Code E019-E024

Troubleshooting steps for errors related to temperature, coagulation, and calculation.

Error Code E025-NO COAG

Troubleshooting steps for errors related to reportable ranges, vibration, and coagulation.

Symbols

Symbol Explanations

Explanation of symbols used in the Element COAG+ Analyzer manual.

Operating Conditions and Product Specifications

14.1 Operating Conditions

Specifies temperature, humidity, and altitude requirements.

14.2 Product Specifications

Technical details including processor, display, memory, and dimensions.

Special Storage Conditions & Methods

15.1 Use of the Element COAG+ Analyzer

Emphasizes adherence to manual instructions for proper operation and safety.

Heska element COAG+ Specifications

General IconGeneral
BrandHeska
Modelelement COAG+
CategoryPet Care Product
LanguageEnglish