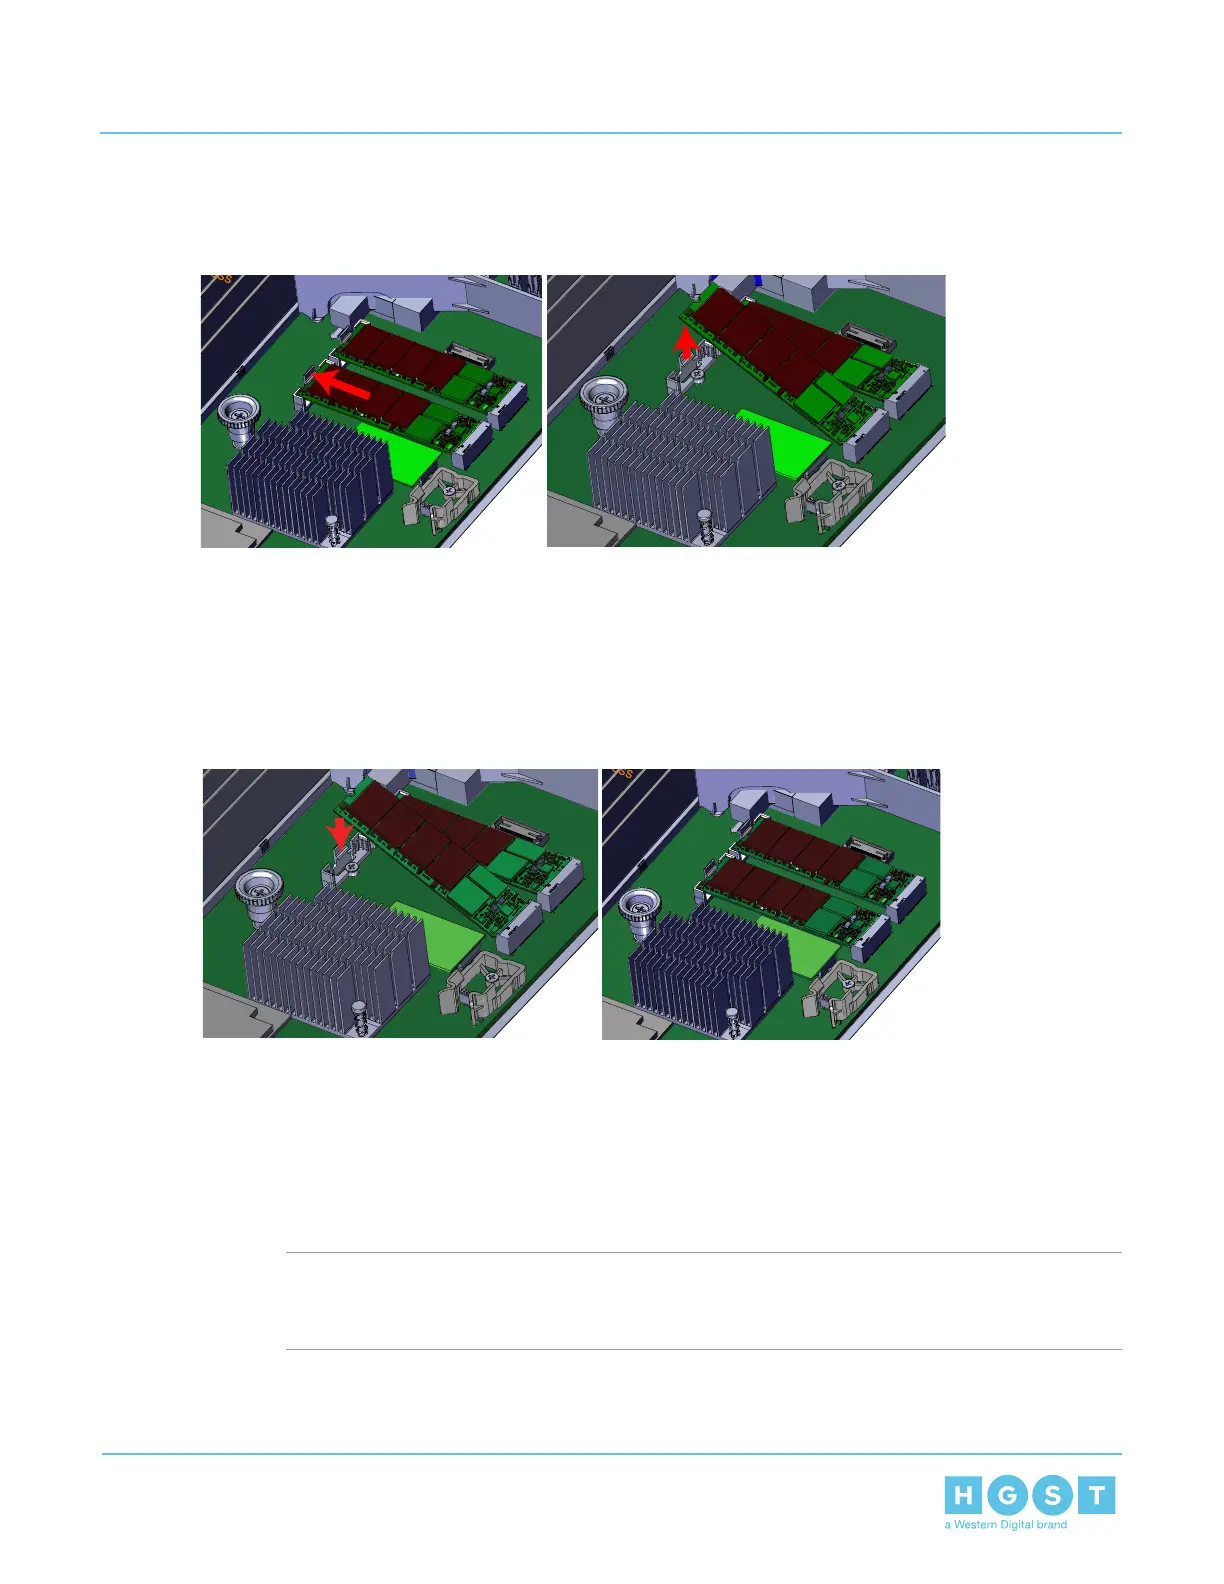
b) Remove the drive from the drive slot by pulling it out of the connector.
Figure 77: M.2 Boot Drive Removal
5. Identify the location of the first M.2 boot drive on the replacement Compute Canister.
6. Install the M.2 boot drive.
a) Slide the card edge of the drive into the connector with even pressure.
b) Slide the opposite end of the card edge into the release latch.
Figure 78: M.2 Boot Drive Installation
7. Install the Compute Canister cover.
a) Align the cover over the Compute Canister and slide towards the front of the Compute Canister.
b) Verify the locks on the cover have engaged and the cover is secure.
8. Install the Compute Canister into the enclosure.
a) From the rear of the enclosure, line up the Compute canister with the empty canister slot. Ensure that
the Compute Canister is oriented correctly.
Note: The top Compute Canister is installed with the top cover facing toward the bottom of the
enclosure. The bottom Compute Canister is installed with the top cover facing the top of the
enclosure.
64
3 Part Replacement
User Guide 3.6 M.2 Boot Drive Replacement
 Loading...