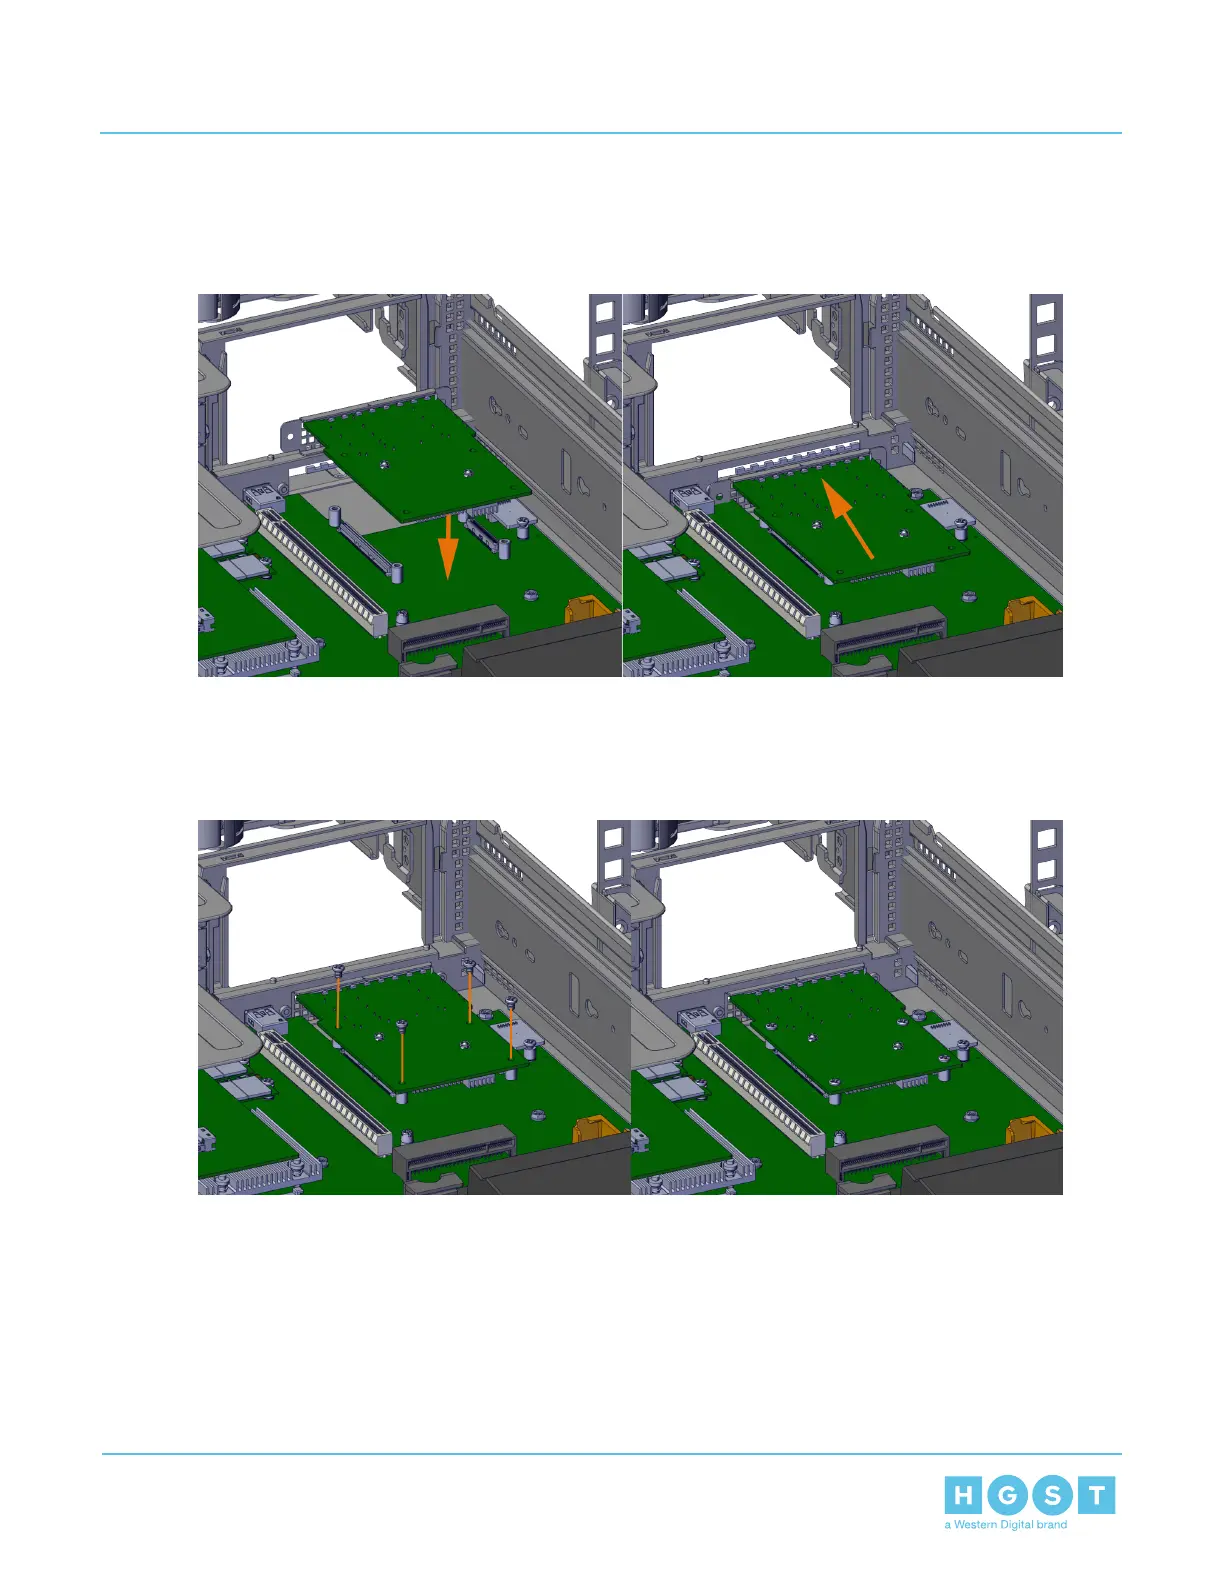
a) From the inside of the enclosure, slide the NIC into place with the connectors sticking out of the NIC
slot in the enclosure.
Figure 89: Install NIC into Place
b) Slide the NIC plate over the NIC ports and secure it in place with the provided screws.
c) From inside of the enclosure, secure the NIC to the enclosure board with the provided screws.
Figure 90: Secure NIC with Screws
7. Install the corner PCIe bracket by carefully lining up the sheet metal carrier on the guides and pressing
it into the bracket.
8. Install the Compute Canister cover.
a) Align the cover over the Compute Canister and slide towards the front of the Compute Canister.
b) Verify the locks on the cover have engaged and the cover is secure.
9. Install the Compute Canister into the enclosure.
70
3 Part Replacement
User Guide 3.7 NIC Replacement
 Loading...