Network Video Recorder User Manual
188
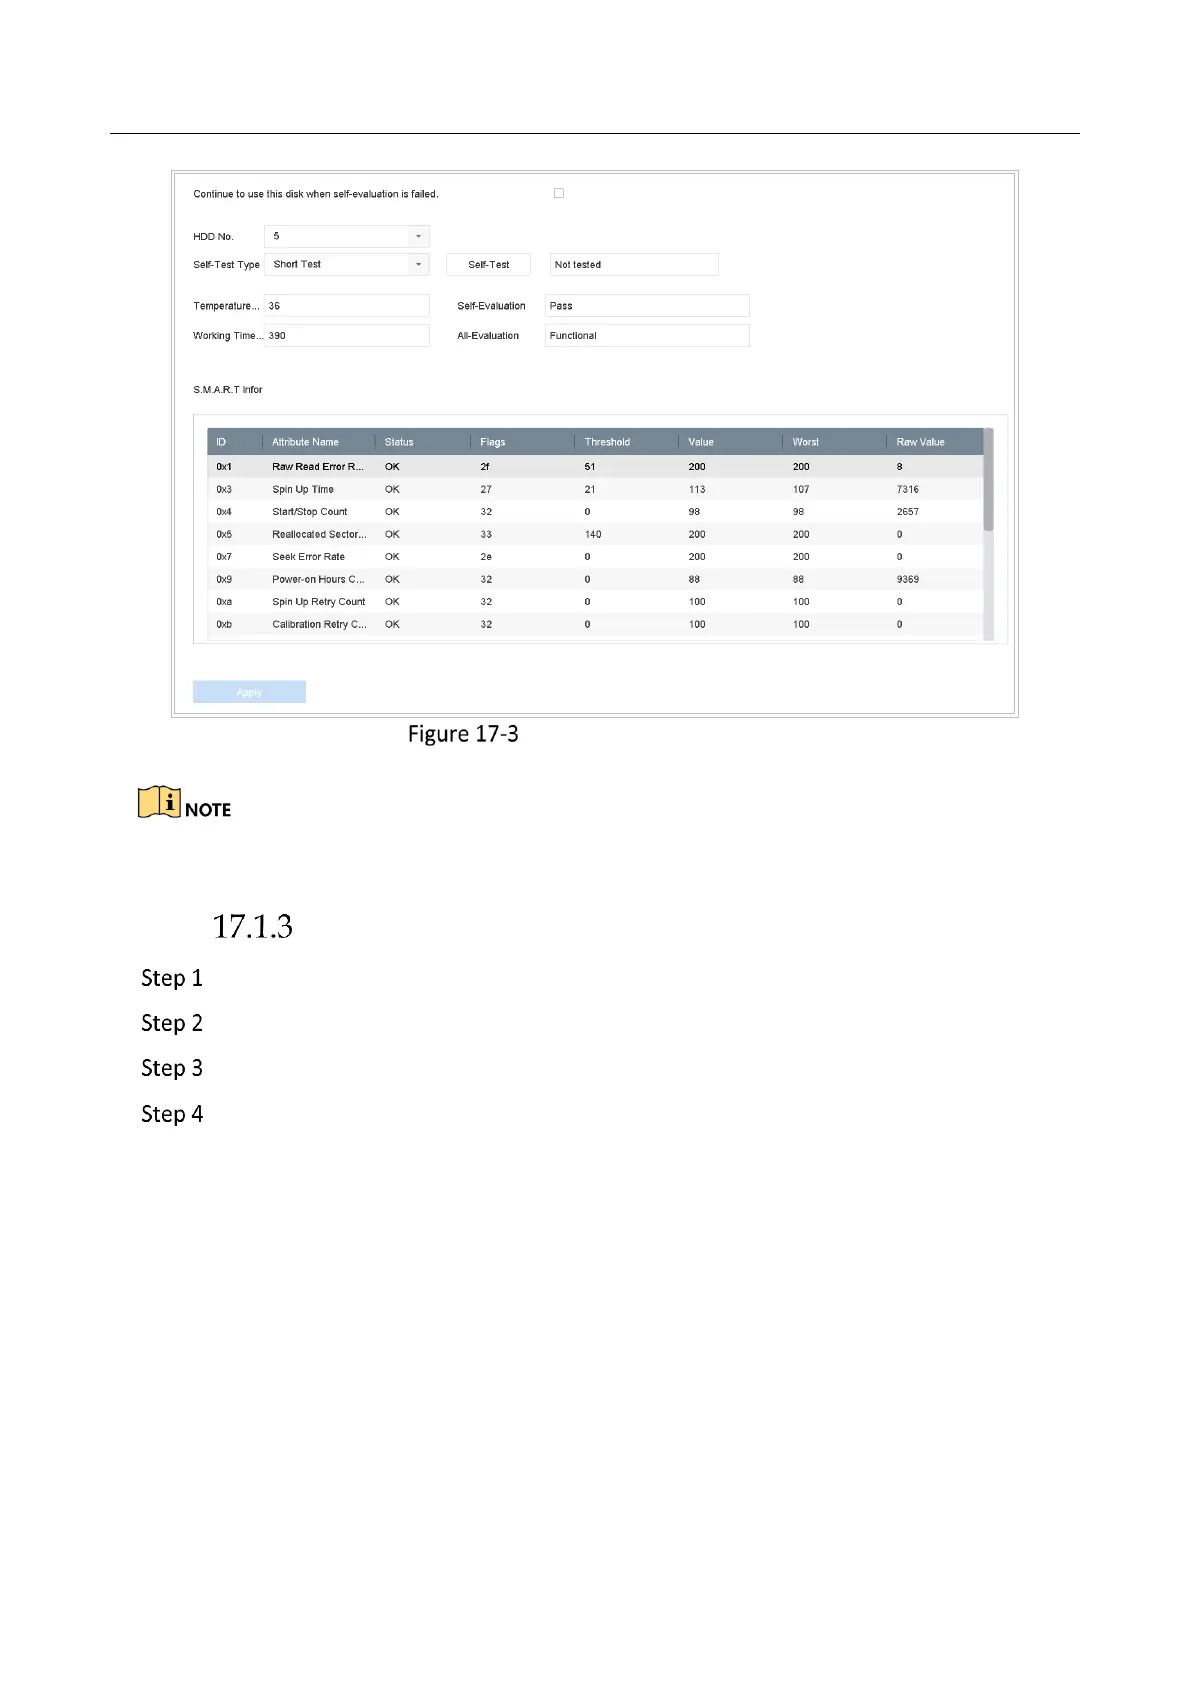
S.M.A.R.T Settings Interface
If you want to use the HDD even when the S.M.A.R.T. checking is failed, you can check Continue
to use the disk when self-evaluation is failed.
Bad Sector Detection
Go to Maintenance > HDD Operation > Bad Sector Detection.
Select the HDD No. in the dropdown list you want to configure.
Select All Detection or Key Area Detection as the detection type.
Click Self-Test to start the detection.
 Loading...