DS-7600 Series NVR User’s Manual
38
9) Check the checkbox of record audio to enable or disable audio while recording. If the
selected camera does not support audio, the checkbox will not be editable.
10) Click the Apply button to save the settings.
11) Repeat the steps to set other cameras.
Note:
The parameters of event recording cannot be configured and they are as same as the ones of continuous
recording.
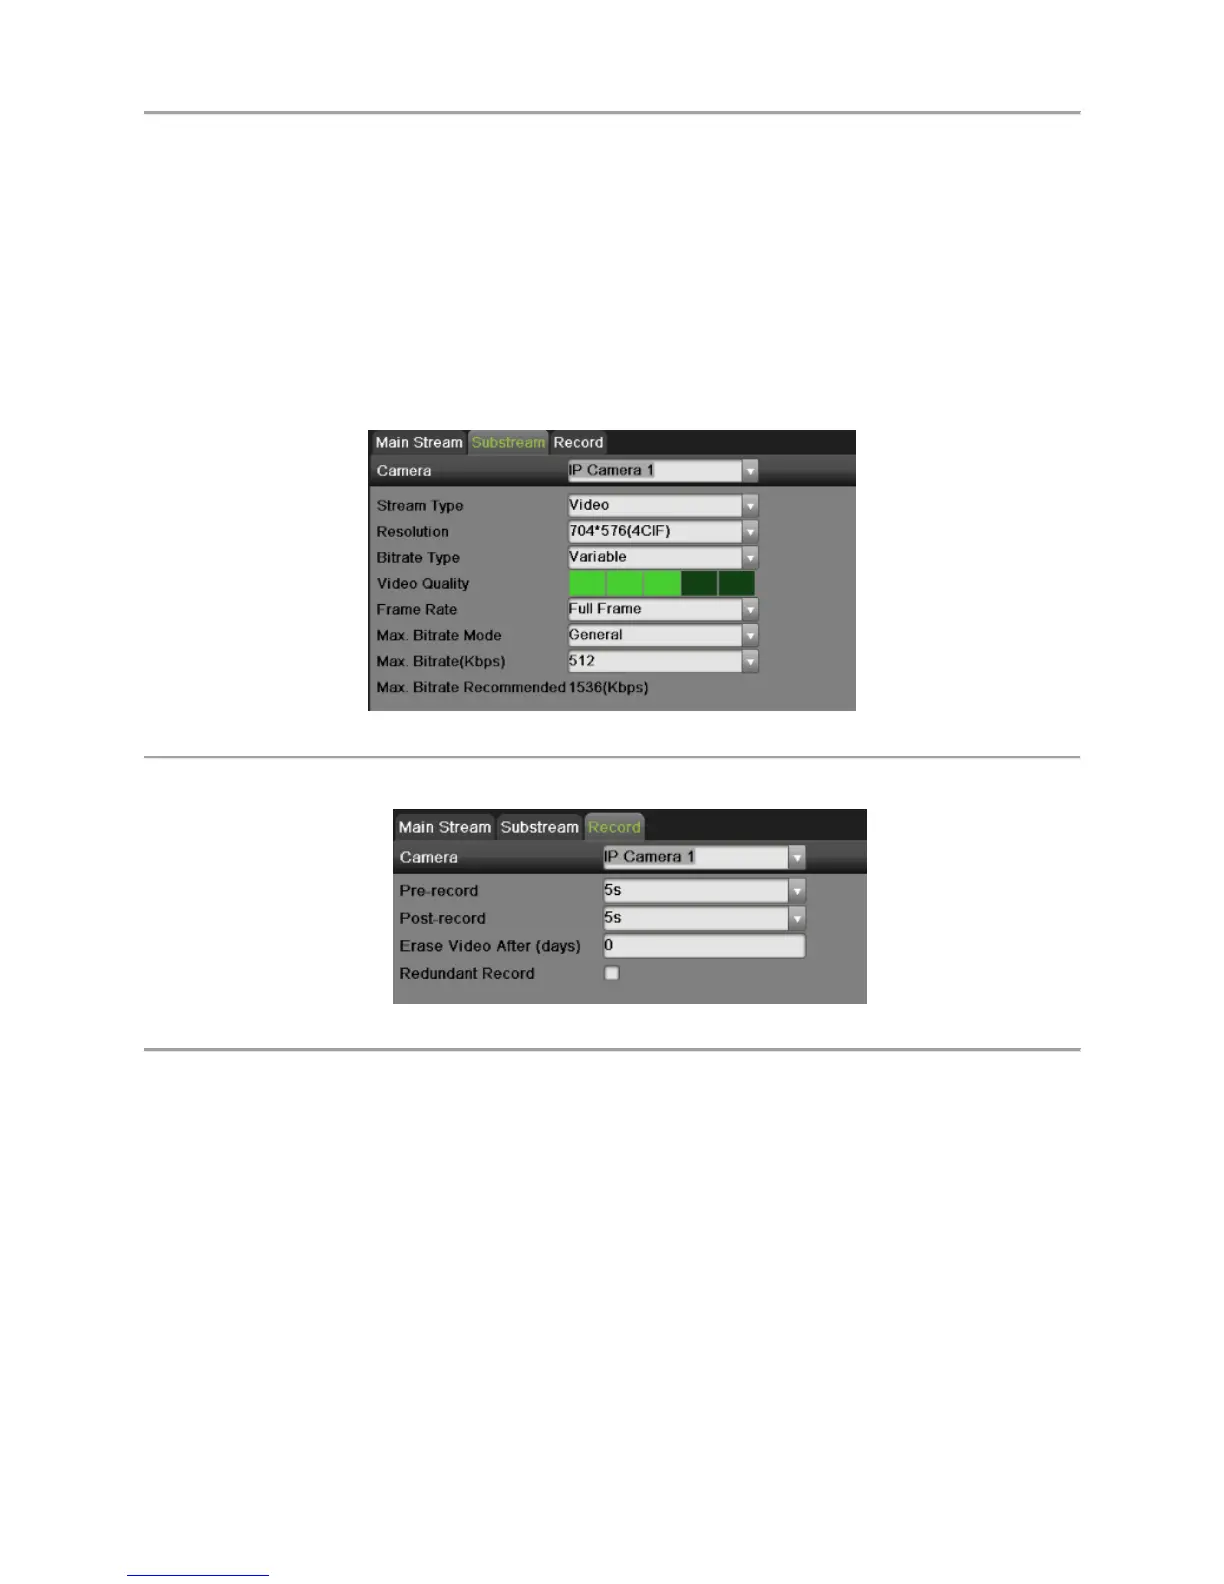
3. Select Substream tab, as shown in Figure 28, to configure the parameters of sub stream. The steps
are the same as main stream configuration.
Figure 28 Substream Settings Menu
4. Select record tab, as shown in Figure 29 to configure some parameters of recording.
Figure 29 Record Settings Menu
1) Select the Pre-record time. The pre-record time is the time in seconds to record before a
recording is triggered. Setting the pre-record time to Max. will allow the NVR to use up to
the maximum available buffer space for recording.
2) Select the Post-record time. The post-record time is the time in seconds to also record after a
recording has ended.
3) Enter the Erase Video After. The Erase Video After time denotes the amount of days that
files will be deleted after its initial recording. Setting the time to 0 will allow the NVR to
only delete and overwrite files when the HDD is full.
4) If check the Redundant Record checkbox, the record will be saved in the redundant HDD.
Note:
The redundant record is to decide whether you want the camera to save the record files or captured
pictures in the redundant HDD. You must configure the redundant HDD in HDD settings.
 Loading...