DS-7600 Series NVR User’s Manual
75
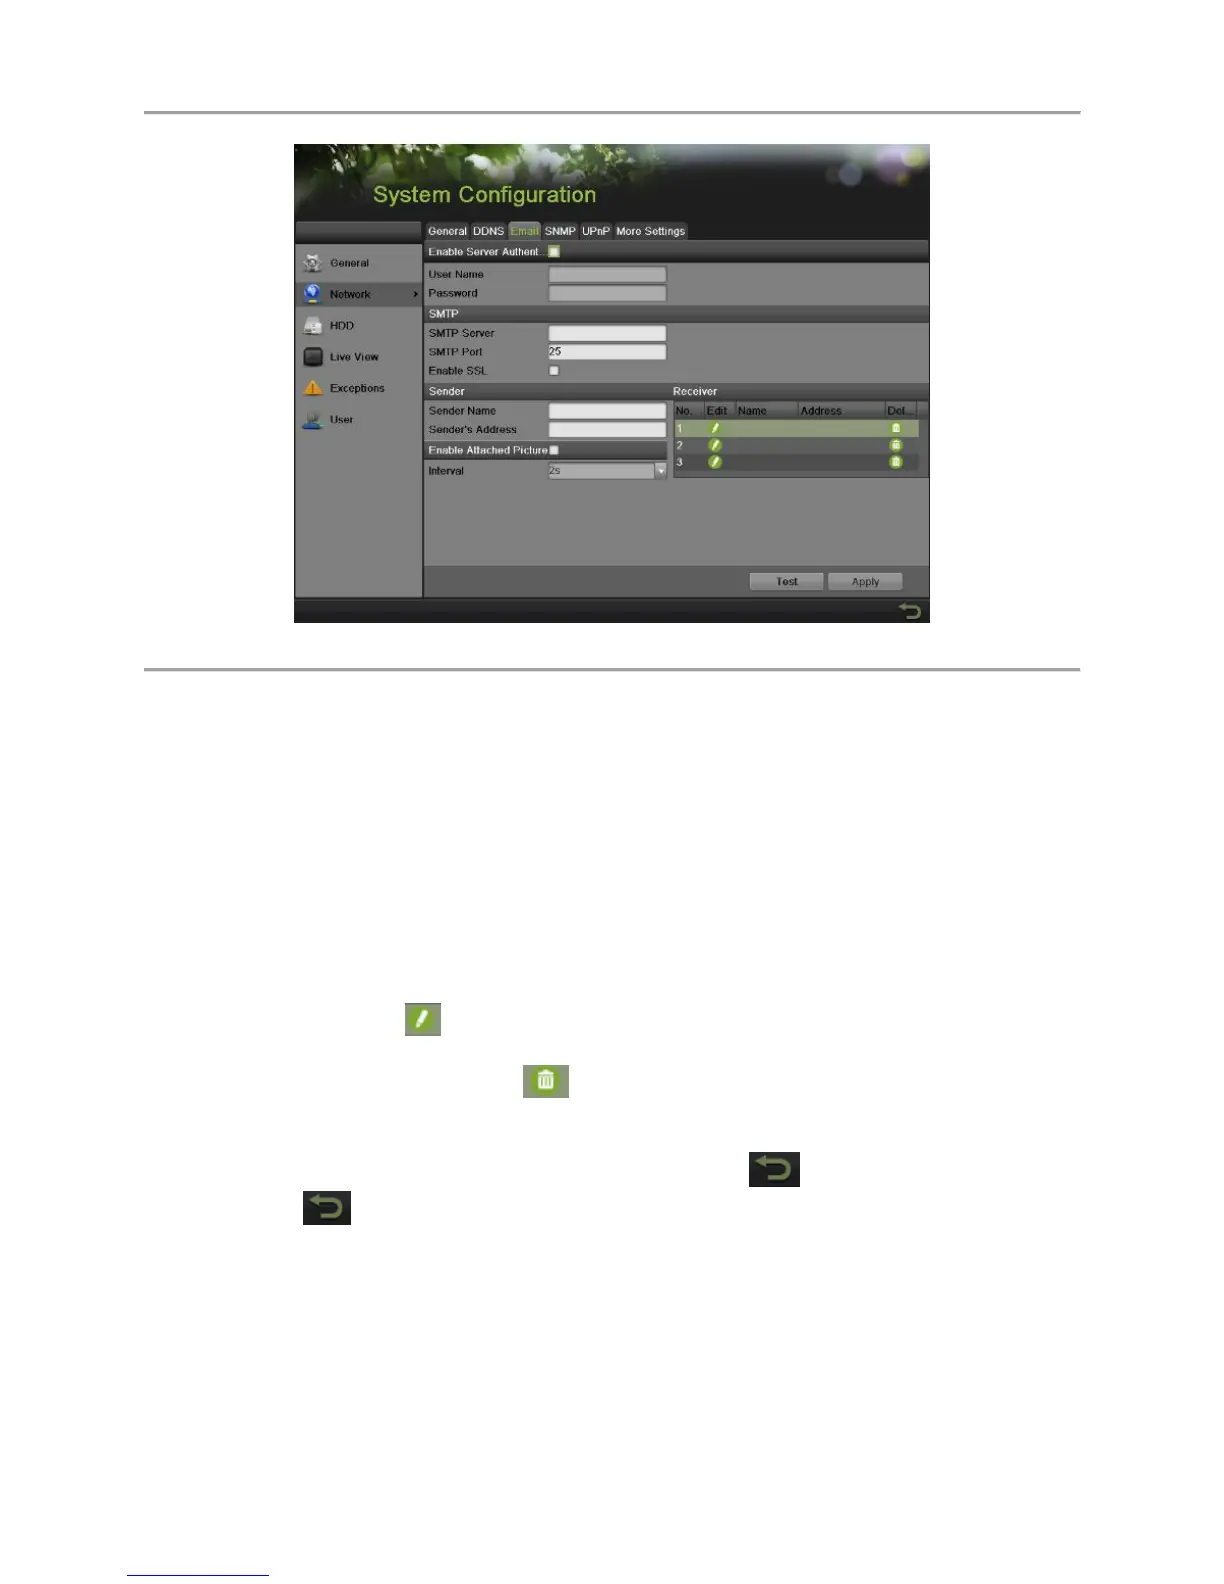
Figure 74 Email Configuration Menu
3. In this tab, enter all pertinent email information, including:
Enable Server Authentication: Enable if email server requires authentication. Enabling
Server Authenticating will enable the User Name and Password fields.
User Name: User name to use for server authentication.
Password: Password to use for server authentication.
SMTP Server: Address for SMTP server.
SMTP Port: Port for SMTP server.
Enable SSL: Enable Secure Sockets Layer (SSL) for out-going email.
Sender Name: The sender name to use when an email is sent out from the NVR.
Sender’s Address: The sender’s address to use when an email is sent out from the NVR.
Enable Attached Picture: Enabling will attach a small picture segment (Interval can be set
below the Enable Attached Picture checkbox) to the out-going email.
Receiver: Click to edit Receiver Settings. Input the receiver’s name and address. Click
Apply to save the settings. The email address will be added to the Receiver list. You can also
delete the receiver by clicking .
4. You may now test the email settings by clicking the Test button. If the settings have been
properly configured, the recipient will successfully receive a test email.
5. Select the Apply button to save the email settings and select to return to the previous menu.
Selecting without clicking Save will quit out of the menu without saving settings.
 Loading...