10 Servicing
313
10
SMGB0077 rev.0 - 01/2013
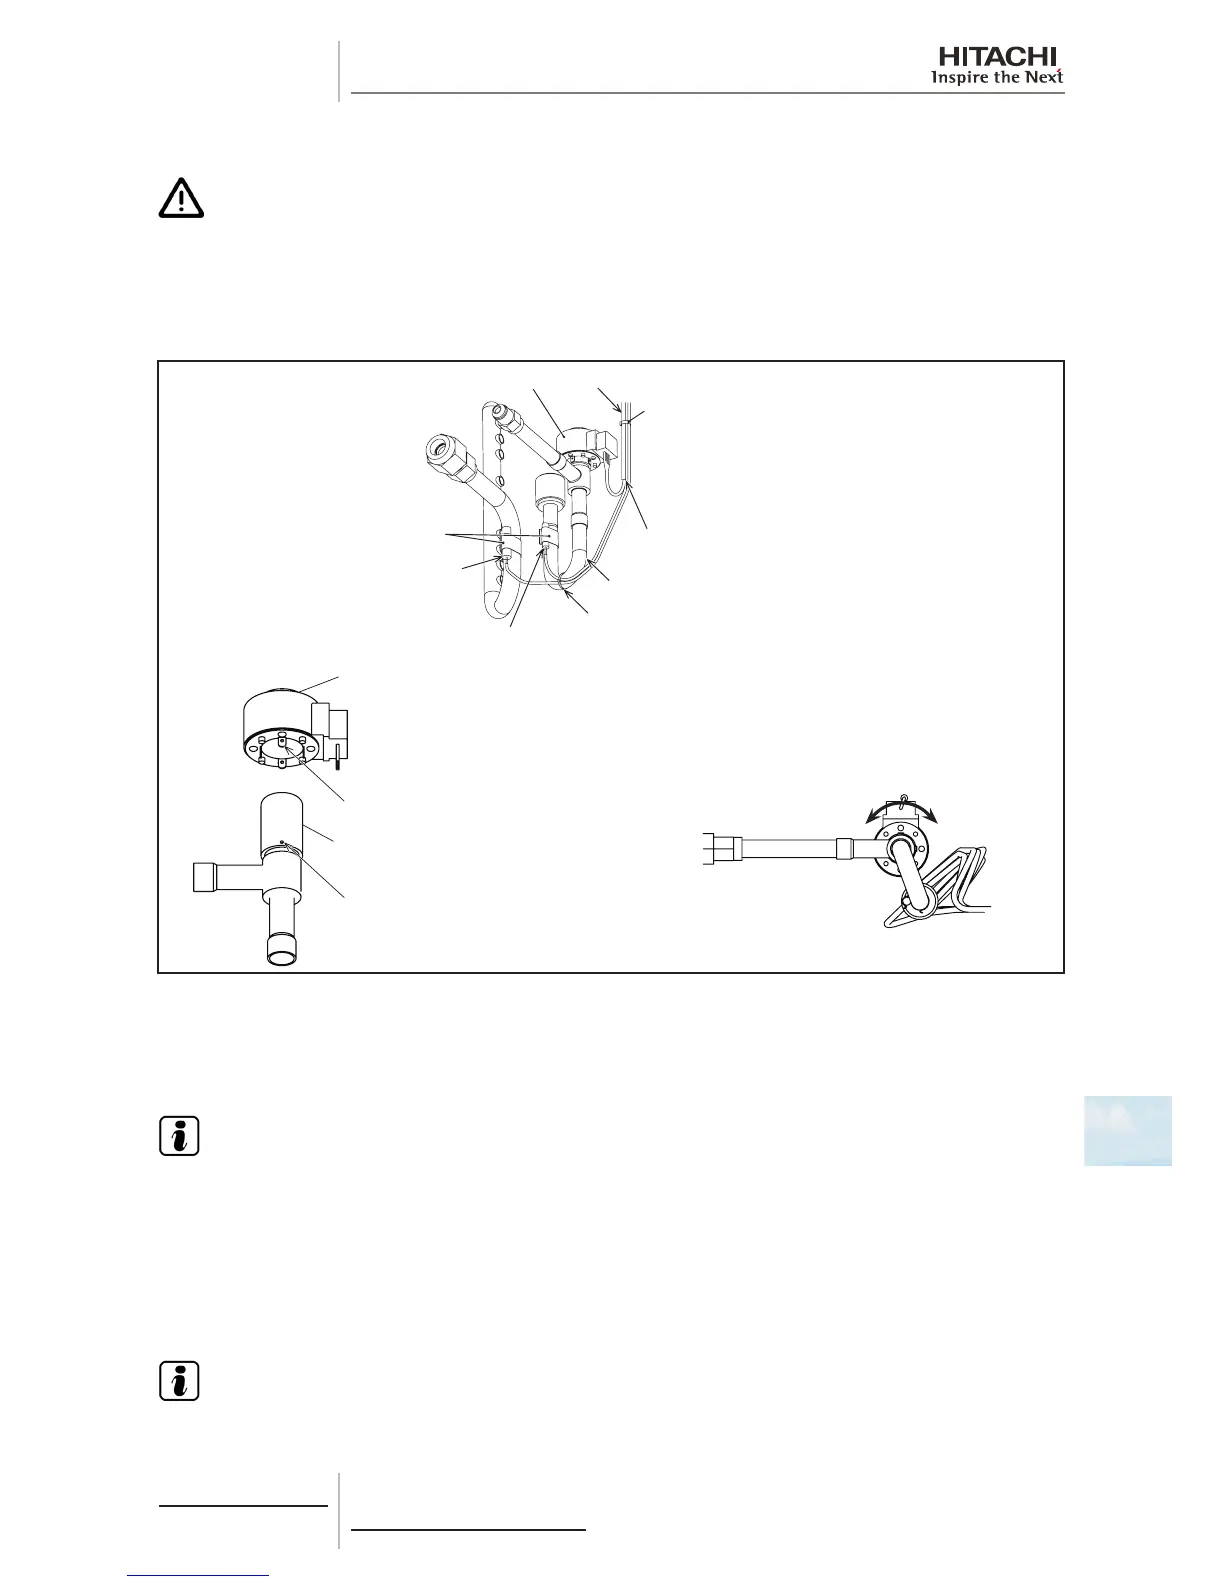
10.1.11 Removing Electronic Expansion Valve Coil
C A U T I O N
TURN OFF all power source switches.
1 Remove the air panel according to the item “Removing Optional Air Panel”.
2 Remove the bell-mouth according to the item “Removing Turbo Fan and Fan Motor”.
3 Remove the drain pan according to the item “Removing Drain Pan”.
4 Remove the partition plate according to the item “Removing Thermistors for Liquid Pipe and Gas Pipe”.
5 Cut the plastic band xing lead wires (for 2 pipe thermistors and expansion valve).
6 Remove the hooks of the expansion valve coil from the projection of the expansion valve body by a few turn of
expansion valve coil. Pull up and remove the expansion valve coil. At this time, pay attention not to twist the pipes.
7 Insert the new expansion valve coil for replacement to the expansion valve body. When inserting, x the expansion
valve coil to catch the projections onto the hooks.
N O T E
The hooks are located each 90o, and the projections are located each 180o.
The hooks shall catch onto the projections completely though the rotation direction does not affect to the operation.
If the hooks do not completely catch onto the projections, it may cause malfunction of expansion valve coil.
8 If the replacement work is completed, x the wire for expansion valve near the expansion valve coil by plastic band. At
this time, x the lead wires for expansion valve to face the edge downward.
After xing the lead wires for expansion valve, x again lead wires (for 2 pipe thermistors and the expansion valve)
together by the plastic band.
N O T E
Whenreassembling,securelyxleadwires(forfanmotor,2pipethermistorsandexpansionvalve)togetherby
the cord clamp attaching at the partition plate.
 Loading...

