10 Servicing
377
10
SMGB0077 rev.0 - 01/2013
10.9.10 Removing Heat Exchanger
D A N G E R
TURN OFF all power source switches.
C A U T I O N
• Recover the refrigerant from the unit before the work. After all the refrigerant is recovered, turn OFF all power source
switches.
• Makesurethattheunitwillnotbedamaged.Ifhavingdifcultyinperformingtheworkalone,theworkshallbetaken
by two people.
• Takespecialcarenottobeinjuredbytheheatexchangerns.
For RPK-(0.8-1.5)FSN(H)3M
1 Remove the power source wiring, the transition wiring and the wiring for the remote control switch.
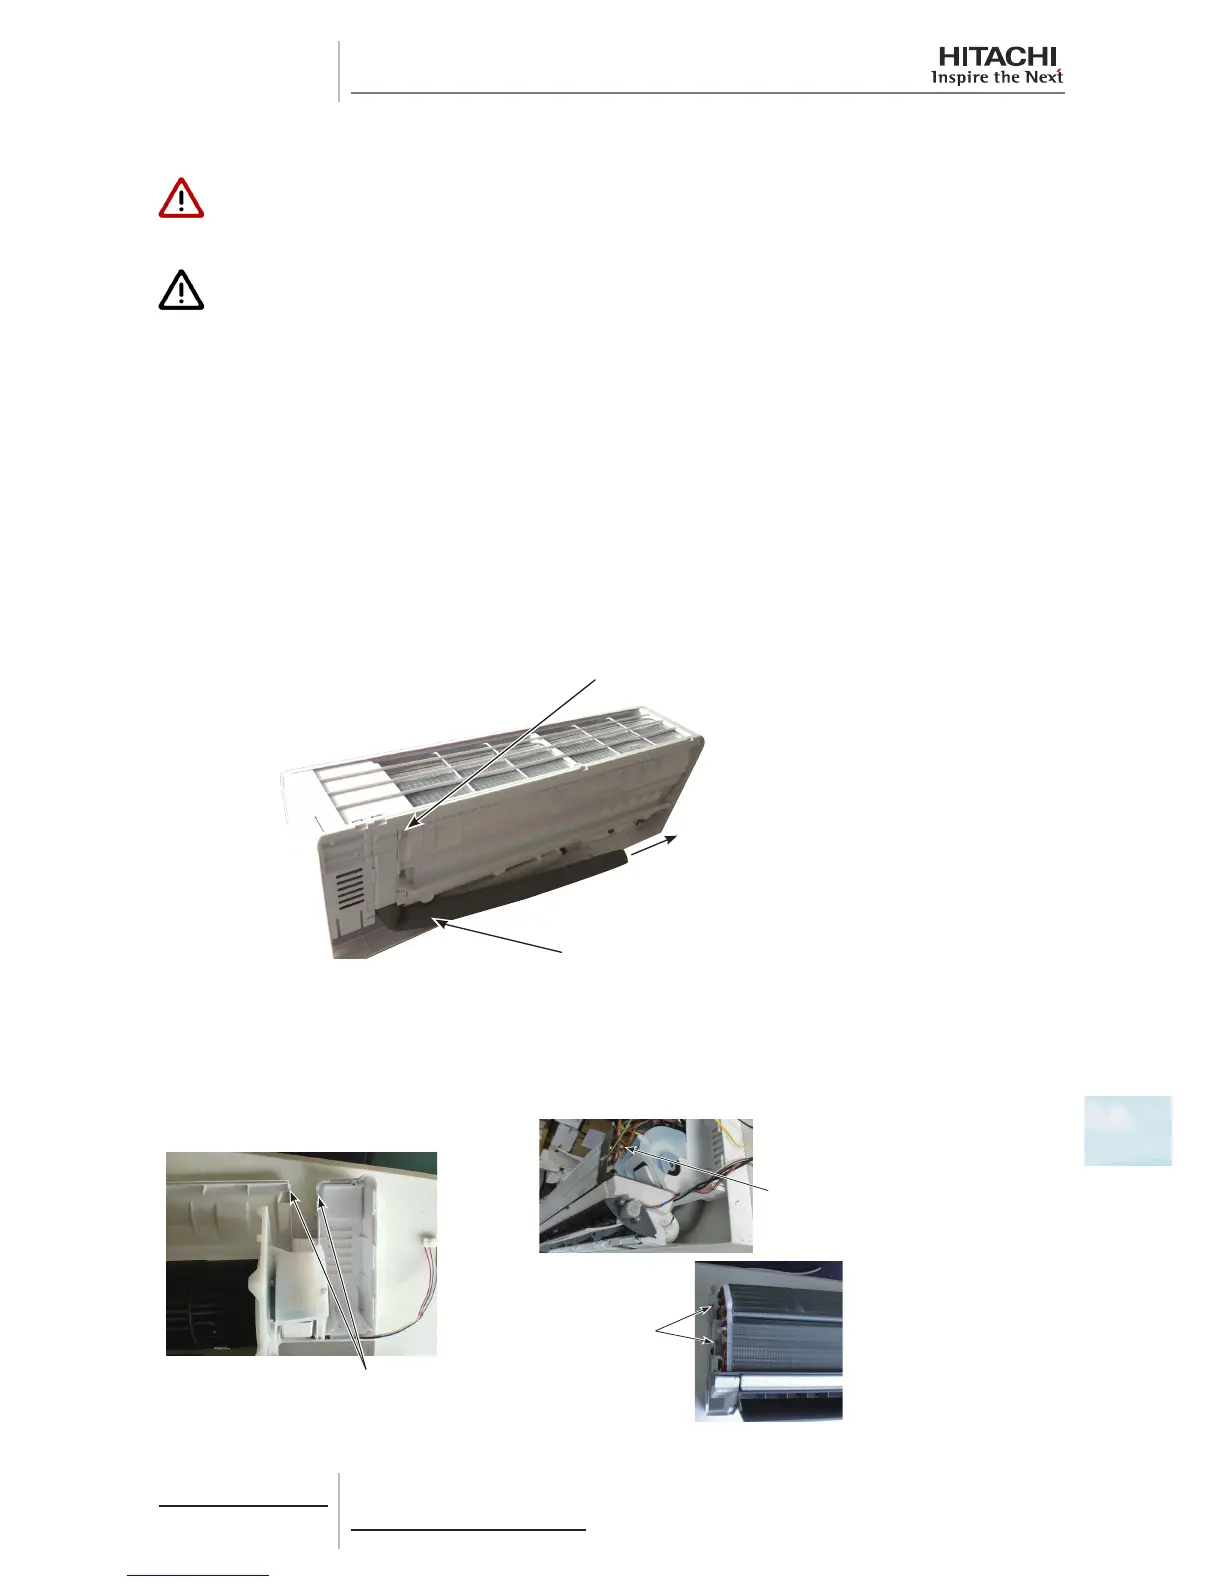
2 Push the portion indicated by “PUSH” on the underside of the unit to release the catches at the lower part of the unit.
3 Remove the are nuts attached to the rear piping of the heat exchanger to disconnect the pipings. Then lift the indoor
unit up and draw it frontward to remove it.
4 Remove the front panel according to the “Removing Front Panel” chapter.
5 Remove the electrical box according to the “Removing Electrical Box” chapter.
6 Remove the drain pan according to the “Removing Drain Pan” chapter.
Rear Piping of
Heat Exchanger
Connected
Pipings
Rear Side of Indoor Unit
7 Release 2 catches on the inside of the piping holder at the rear side of the indoor unit and remove the piping holder.
8 Remove 1 screw xing the right side of the heat exchanger. Then remove 2 screws xing the left side of the heat
exchanger.
Front Side of Indoor Unit (The gures above show the examples with the piping for heat exchanger removed.)
 Loading...

