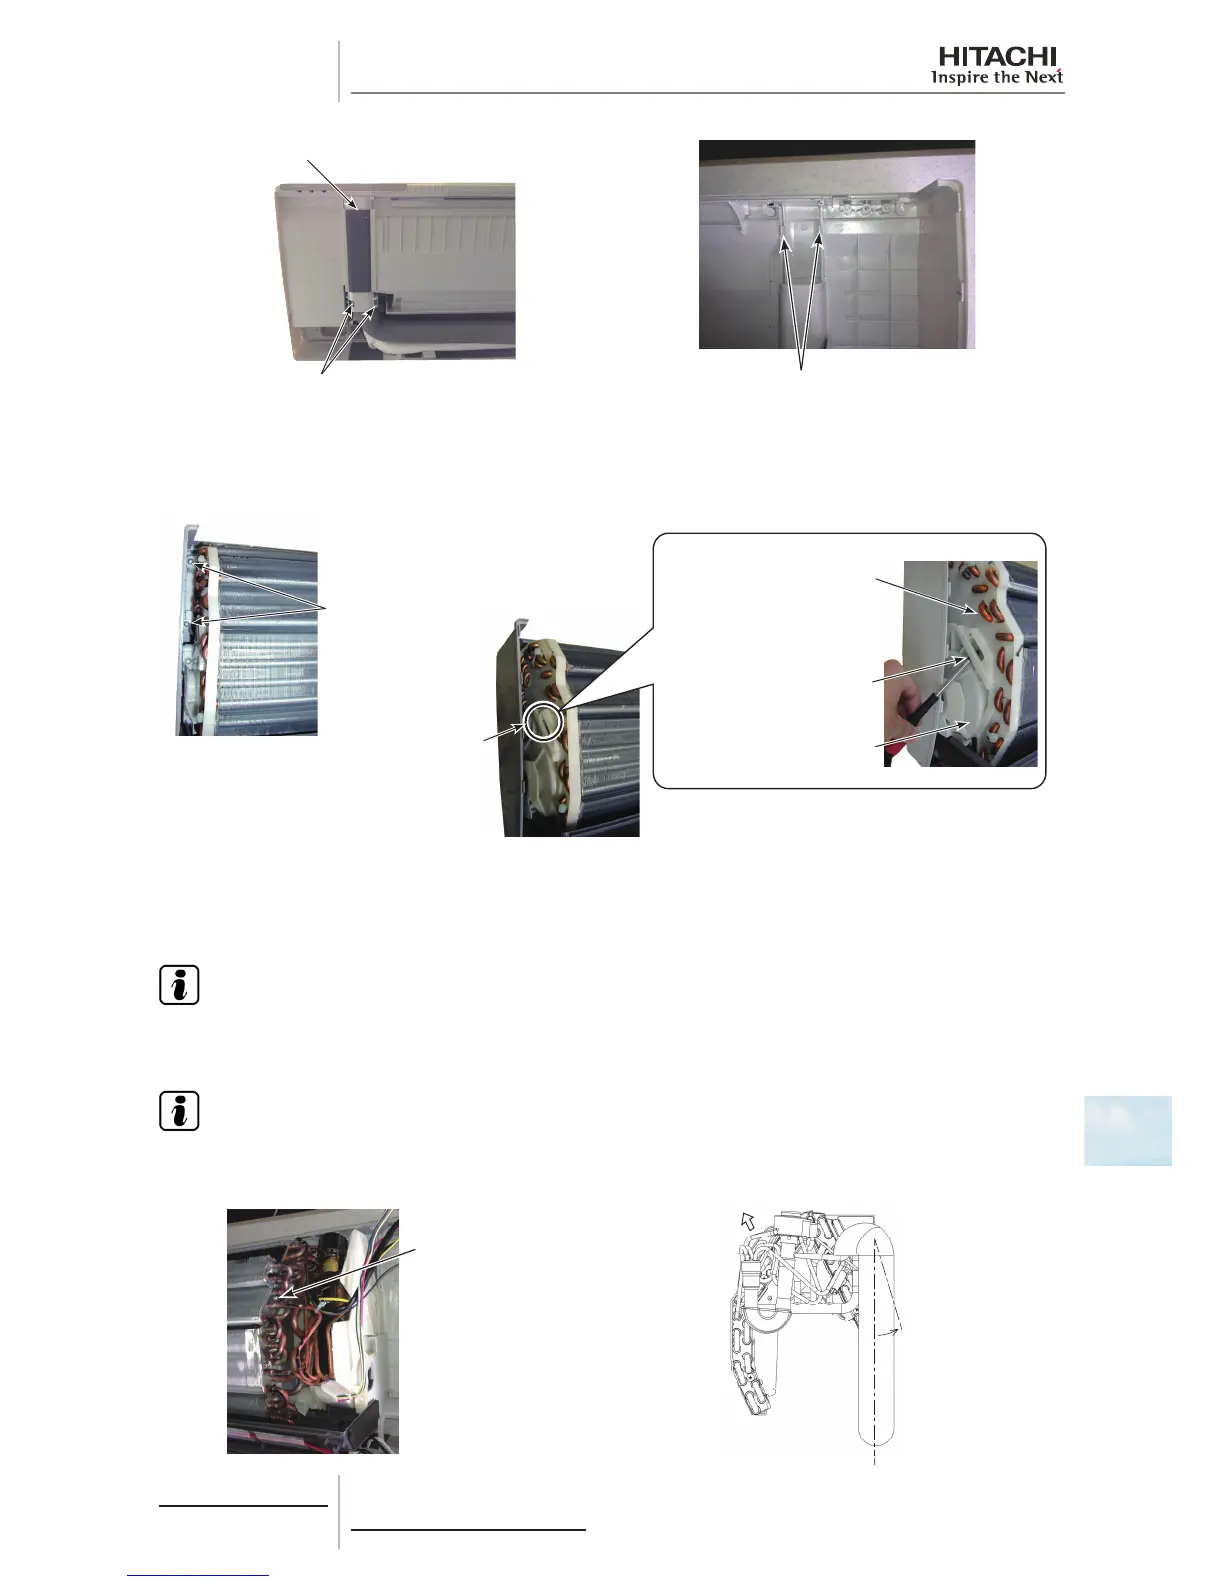
10 Remove 2 screws xing the left side of the heat exchanger and undo 1 hook for the heat exchanger. Then remove butyl
sheet covering piping between the heat exchanger and the electrical box.
11 Remove 1 screw xing the right side of the heat exchanger.
12 Release the catches for the heat exchanger xed to the bearing cover with a slotted screwdriver.
Screws Fixing
Left Side of
Heat Exchanger
Fixing Hole for
Heat Exchanger
The heat exchanger is
fixed to the bearing cover.
Insert a slotted screwdriver
here and remove the resin
plate from the bearing cover.
Resin Plate on Left Side
of Heat Exchanger
Bearing Cover
13 Tilt up the piping holder at the rear side approximately 10 degrees in the direction of the arrow (A) as shown in the
gure below.
14 Pull out the heat exchanger with the rear pipings obliquely upward in the direction of the arrow (B) to remove it from the
slotted portion.
N O T E
Make sure that the heat exchanger and the unit body will not be damaged when removing the heat exchanger.
15 When mounting the heat exchanger, mount it in the reverse procedure.
N O T E
Before mounting the heat exchanger, check to ensure that there is no clearance between the heat exchanger and the motor
clamp in order to prevent dew drops.
Fixing Screw for
Heat Exchanger
 Loading...

