OPERATION
4.12
ThinPrep
®
Integrated Imager Operator’s Manual
Note:
The speed that the stage moves from location to location when
Next
or
Previous
is used is a
user-adjustable preference. Refer to
“Auto Locate Speed” on page 3.38.
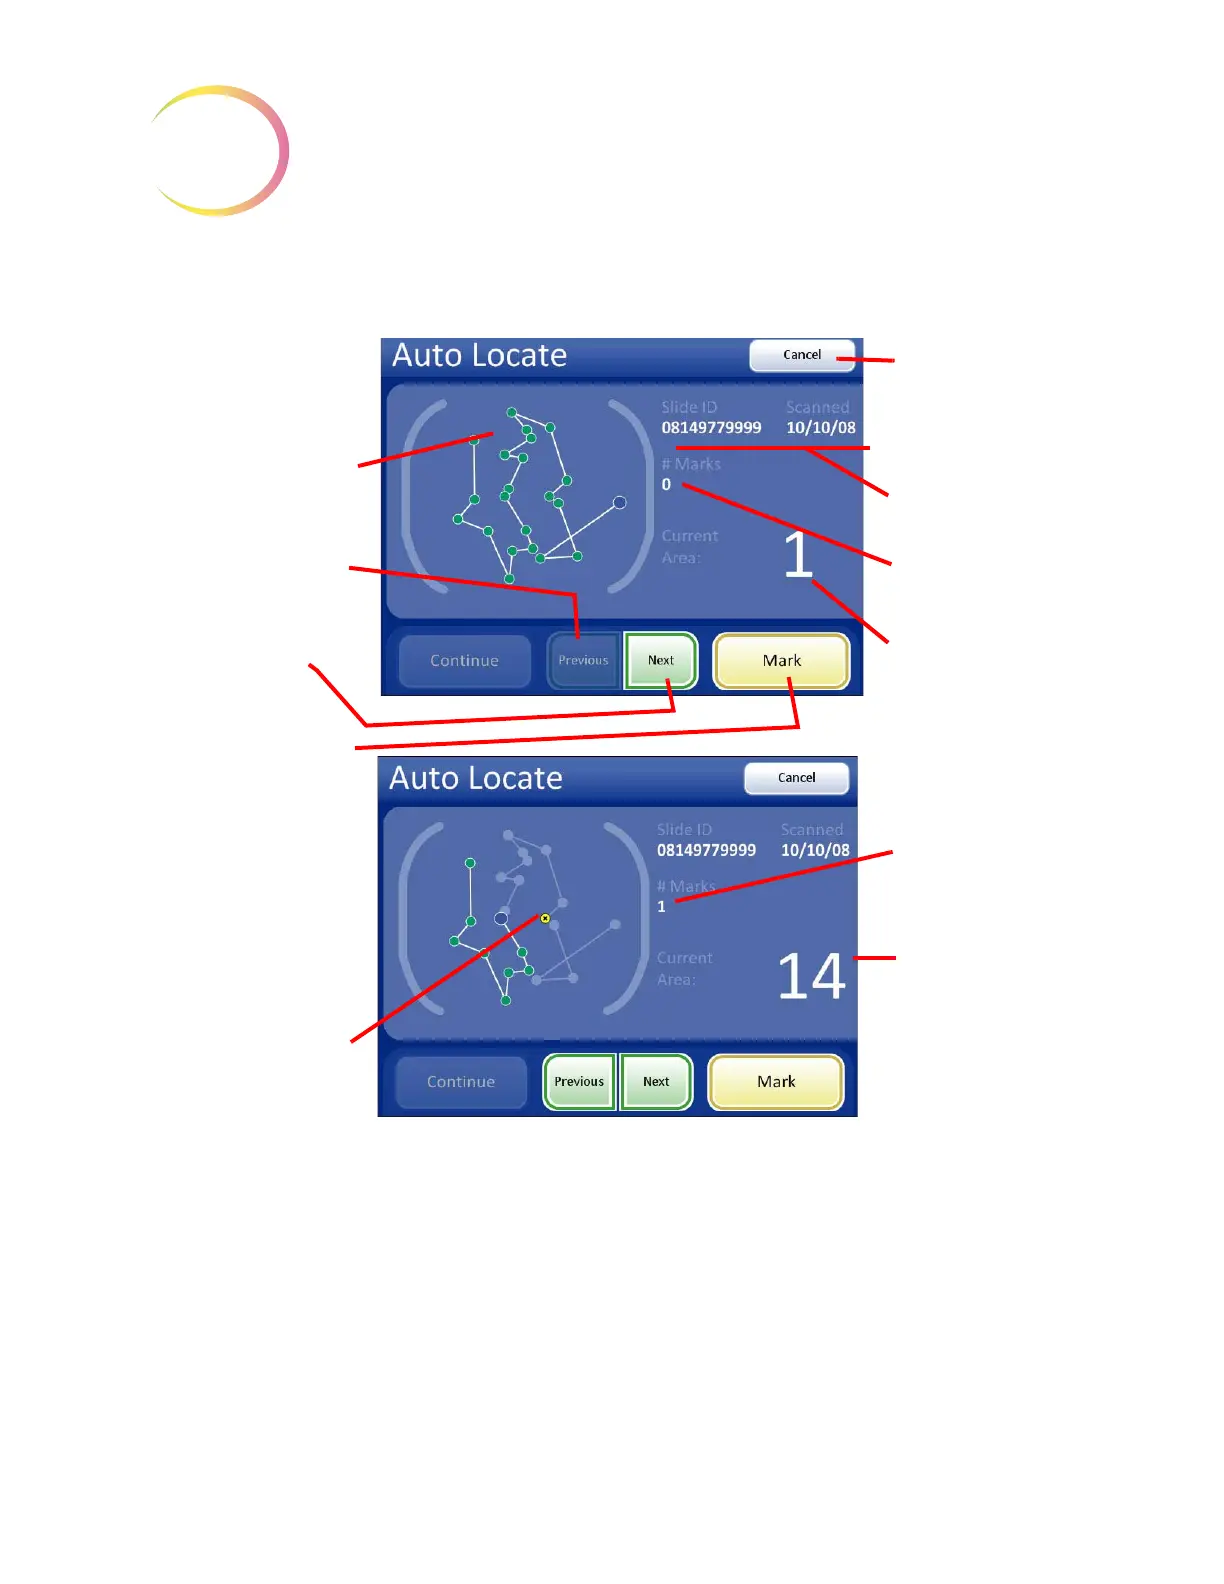
Figure 4-12 Auto Locate Screen
Mark Indicator
The mark indicator is set up in User Preferences as either a blink in the field of view or an audible
beep (
page 3.40).
When the review control or touch screen is pressed to make a mark, the indicator will blink or beep
once. If it is pressed again to unmark the area, the indicator blinks or beeps twice, to differentiate.
22 fields of interest are
graphically repre-
sented.
As each location is vis-
ited, the dot changes
from green to blue:
Previous
button, to go
back one field of view
Next
button, to pro-
ceed to next field of
view
Mark
button, to elec-
tronically mark an area
of interest
Note:
The
Next
, Previous,
and Mark functions are
also available on the
review control.
Cancel
button, to
end slide review and
return to the Load
Slide screen
The slide ID and the
date of imaging
Number of electronic
marks made
Current area - which
field of view is pre-
sented
Auto Locate in progress;
electronic marks
display as a yellow dot
with an x.
Number of elec-
tronic marks made
Current area -
which field of view
is presented
Do not remove the slide from the stage during Auto Locate.
To end slide review before finishing, press the
Cancel
button.