ThinPrep
®
Integrated Imager Operator’s Manual
3.25
USER INTERFACE
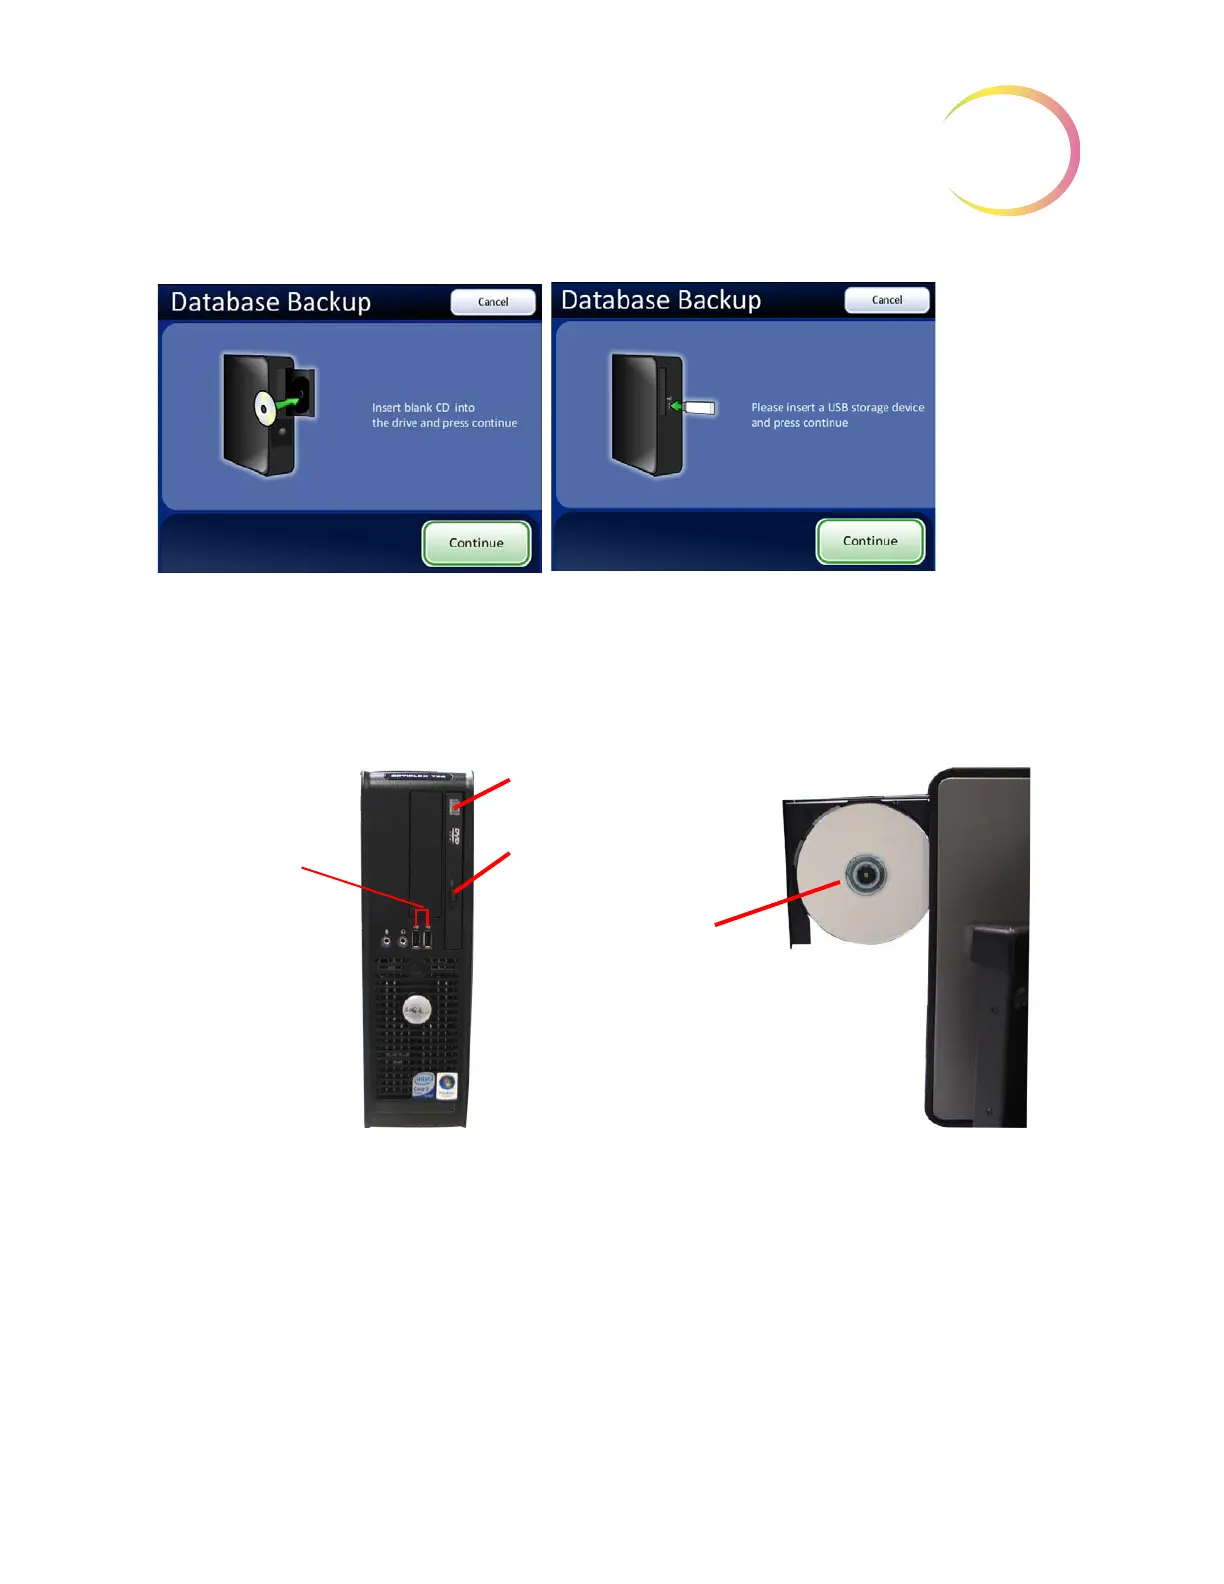
Figure 3-39 Database Backup Screen
To open the CD drive, press the release button on the drive door. (See Figure 3-40.)
Figure 3-40 USB and CD: Open CD Drive - Insert Disc
As prompted, insert a blank disk into the CD drive and close the door, or insert a USB storage device
into a USB port. The Integrated Imager will back up to the first USB storage device detected by the
Integrated Imager. It is recommended to have only one USB device connected to the Integrated
Imager at a time.
Note:
The CD drive of this computer only writes to a CD ROM (do not use a DVD disc, the system
will not recognize it).
Note:
The CD ROM must be blank, or the system will reject it. You cannot accumulate backups onto
a single disk. The USB storage device, however, does not need to be blank. The USB storage
device only needs adequate space to store the database backup.
Press
Cancel
to cancel the
backup and
return to the
Administrative
Options
screen.
After loading a blank CD or a USB storage device into the drive, press
Continue
.
CD drive door
CD release button
Mount the CD on the
spindle in the drive (shiny
side facing the drive mecha-
nism).
USB ports
(The ports may be
located differently,
depending on the
computer model
you have.)