Trident HD Specimen Radiography System User Guide
Chapter 5: The Images
Page 46 MAN-05478-002 Revision 003
5.4.1 Image Review Tools
Tools Tab
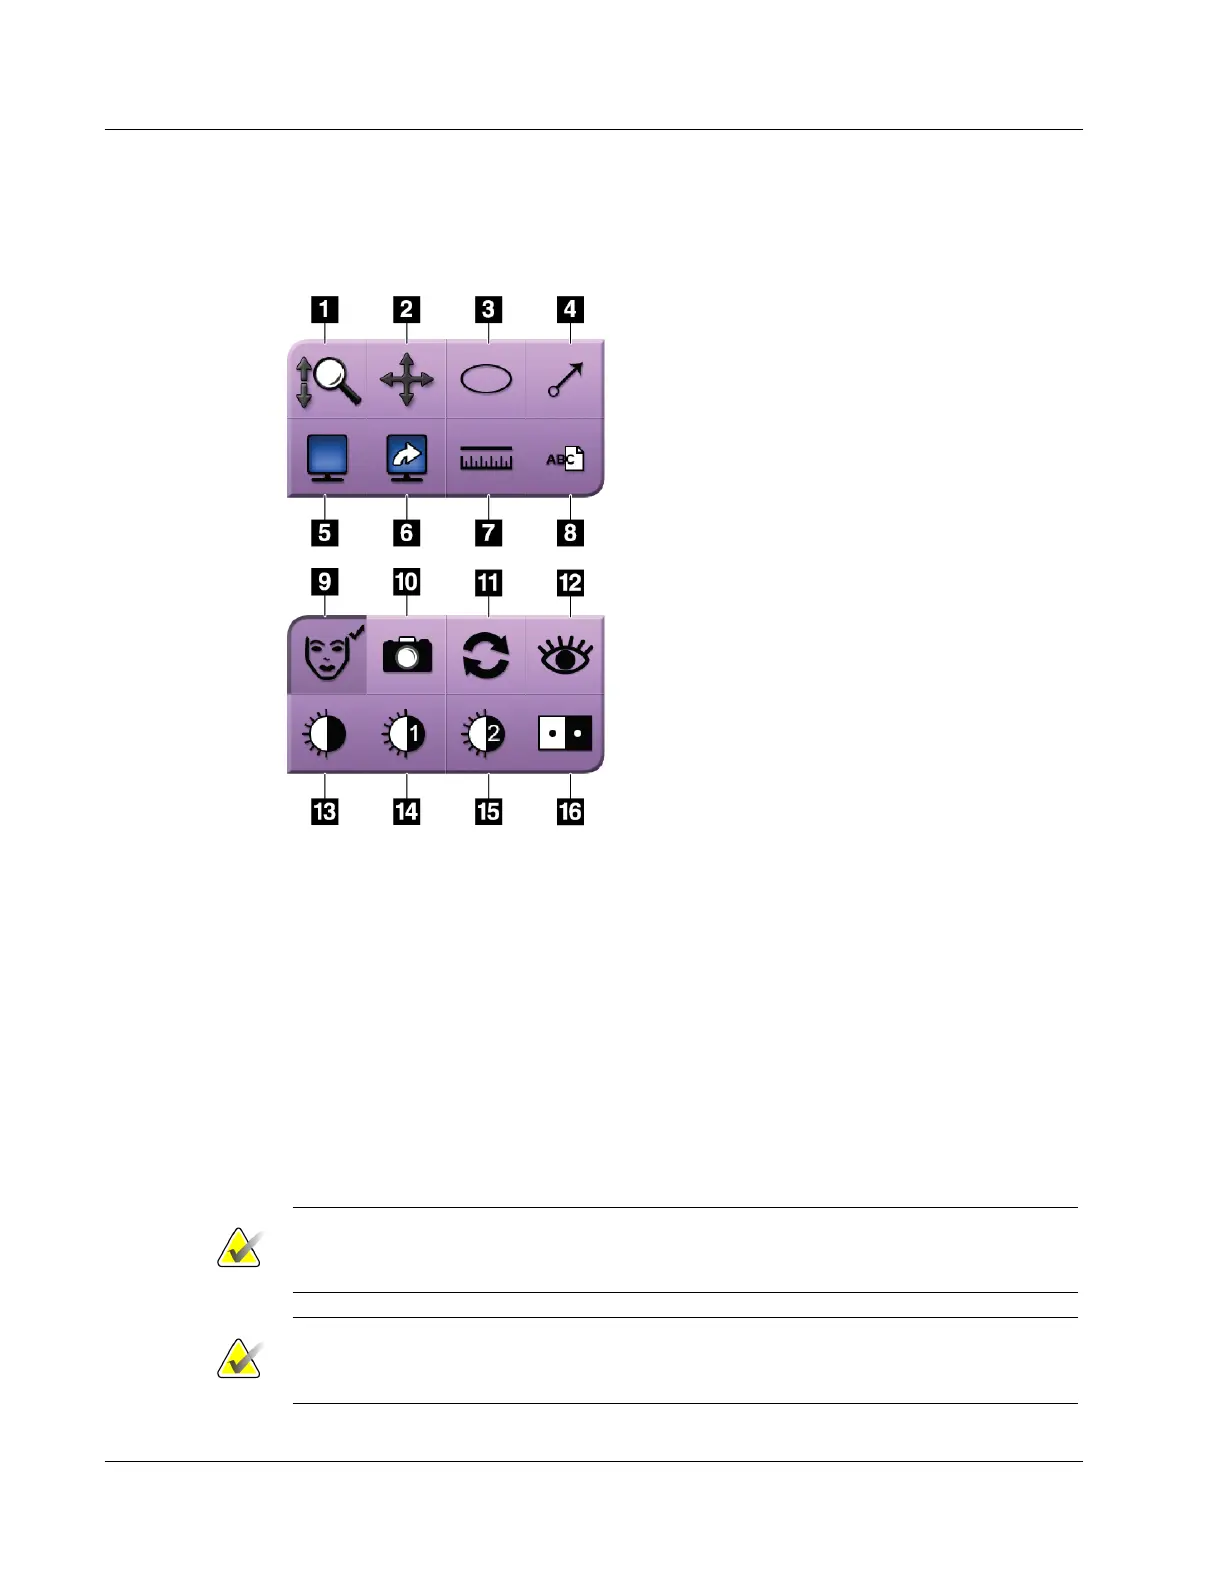
Figure 29: The Image Review Tools
Figure Legend
1. The Zoom tool magnifies the whole image.
2. The Pan tool is used to move the view to a
different portion of the image by dragging.
3. The Ellipse tool draws an elliptical pattern in
the image. You can change the size and move
this pattern within the display area, and you
can add the text to this pattern.
4. The Arrow tool creates an arrow to point to an
area of interest. You can change the size, move
the arrow within the display area, and add the
text to this pattern.
5. The Multi-Up Display tool selects the number
of tiles to display.
6. The Image Tile Advance tool sets the active
Multi-Up tile.
7. The Ruler tool displays a measurement of the
distance between two points. To move the
measurement line, click and drag the line to
the new location.
8. The Text tool adds a text note to the image
without a marking.
9. The Patient Information tool activates the patient information display.
10. The Camera button captures a snapshot of the image display area and adds the snapshot to
the current procedure.
11. The Reset tool returns an enhanced image to the original state.
12. The Enhanced Visualization tool adjusts the image sharpness with a slider.
13. The Window/Level tool is used with the mouse to change the brightness and contrast. To
reset the Window/Level to the original values, double-click the image.
14. The Pre-defined Window/Level tools set the values most used.
15. The Pre-defined Window/Level tools set the values most used.
16. The Invert tool changes blacks to white and whites to black.
Note
The Ruler, W/L Presets, and Enhanced Visualization tool are inactive for snapshot
images.
Note
To save markings and comments, use the Camera button to create a snapshot of the
image with the markings and comments.