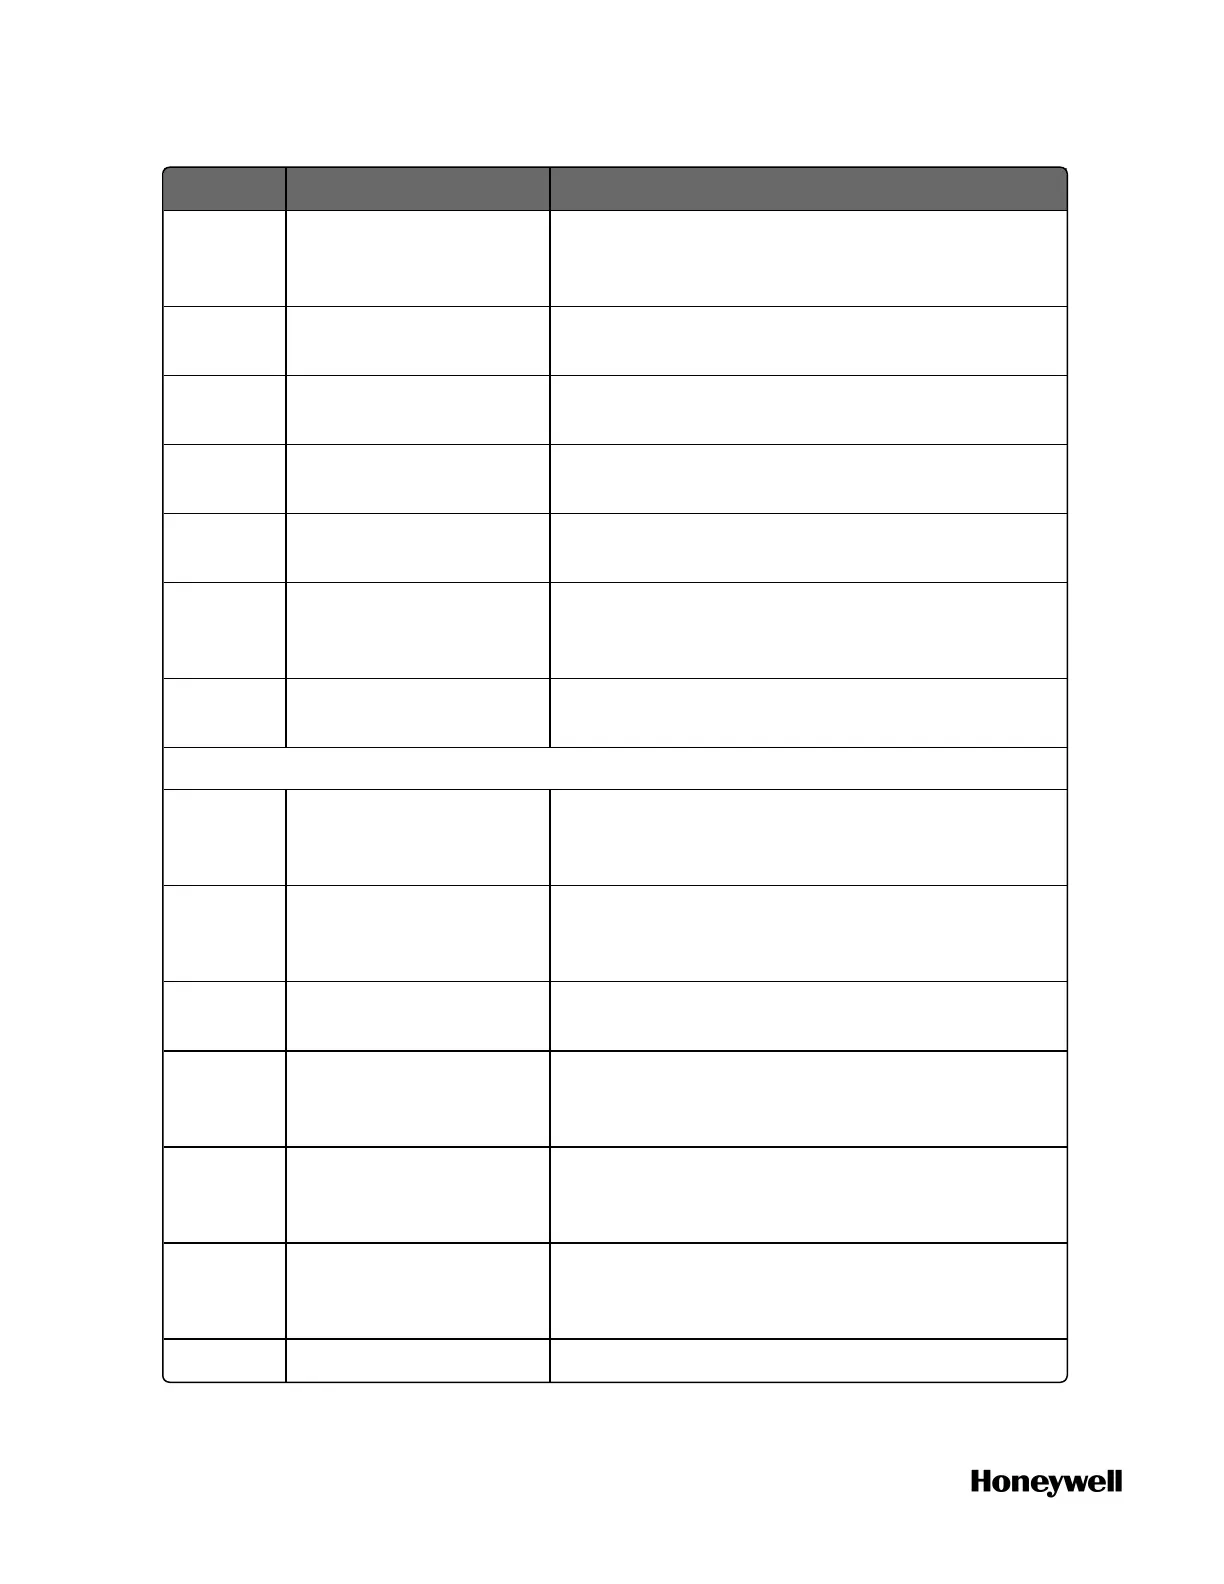
Task Go to
Step 3 Configure ISA100
network ID.
See "Configuring the ISA100 wireless network" >
"Configuring ISA100 network ID" in the
ControlEdge Builder User's Guide.
Step 4 Import DD files. See "Importing DD files" in the ControlEdge
Builder User's Guide.
Step 5 Add wireless I/O
devices.
See "Adding wireless I/O devices" in the
ControlEdge Builder User's Guide.
Step 6 Configure channels for
wireless I/O devices.
See "Configuring channels" in the ControlEdge
Builder User's Guide.
Step 7 Bind channels to I/O
variables.
See "Binding channels to I/O variables" in the
ControlEdge Builder User's Guide.
Step 8 Configure wireless I/O
diagnostic parameters
See "Configuring wireless I/O diagnostic
parameters" in the ControlEdge Builder User's
Guide.
Step 9 Download the project. See "Downloading a project to the controller" on
page68 for more information.
Configure and commission FDAP and field device - online
Step 10 Enable over-the-air
provisioning for the
controller.
See "Enabling over-the-air provisioning" in the
ControlEdge Builder User's Guide.
Step 11 Accept un-provisioned
FDAPs.
See "Provisioning the devices using over-the-air
provisioning method" in the ControlEdge Builder
User's Guide.
Step 12 Enable over-the-air
provisioning for FDAPs.
See "Enabling over-the-air provisioning" in the
ControlEdge Builder User's Guide.
Step 13 Configure field devices. See "Configuring field devices" and "Configuring
field device channels" in the ControlEdge Builder
User's Guide.
Step 14 Accept un-provisioned
field devices.
See "Provisioning the devices using over-the-air
provisioning method" in the ControlEdge Builder
User's Guide.
Step 15 Bind wireless I/O
devices to field devices.
See "Binding and unbinding field devices to
wireless I/O devices" in the ControlEdge Builder
User's Guide.
Step 16 Activate channels for See "Activating channels" in the ControlEdge
112
Chapter 6 - Communication
 Loading...