MAN0597 ISSUE 08 - 02/04
2302M5030
8. ROUTINE SERVICING
80
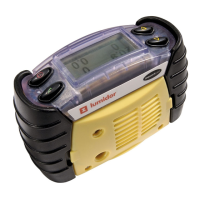
Special Notes for Cl
2
Cartridges
It is important that you read all of the notes below before
installation or use of your new cartridge.
Installation of your Cl
2
Cartridge
Note: Cartridge Installation or Replacement must never be
carried out in a hazardous area.
(1) If a cartridge was previously fitted to the Impact into
which the Cl
2
cartridge is to be installed, remove the
Front Cover Grille using the Allen Key provided in the
bottom of the Impact. Unscrew the fixing in the centre of
the cartridge and lift the cartridge from the Impact.
(2) Place the Cl
2
cartridge into the Impact and screw the
cartridge fully home using the Allen Key. Guide the
cartridge if necessary using your fingers to ensure that
it is seated correctly.
(3) Replace the Pump Seal with the one provided with your
cartridge.
(4) Remove the existing Filter Assembly from the inside of
the Front Cover Grille by peeling it away. Take the
Stainless Steel Filter assembly (supplied in the
Cartridge Kit) and remove the protective backing paper.
Locate the Filter assembly onto the locating pegs on the
inside of the Front Cover Grille and lightly press around
the edge of the gasket to secure.
(5) Replace the Front Cover Grille and refit the Allen Key
into the bottom of the Impact.
(6) To complete installation of the cartridge allow at least
20 minutes before operating the Impact.
(7) After this period of time switch the Impact on and accept
the New Configuration when prompted to do so.

 Loading...