Honeywell MAXPRO Intrusion MPIP2000U/3000U Series Installation and Setup Guide
800-23044 Rev. A draft_11 61
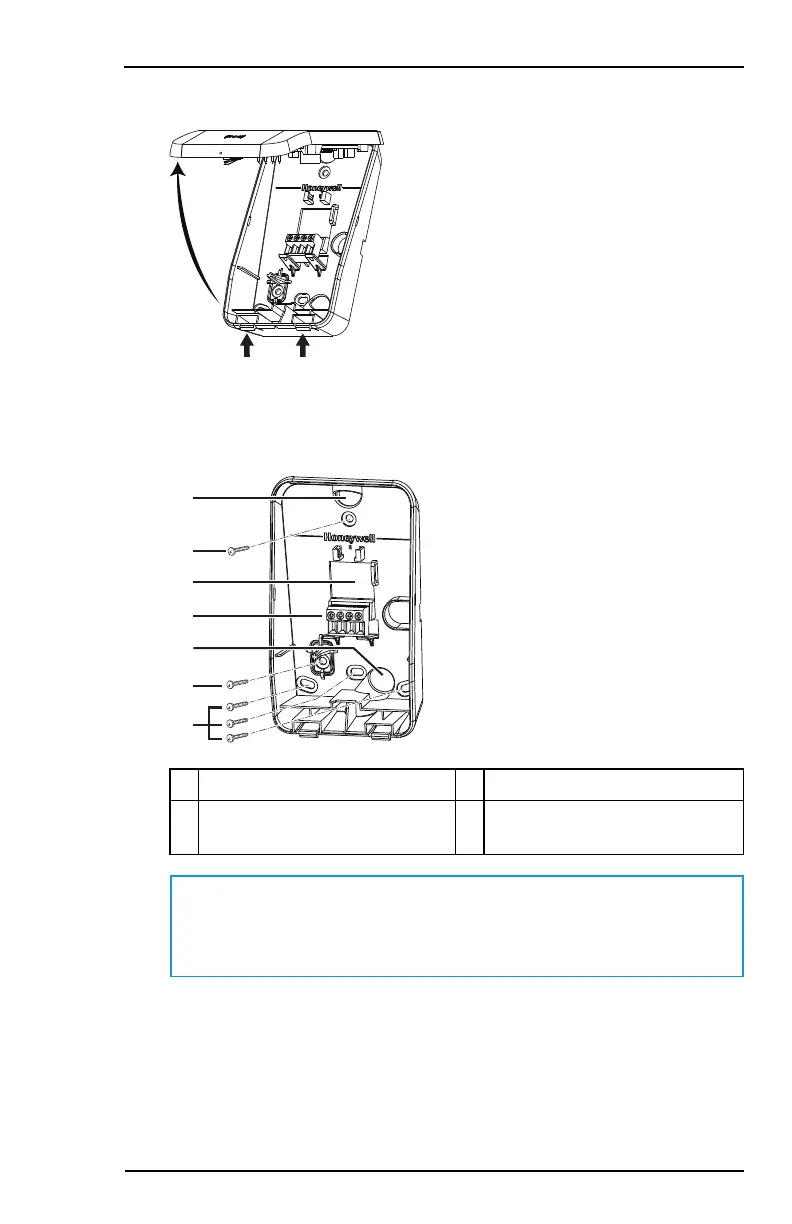
2. Separate the back plate from the lid: press the two tabs at the bottom of
the keypad, and remove the lid.
3. Place the back plate on the wall at the desired location, andmark the
position of the mounting holes. There are 4mounting holes available (B).
Use the one at the top, and at the bottom you can use the one in the
middle or the two at the edges, depending on your needs.
A Opening for wiring (x3) E IB2 bus connector
B Mounting screw holes (x4) F Tamper screw (x1). Required
for off-wall tamper protection.
Note
The 2mounting holes in the middle (top and bottom)
correspond with the mounting holes in a standardUS wall box.
4. Remove the back plate from the wall, and then drill the holes as required.
5. Screw the back plate to the wall using the large screws, while running
the wiring through the available openings.
6. Screw the tamper screw (F) into the wall. This screw provides off-wall
tamper protection.
 Loading...