EasyManuals Logo

HP 9000 Series User Manual

HP 9000 Series
214 pages
To Next Page IconTo Next Page
To Previous Page IconTo Previous Page
Page #152 background imageLoading...
Page #152 background image
FINAL TRIM SIZE : 7.0 in x 8.5 in
A
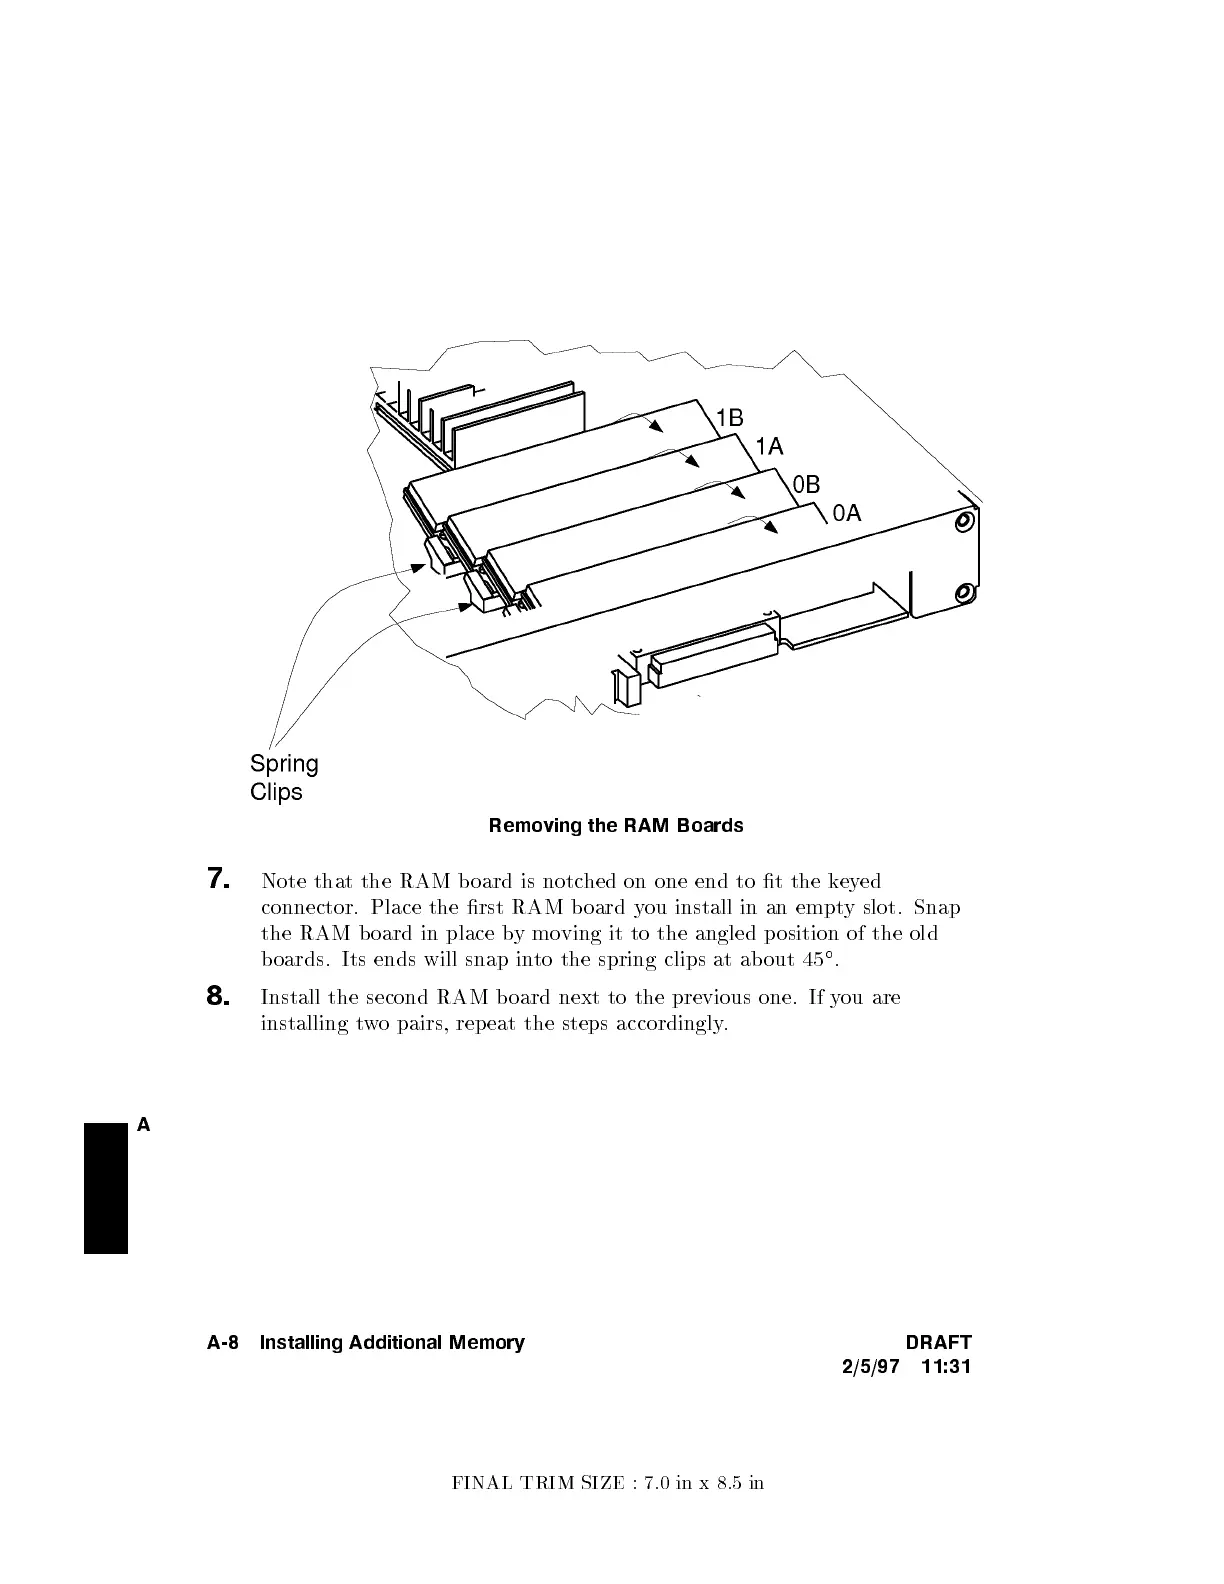
Removing the RAM Boards
7.
Note that the RAM b oard is notched on one end to t the k
eyed
connector. Place the rst RAM b oard you install in an empty slot. Snap
the RAM b oard in place bymoving it to the angled p osition of the old
boards. Its ends will snap into the spring clips at ab out 45
.
8.
Install the second RAM b oard next to the previous one. If y
ou are
installing two pairs, rep eat the steps accordingly.
A-8 Installing Additional Memory DRAFT
2/5/97 11:31

Table of Contents

Other manuals for HP 9000 Series

Questions and Answers:

Question and Answer IconNeed help?

Do you have a question about the HP 9000 Series and is the answer not in the manual?

HP 9000 Series Specifications

General IconGeneral
Operating SystemHP-UX
ManufacturerHewlett-Packard (HP)
Series9000
TypeServer
ProcessorPA-RISC
MemoryVaries by model
CPUPA-RISC processors
Expansion SlotsVaries by model
NetworkingEthernet
Form FactorRackmount
ModelsA-Class, D-Class, E-Class, K-Class, N-Class, RP Series, Superdome

Related product manuals