Removal and Replacement Procedures
HP ProLiant DL320 Generation 3 Server Maintenance and Service Guide 2-7
Drive Assembly
The server contains a removable media drive assembly including one LED/PWR switch
board, one optical drive, and one diskette drive.
To remove the drive assembly:
1. Power down the server. See “Powering Down the Server” in this chapter.
2. Remove the access panel. See “Access Panel” in this chapter.
3. Disconnect the LED/PWR switch board cable from the system board.
4. Disconnect the diskette drive cable from the diskette drive.
5. Disconnect the two optical drive cables from the optical drive.
6. Remove the fan module.
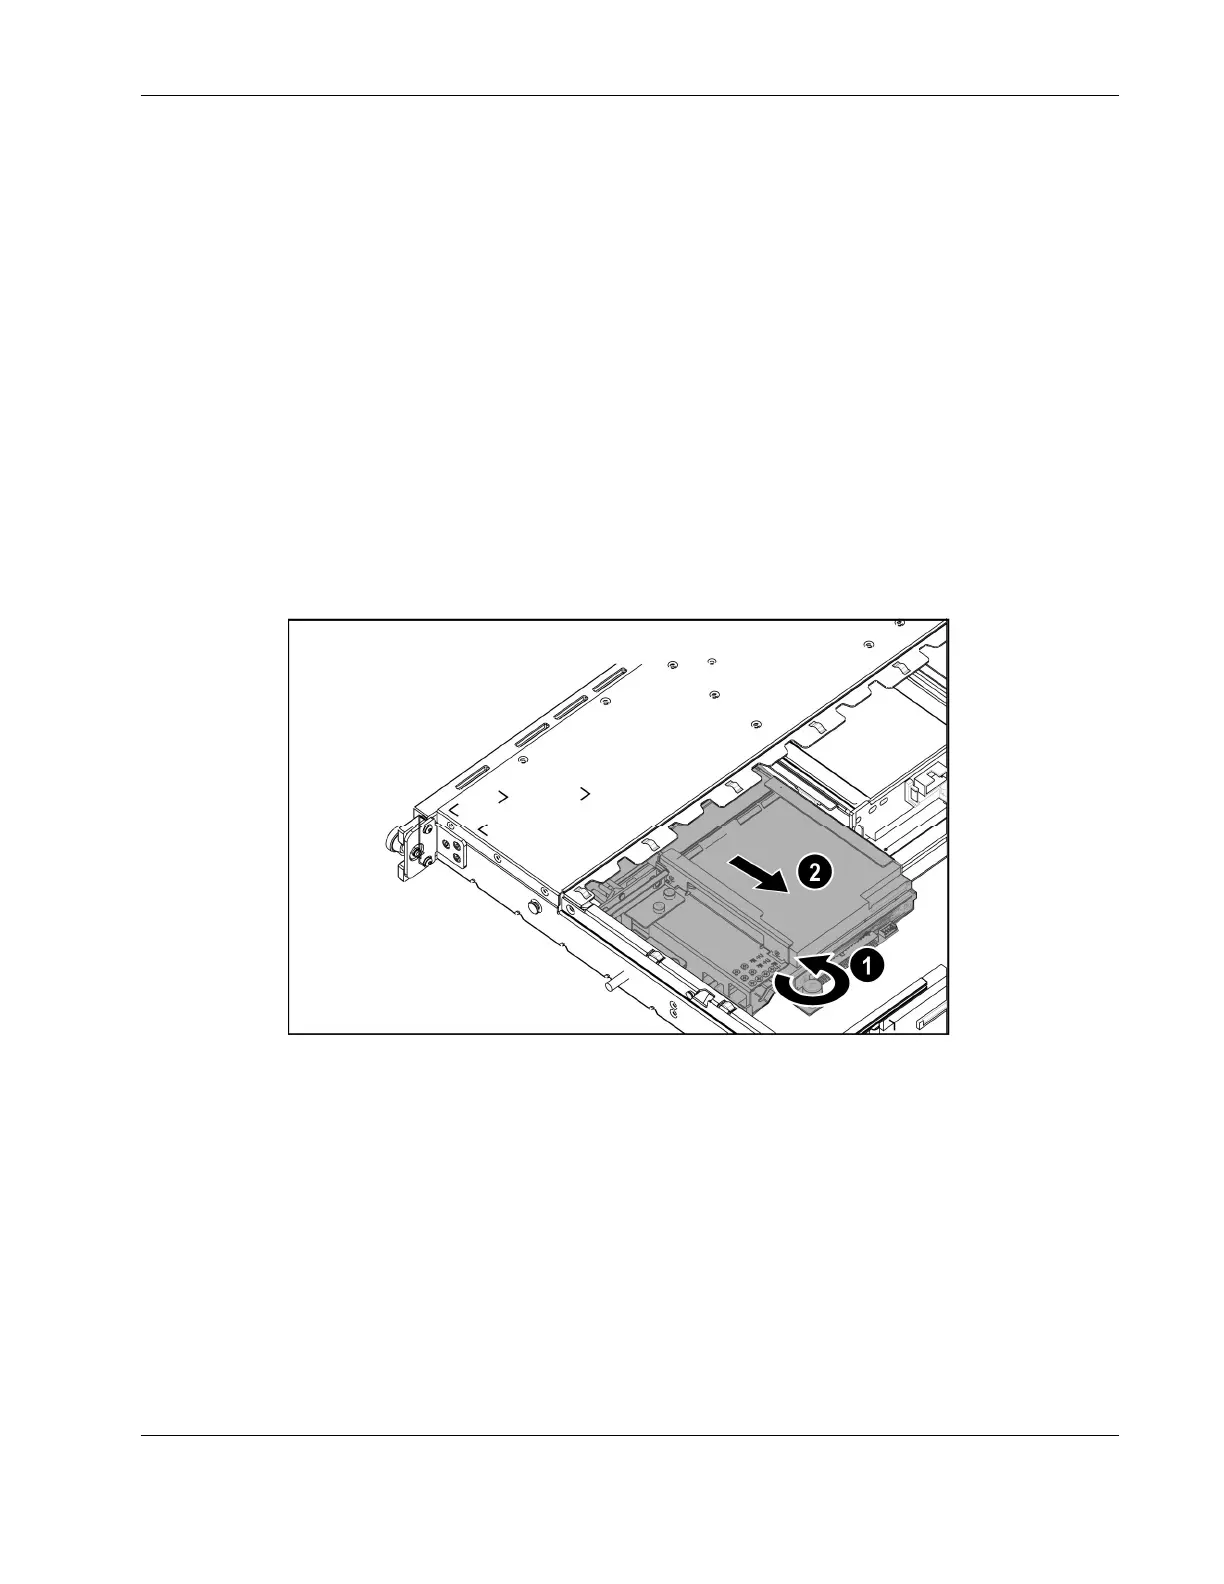
7. Loosen the one thumbscrew of the drive assembly (1).
8. Slide the drive assembly gently toward the back of the server (2).
Figure 2-2: Loosen the thumbscrew and slide the assembly toward
the back of the server
IMPORTANT : Carefully remove the LED/PWR switch board to avoid damaging the LEDs.
Reverse steps 1 through 8 to replace the drive assembly.
LED/PWR Switch Board
To remove the LED/PWR switch board:
1. Power down the server. See “Powering Down the Server” in this chapter.

 Loading...